audi Workshop Repair Guides

Audi Workshop Service and Repair Manuals

Removing and installing camshafts > < Checking axial clearance of camshafts
Renewing exhaust camshaft oil seal
   
Renewing exhaust camshaft oil seal
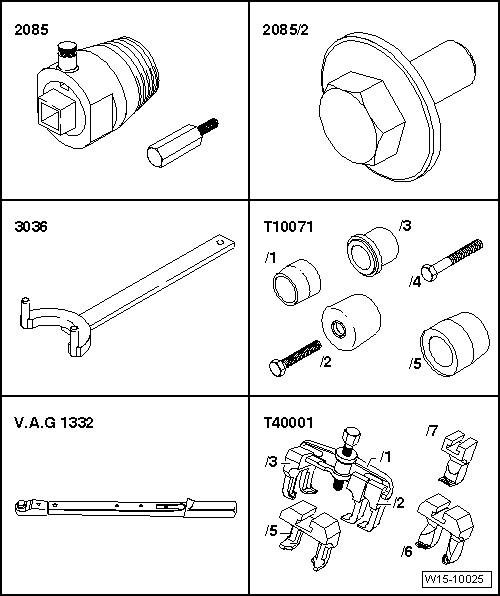
Special tools and workshop equipment required
t  Oil seal extractor -2085-
t  Adapter -2085/2-
t  Counterhold tool -3036-
t  Assembly tool -T10071-
t  Torque wrench -V.A.G 1332-
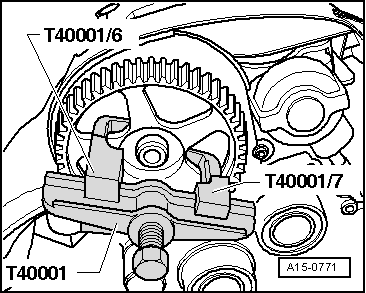
t  Two-arm puller -T40001- with claw -T40001/6- and claw -T40001/7-

   
Procedure
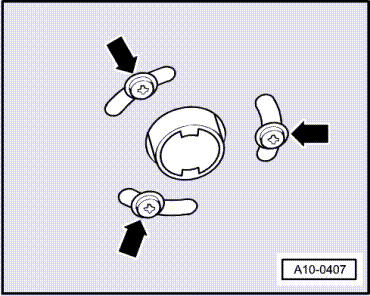
–  On vehicles with auxiliary/additional heater, remove bolts -arrows- securing exhaust pipe for auxiliary/additional heater to noise insulation.
  A10-0407
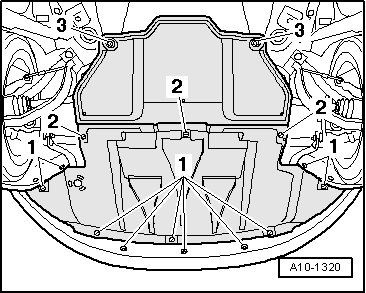
–  Release quick-fasteners -1- and -2- and take off front noise insulation.
–  Remove front bumper cover → General body repairs, exterior; Rep. Gr.63.
–  Move lock carrier into its service position → General body repairs, exterior; Rep. Gr.50.
–  Remove toothed belt from camshaft sprocket.
t  Vehicles to 04.2003 → Chapter.
t  Vehicles from 05.2003 to 05.2004 → Chapter.
t  Vehicles from 06.2004 → Chapter.
  A10-1320
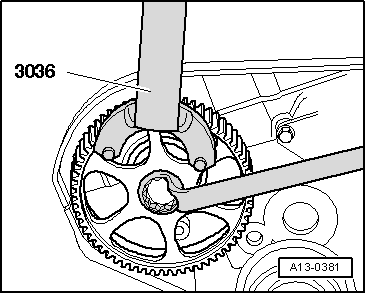
–  Unscrew securing bolt for camshaft sprocket approx. 3 turns (counterhold with counterhold tool -3036-).
  A13-0381
–  Use two-arm puller -T40001-, claw -T40001/6- and claw -T40001/7- to pull off camshaft sprocket.
–  Unscrew bolt and remove camshaft sprocket.
–  Remove parallel key from camshaft.
  A15-0771
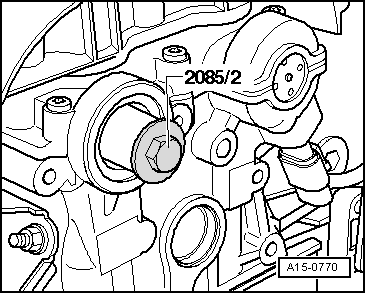
–  To guide oil seal extractor, screw adapter -2085/2- into camshaft as far as it will go until finger-tight.
–  Unscrew inner part of oil seal extractor -2085- 2 turns (approx. 3 mm) from outer part of extractor and lock in position with knurled screw.
  A15-0770
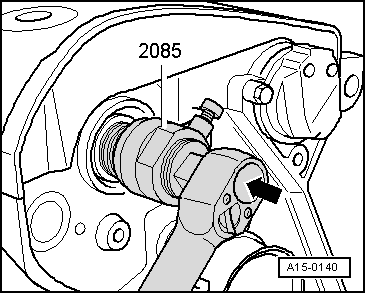
–  Lubricate threaded head of oil seal extractor -2085-, place it in position and, while exerting firm pressure, screw it into oil seal as far as possible.
–  Loosen knurled screw and turn inner part of extractor against camshaft until oil seal has been extracted.
–  Clamp flats of oil seal extractor in vice and use pliers to remove seal.
  Note
t  Do not lubricate sealing lip of oil seal.
t  Apply invisible adhesive tape onto groove for parallel key to protect oil seal.
  A15-0140
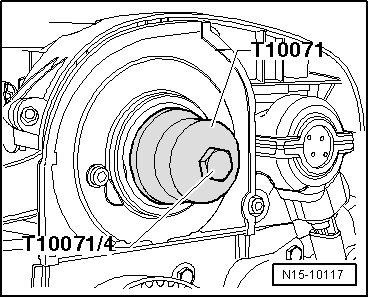
–  Press oil seal in as far as the stop using assembly tool -T10071- and bolt -T10071/4-.
  Note
Place a commercially available M12 washer below bolt to prevent wear on the press sleeve.
  N15-10117
–  Insert parallel key into groove on camshaft.
–  Install camshaft sprocket.
–  Tighten securing bolt of camshaft sprocket (use counterhold tool -3036-).
  Note
If a piston is at TDC the valves could strike the piston when turning the camshaft. Pistons must therefore not be at TDC Otherwise, there is a risk of damage to valves and piston crowns.
–  Fit toothed belt:
t  Vehicles to 04.2003 → Anchor.
t  Vehicles from 05.2003 to 05.2004 → Anchor.
t  Vehicles from 06.2004 → Anchor.
–  Install poly V-belt → Chapter.
–  Install lock carrier with attachments → General body repairs, exterior; Rep. Gr.50.
–  Install front bumper cover → General body repairs, exterior; Rep. Gr.63.
Tightening torque
  A13-0381
ComponentNm
Camshaft sprocket to camshaft50 + 90° 1)2)
l  1) Renew bolts.
l  2) 90° = one quarter turn.


Removing and installing camshafts > < Checking axial clearance of camshafts