audi Workshop Repair Guides

Audi Workshop Service and Repair Manuals

Servicing toothed belt - vehicles from 06.2004 > < Removing and installing toothed belt
Detaching toothed belt from camshaft sprocket
Special tools and workshop equipment required
   
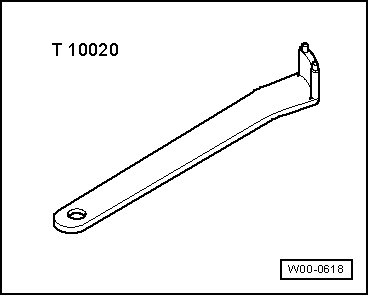
t  Pin wrench -T10020-
  W00-0618
Removing
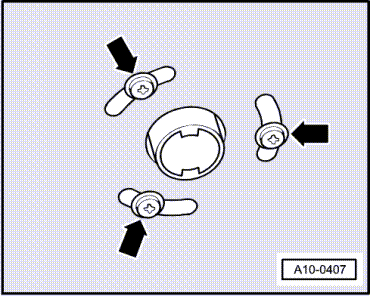
–  On vehicles with auxiliary/additional heater, remove bolts -arrows- securing exhaust pipe for auxiliary/additional heater to noise insulation.
  A10-0407
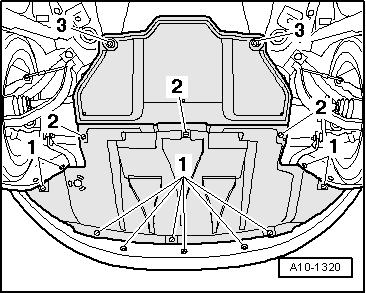
–  Release quick-fasteners -1- and -2- and take off front noise insulation.
–  Remove front bumper cover → General body repairs, exterior; Rep. Gr.63.
–  Move lock carrier into its service position → General body repairs, exterior; Rep. Gr.50.
  A10-1320
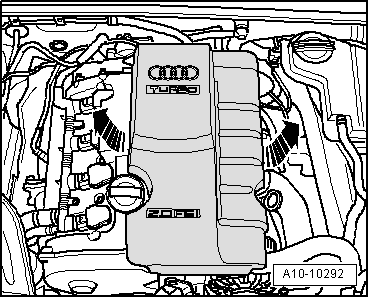
–  Pull off engine cover panel -arrows-.
  Note
  A10-10292
Before removing, mark direction of rotation of poly V-belt with chalk or felt-tipped pen. If the belt runs in the opposite direction when it is refitted, this can cause breakage.
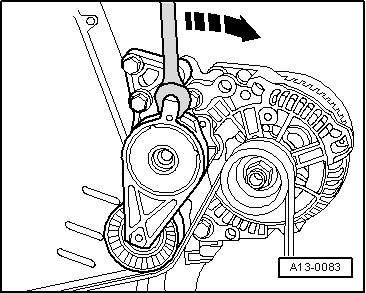
–  Turn the tensioner in the direction of the -arrow- to slacken the poly V-belt.
–  Remove poly V-belt.
  A13-0083
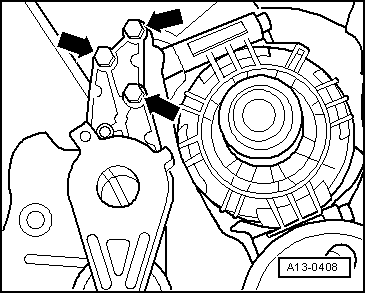
–  Unscrew bolts -arrows- and remove poly V-belt tensioner together with engine lifting eye.
  A13-0408
–  Remove toothed belt cover (top section) -arrows-.
  A13-10250
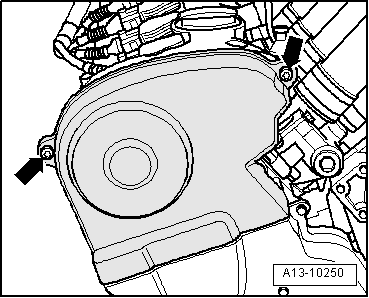
–  Remove toothed belt cover (centre) -arrows-.
  Caution
The engine must only be turned at the crankshaft, in the direction of normal engine rotation (clockwise).
  N15-10092
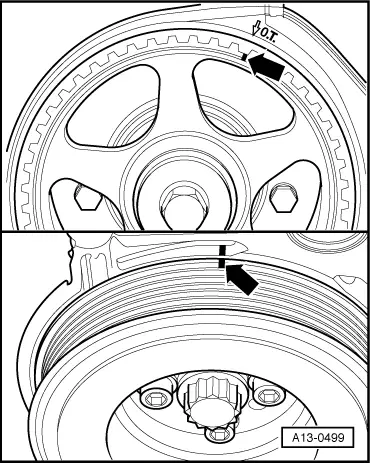
–  Rotate crankshaft to TDC by turning central bolt for toothed belt sprocket.
l  Marking on camshaft sprocket and marking on crankshaft must be aligned to TDC -arrows-.
  A13-0499
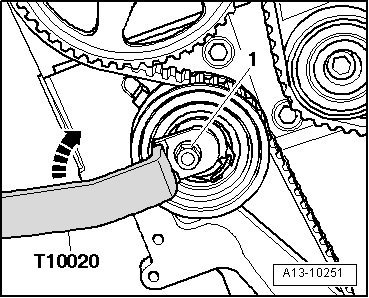
–  Slacken nut -1- and release tensioning roller in direction of -arrow- using 2-hole pin wrench -T10020-.
–  Remove toothed belt from camshaft sprocket.
  A13-10251
Fitting toothed belt
–  Align markings on camshaft sprocket / toothed belt cover (rear) and markings on vibration damper / toothed belt cover (bottom) -arrows-.
–  Fit toothed belt onto sprockets.
  A13-0499
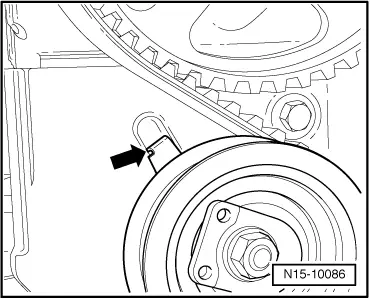
–  Ensure that tensioning roller is seated properly in retaining plate -arrow-.
  N15-10086
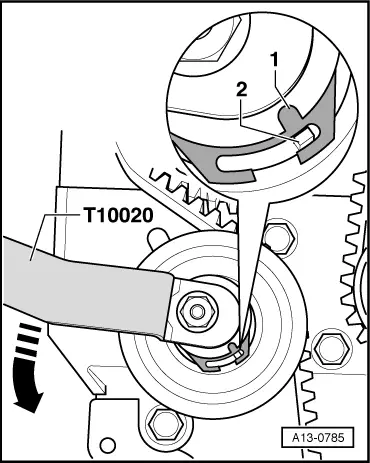
–  Using 2-hole pin wrench -T10020-, turn the eccentric adjuster anti-clockwise until the notch -1- is above the indicator -2- (toothed belt over-tensioned).
–  Then release tension on toothed belt until the notch -1- and the indicator -2- are aligned.
–  Tighten nut to 23 Nm.
  Caution
The engine must only be turned at the crankshaft, in the direction of normal engine rotation (clockwise).
  A13-0785
–  Turn crankshaft two rotations via central bolt for toothed belt sprocket until it is positioned at TDC again.
l  Make sure that the engine is rotated without stopping during the final 45° (1/8 turn) of the crankshaft.
–  Check valve timing again:
l  Marking on camshaft sprocket and marking on crankshaft must be aligned to TDC -arrows-.
  A13-0499
–  Check toothed belt tension again.
l  Notch -1- should align with indicator -2-.
If the markings do not align:
–  Repeat adjustment of valve timing.
  A13-0785
If the markings align:
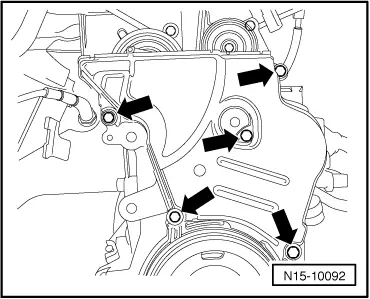
–  Install toothed belt cover (centre) -arrows-.
  N15-10092
–  Install top section of toothed belt cover (make sure it engages securely on centre section of toothed belt cover).
–  Tighten bolts -arrows-.
  A13-10250
–  Install tensioner for poly V-belt together with engine lifting eye -arrows-.
Remaining installation steps are carried out in reverse sequence; note the following:
–  Install poly V-belt → Chapter.
–  Install lock carrier with attachments → General body repairs, exterior; Rep. Gr.50.
–  Install front bumper cover → General body repairs, exterior; Rep. Gr.63.
Tightening torques
  A13-0408
ComponentNm
Tensioning roller to cylinder head23
Toothed belt cover (centre) to cylinder block10 1)
Toothed belt cover (top section) to cylinder head10
Tensioner for poly V-belt to bracket for ancillaries23
l  1) Install using locking fluid; for locking fluid refer to → Parts catalogue.


Servicing toothed belt - vehicles from 06.2004 > < Removing and installing toothed belt