audi Workshop Repair Guides

Audi Workshop Service and Repair Manuals

Removing and installing coolant pump > < Thermostat - exploded view
Removing and installing thermostat
Special tools and workshop equipment required
   
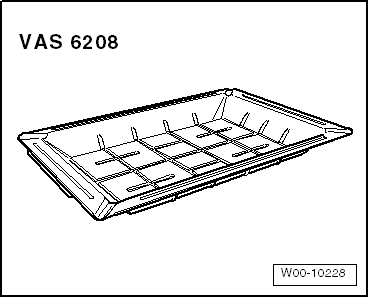
t  Drip tray for workshop hoist -VAS 6208-
  W00-10228
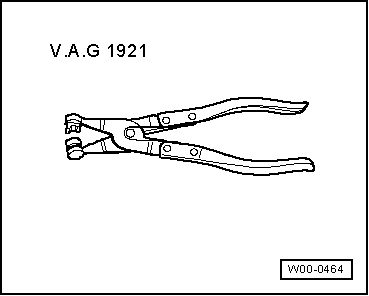
t  Hose clip pliers -V.A.G 1921-
  W00-0464
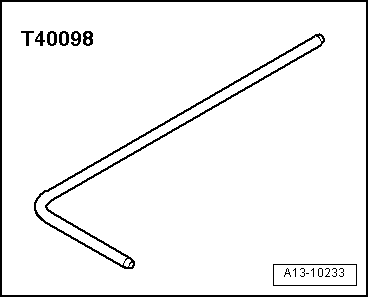
t  Locking pin -T40098-
Removing
  WARNING
Observe notes on procedure for disconnecting battery → Electrical system; Repair group 27.
  A13-10233
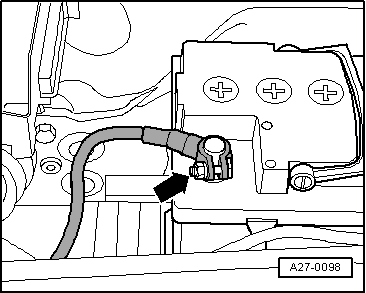
–  With ignition switched off, disconnect battery earth cable -arrow-.
  A27-0098
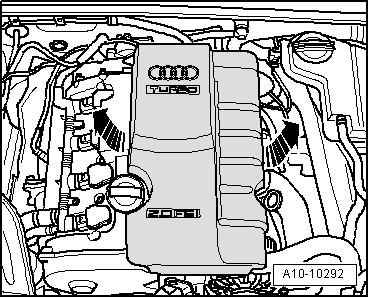
–  Pull off engine cover panel -arrows-.
  WARNING
Hot steam/hot coolant can escape - risk of scalding.
t  The cooling system is under pressure when the engine is hot.
t  To allow pressure to dissipate, cover filler cap on coolant expansion tank with cloth and open carefully.
–  Open filler cap on coolant expansion tank
  A10-10292
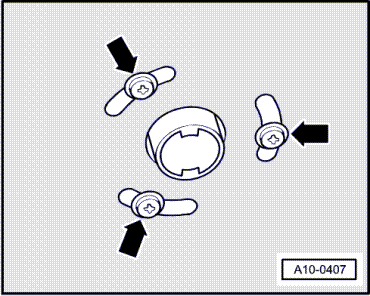
–  Vehicles with auxiliary heater: remove bolts -arrows- securing exhaust pipe for auxiliary/additional heater to noise insulation.
  A10-0407
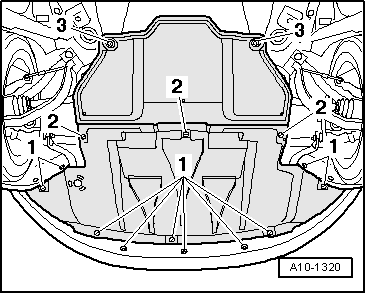
–  Release quick-release fasteners -1- and -2- and take off front noise insulation.
–  Drain off coolant → Chapter.
  A10-1320
–  Unplug electrical connector -1- from oil pressure sender.
–  Also disconnect bottom coolant hose at coolant pipe -2-, and drain off remaining coolant.
  Note
Before removing, mark direction of rotation of poly V-belt with chalk or felt-tipped pen. If the belt runs in the opposite direction when it is refitted, this can cause breakage.
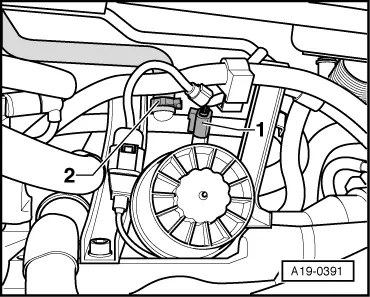
–  Mark direction of rotation of poly V-belt.
  A19-0391
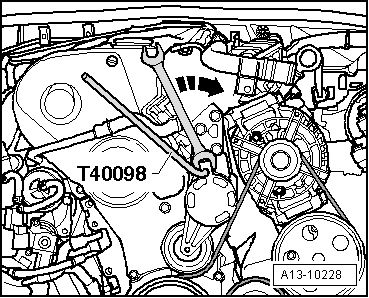
–  To slacken poly V-belt, turn belt tensioner/damper in direction of -arrow-.
–  Lock tensioner in position with locking pin -T40098-.
–  Remove poly V-belt.
–  Remove alternator → Rep. Gr.27.
–  Remove coolant pipes (at side) → Chapter.
  A13-10228
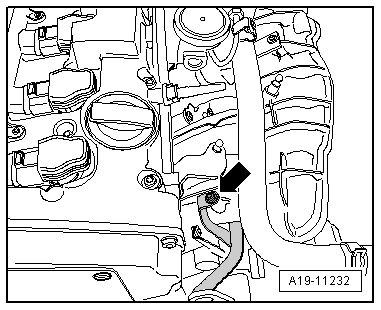
–  Unbolt coolant pipe -arrow- from intake manifold and place on one side.
  A19-11232
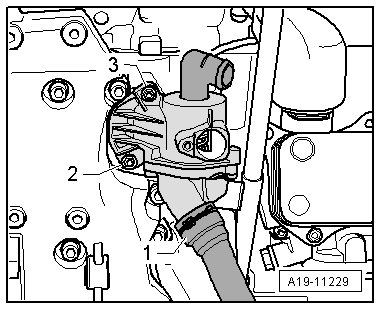
–  Pull out retaining clip and disconnect coolant hose -1-.
–  Remove bolts -2 and 3- and detach thermostat.
Installing
l  Tightening torques → Chapter
Installation is carried out in the reverse order; note the following:
  Note
Renew O-ring.
–  Clean and smoothen sealing surface for O-ring.
–  Coat new O ring with coolant G12+.
–  Install coolant pipes (at side) → Chapter.
–  Fill up with coolant → Chapter.
–  Install alternator → Electrical system; Repair group 27.
–  Install poly V-belt → Chapter.
–  Connect battery. Procedures required → Electrical system; Repair group 27.
  A19-11229

Removing and installing coolant pump > < Thermostat - exploded view