audi Workshop Repair Guides

Audi Workshop Service and Repair Manuals

Removing and installing vacuum unit for turbocharger > < Removing and installing turbocharger
Checking vacuum unit for turbocharger
Special tools and workshop equipment required
   
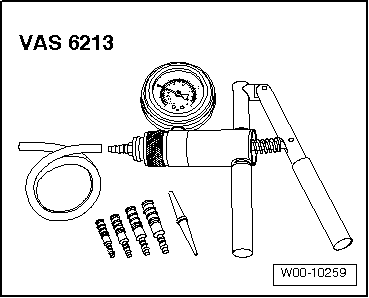
t  Hand vacuum pump -VAS 6213-
Test condition:
t  Hose from turbocharger via charge pressure control solenoid valve -N75- to vacuum unit must not be blocked.
t  Charge pressure control solenoid valve -N75- OK.
Procedure:
  W00-10259
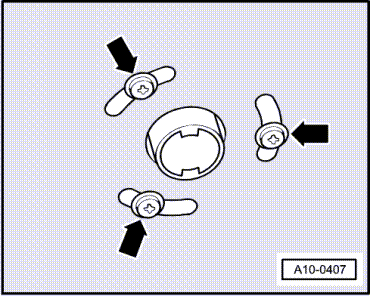
–  Vehicles with auxiliary heater: remove bolts -arrows- securing exhaust pipe for auxiliary/additional heater to noise insulation.
  A10-0407
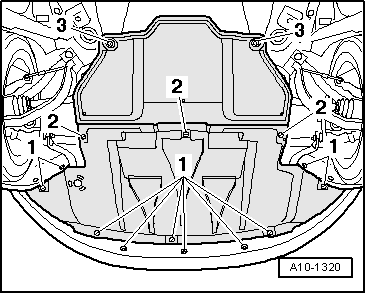
–  Release quick-release fasteners -1- and -2- and take off front noise insulation.
  A10-1320
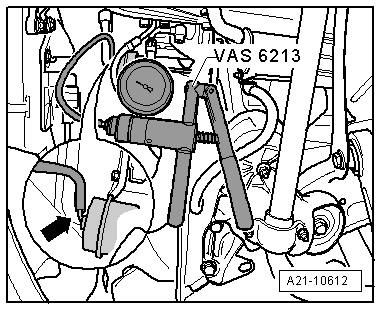
–  Connect hand vacuum pump -VAS 6213- to vacuum unit -arrow-.
  A21-10612
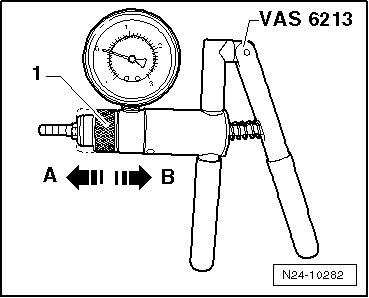
–  Move adjuster ring -1- on hand vacuum pump -VAS 6213- to position -B- to select “pressure”.
  Caution
The pressure must not exceed 750 mbar. The vacuum unit could be damaged if the pressure is exceeded.
  N24-10282
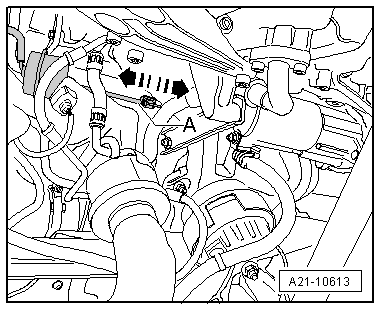
–  Operate hand vacuum pump -VAS 6213- several times and at the same time observe linkage.
The linkage -A- should start to move at a pressure of approx. 300 mbar and be at its limit stop at a pressure of approx. 700 mbar.
The linkage should travel approx. 10 mm.
  Note
If it is not possible to build up pressure with hand vacuum pump -VAS 6213- or if the pressure drops again immediately, check hand vacuum pump -VAS 6213- and connecting hoses for leaks. If no fault is found: renew vacuum unit → Chapter.
  A21-10613

Removing and installing vacuum unit for turbocharger > < Removing and installing turbocharger