audi Workshop Repair Guides

Audi Workshop Service and Repair Manuals

Servicing oil filter bracket with oil cooler > < Installing a new balance shaft assembly
Re-installing the "old" balance shaft assembly
  Note
t  If re-installing the "old" balance shaft assembly and neither the drive gear on the crankshaft nor the crankshaft itself have been renewed, proceed as described in the following. It is also essential that the idler gear has NOT been slackened.
t  If the bolt for the idler gear has been slackened or the drive gear on the crankshaft or the crankshaft itself have been renewed you must install a new idler gear with the appropriate coating. Procedure for installation → Chapter „Installing a new balance shaft assembly“.
t  Renew the bolts tightened with specified tightening angle.
   
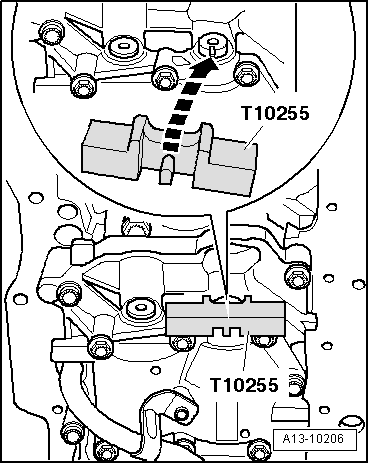
–  Lock balance shaft with locking tool -T10255-; turn balance shaft to do so, if necessary.
l  The lug of the locking tool must engage in the groove of the balance shaft.
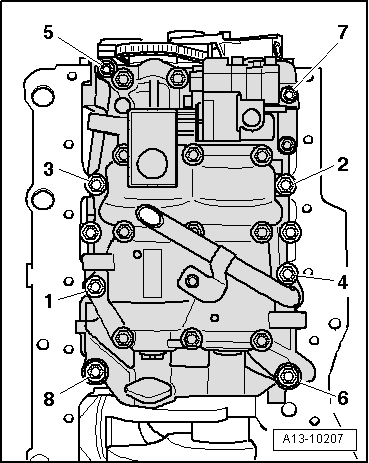
–  Check that two dowel sleeves are in place, to ensure that balance shaft assembly is located correctly on cylinder block.
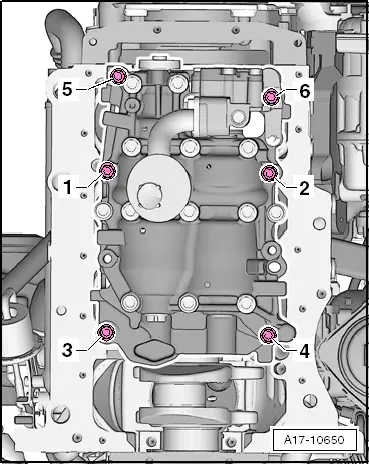
–  Attach balance shaft assembly to cylinder block.
l  When balance shaft is locked in position, idler gear must engage in drive gear on crankshaft.
l  Idler gear must have noticeable backlash.
  A13-10206
t  Balance shaft assembly with eight attachment points: tighten bolts → Fig..
  A13-10207
t  Balance shaft assembly with six attachment points: tighten bolts → Fig..
–  Take out locking pin -3359-.
Remaining installation steps are carried out in reverse sequence; note the following:
–  Install sump → Chapter.
  A17-10650

Servicing oil filter bracket with oil cooler > < Installing a new balance shaft assembly