audi Workshop Repair Guides

Audi Workshop Service and Repair Manuals

6-cylinder engine (3.0 ltr. 5V), mechanics > < Removing and installing exhaust gas recirculation cooler
Removing and installing vacuum unit for exhaust gas recirculation cooler
Special tools and workshop equipment required
   
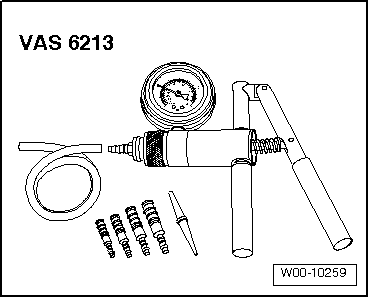
t  Hand vacuum pump -VAS 6213-
  W00-10259
Removing
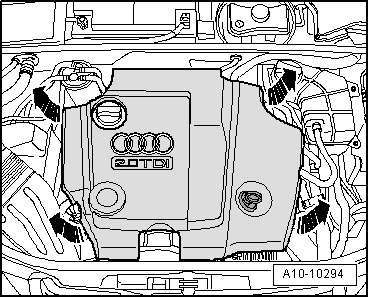
–  Pull off engine cover panel -arrows-.
  A10-10294
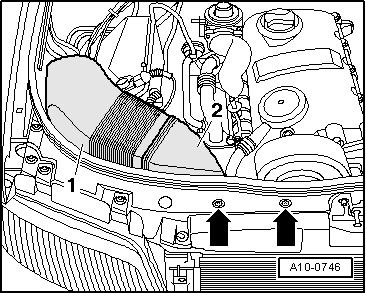
–  Remove bolts -arrows-.
–  Remove air ducts -1- and -2-.
  A10-0746
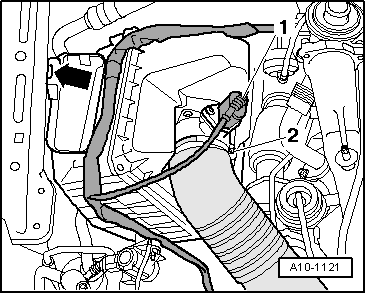
–  Unplug electrical connector -1- at air mass meter -G70-.
–  Loosen hose clip -2- to remove air intake hose.
–  Move clear wiring harness at air cleaner housing and remove air cleaner housing -arrow-.
  A10-1121
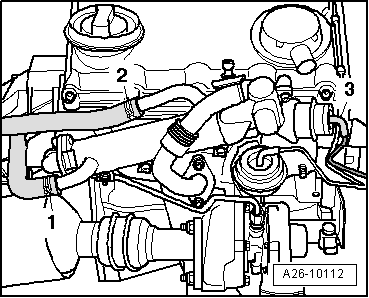
–  Detach vacuum hose -3- from vacuum unit for change-over flap for exhaust gas recirculation.
  Note
Coolant hoses -1- and -2- must not be detached.
  A26-10112
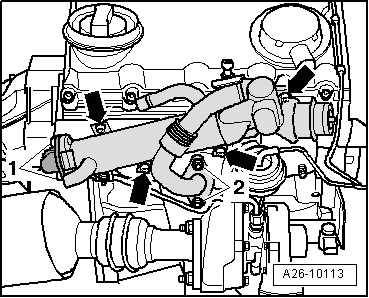
–  Unscrew bolts -1- and nuts -2-.
–  Remove bolts -arrows-.
–  Move exhaust gas recirculation cooler to one side with coolant hoses attached.
  A26-10113
–  Remove bolts -1- to -4- and detach vacuum unit with gasket.
  Note
Disregard hand vacuum pump -VAS 6213-.
Installing
Installation is carried out in the reverse order; note the following:
Tightening torques → Chapter
  Note
t  Renew gaskets and self-locking nuts.
t  Secure all hose connections with the correct type of hose clips (same as original equipment) → Parts catalogue.
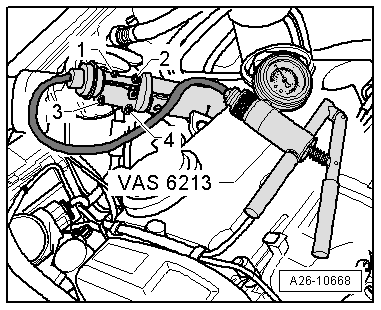
  A26-10668
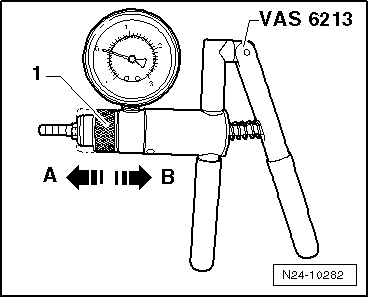
–  Set sliding ring -1- to position -A- for vacuum function.
  N24-10282
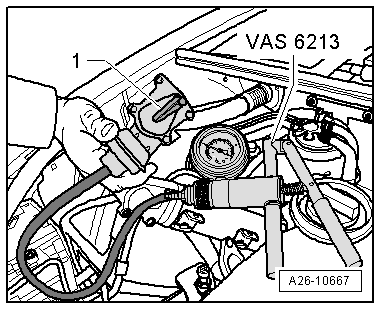
–  Set change-over flap -1- as shown in illustration using hand vacuum pump -VAS 6213-.
–  Install vacuum unit with gasket and secure in position.
  A26-10667

6-cylinder engine (3.0 ltr. 5V), mechanics > < Removing and installing exhaust gas recirculation cooler