
A4 Mk2
|
 Note
Note
|
|
|
|
|
|
|
|
Note
|
|
|
|
|
|
|
|
Note
|
|
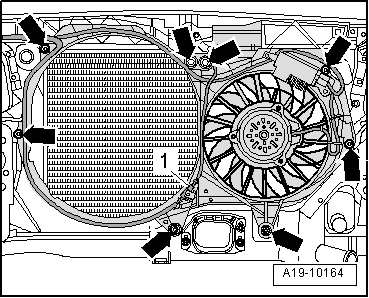
| Component | Nm | |
| Radiator cowl to lock carrier | M6 | 11 |
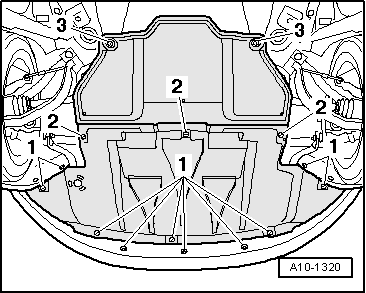
| Panel bolt | 2 | |
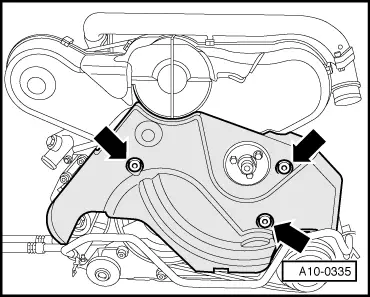
| Poly V-belt cover to bracket | 10 | |