Audi Workshop Service and Repair Manuals
HOME
FEATURES
MENU
INDEX
ABOUT US
Removing and installing camshafts >
< Checking axial clearance of camshafts
A4 Mk2
Power unit
6-cylinder diesel direct injection engine (TDI), mechanics
Engine cylinder head, valve gear
Servicing valve gear - engine code letters AKE, AYM, BFC
Renewing camshaft oil seal
Renewing camshaft oil seal
Renewing camshaft oil seal
Special tools and workshop equipment required
t
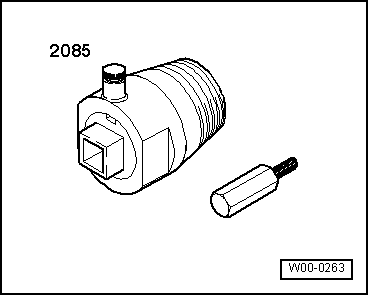
Oil seal extractor -2085-
t
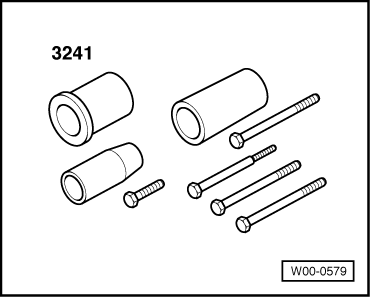
Fitting sleeves -3241-
Procedure
Note
If one of the oil seals is leaking, renew seals on both cylinder heads.
–
On vehicles with auxiliary/additional heater, remove bolts
-arrows-
securing exhaust pipe for auxiliary/additional heater to noise insulation.
–
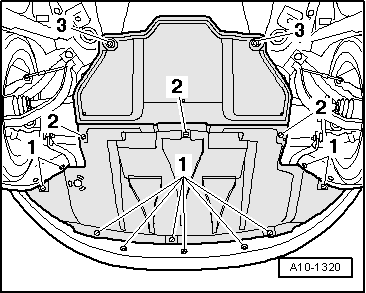
Open quick-release fasteners
-1 … 3-
and take off front and rear noise insulation.
–
Remove front bumper cover
→ General body repairs, exterior; Rep. Gr.63
.
–
Move lock carrier into its service position
→ General body repairs, exterior; Rep. Gr.50
.
–
Detach toothed belt from camshaft sprockets
→ Chapter
.
–
Take off camshaft sprocket (right-side).
–
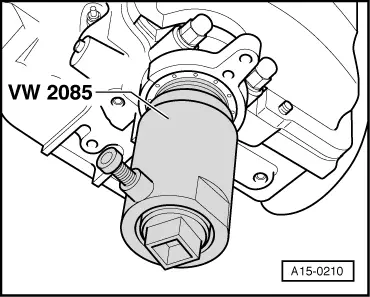
Adjust inner part of oil seal extractor -2085- so it is level with the outer part and lock in position with knurled screw.
–
Lubricate threaded head of oil seal extractor, place it in position and screw it into oil seal as far as possible (applying firm pressure).
–
Loosen knurled screw and turn inner section against camshaft until oil seal is pulled out.
–
Clamp flats of oil seal extractor in vice and use pliers to remove seal.
–
Clean running surface and sealing surface.
–
Slip oil seal over camshaft taper.
–
Insert 3 washers between bolt -3241/7- and fitting sleeve -3241/1-.
–
Press in oil seal until flush using fitting sleeve -3241/1- and bolt -3241/7-.
–
Fit camshaft sprocket (right-side) to camshaft.
–
Install toothed belt (adjust valve timing)
→ Anchor
.
–
Install viscous fan
→ Chapter
.
–
Install lock carrier with attachments
→ General body repairs, exterior; Rep. Gr.50
.
–
Install front bumper cover
→ General body repairs, exterior; Rep. Gr.63
.
Power unit
6-cylinder diesel direct injection engine (TDI), mechanics
Engine cylinder head, valve gear
Servicing valve gear - engine code letters AKE, AYM, BFC
Renewing camshaft oil seal
Removing and installing camshafts >
< Checking axial clearance of camshafts
 Note
Note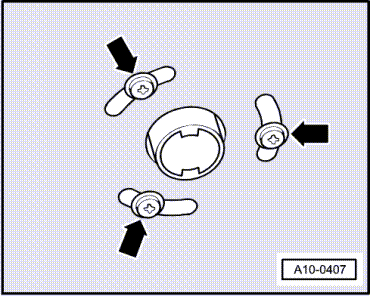

 Note
Note