
A4 Mk2
|
|
|
|
|
|
|
|
|
 Note
Note
|
|
|
|
 WARNING
|
|
Note
|
|
|
|
|
|
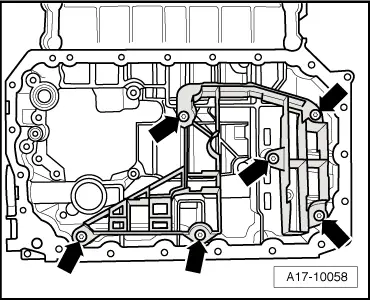
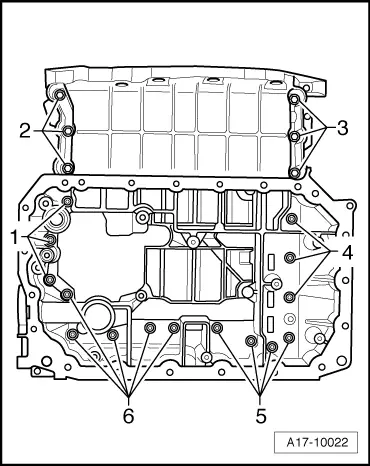
| Component | Nm | ||||
| Sump (top section) to cylinder block | 16 1) | ||||
| Baffle plate (top) to sump (top section) | 9 2) | ||||
| Baffle plate (bottom) to sump (top section) | 9 | ||||
| Oil drain plug | 30 | ||||
| |||||