audi Workshop Repair Guides

Audi Workshop Service and Repair Manuals

Separating engine from multitronic gearbox > < Removing and installing engine - vehicles with multitronic gearbox
Removing engine
   
Removing engine
Special tools and workshop equipment required
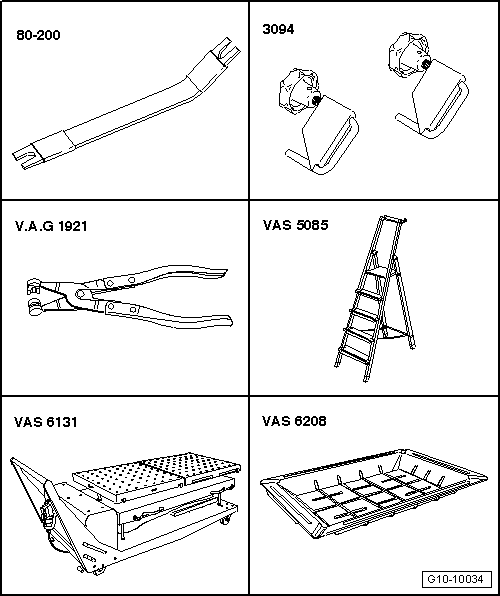
t  Removal lever -80 - 200-
t  Hose clamps up to Ø 25 mm -3094-
t  Hose clip pliers -V.A.G 1921-
t  Stepladder -VAS 5085-
t  Scissor-type assembly platform -VAS 6131 A- with support set for Audi -VAS 6131/10- and supplementary set -VAS 6131/13-
t  Drip tray for workshop hoist -VAS 6208-

   
t  Eye-head bolt -3368-
t  Used oil collection and extraction unit -V.A.G 1782-
t  Tensioning strap -T10038-

  Note
If the engine is going to be separated from the gearbox (after the entire assembly is removed), you will additionally need supplementary set -VAS 6131/11- and -VAS 6131/12-.
Procedure
–  Move selector lever to position „N“.
–  Discharge the refrigerant system → Air conditioner system - with refrigerant R134a.
  Caution
Observe notes on procedure for disconnecting the battery → Rep. gr.27.
   
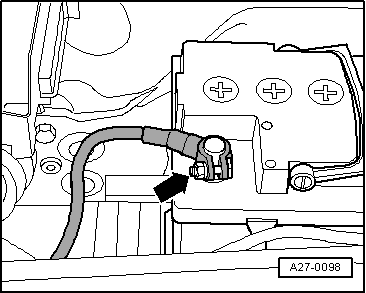
–  With ignition switched off, disconnect battery earth cable -arrow-.
  A27-0098
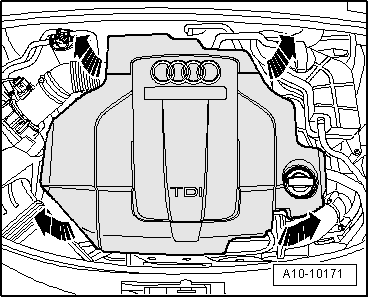
–  Carefully pull engine cover panel off four retaining pins one after the other -arrows-.
  WARNING
Hot steam or hot coolant can escape when expansion tank is opened; cover filler cap with cloth and open carefully.
–  Open filler cap on coolant expansion tank.
  A10-10171
–  Remove both front wheels.
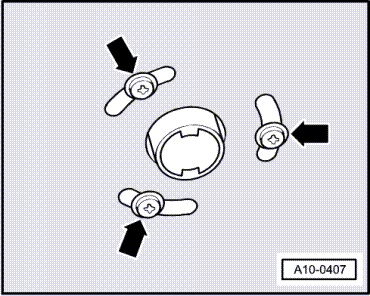
–  Vehicles with auxiliary heater: remove bolts -arrows- securing exhaust pipe for auxiliary/additional heater to noise insulation.
  A10-0407
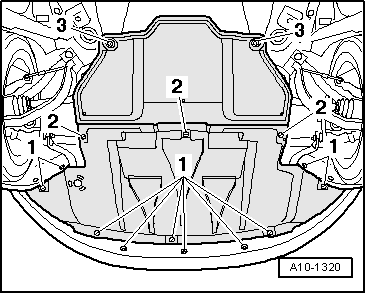
–  Open quick-release fasteners -1 … 3- and take off front and rear noise insulation.
  A10-1320
–  Place drip tray for workshop hoist -VAS 6208- under engine.
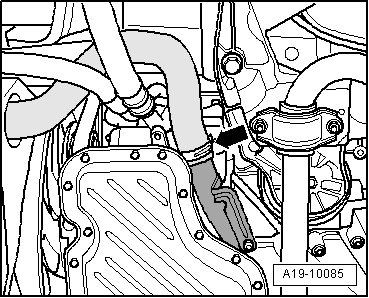
–  Disconnect coolant hose -arrow- from coolant pipe (left-side) and drain off coolant.
  A19-10085
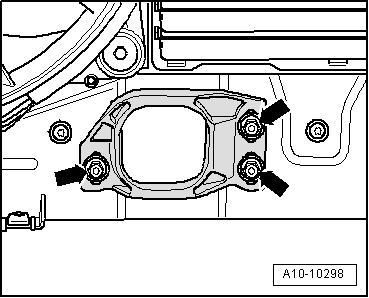
–  Remove nuts -arrows- on stop for torque reaction support.
  A10-10298
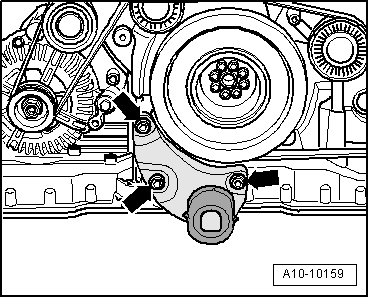
–  Unscrew bolts -arrows- and remove torque reaction support together with stop for torque reaction support.
  Note
Use a shortened hexagon key to slacken off the bolts.
  A10-10159
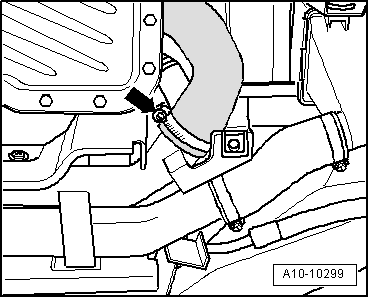
–  Disconnect air intake hose -arrow- from air pipe.
  A10-10299
–  Place drip tray for workshop hoist -VAS 6208- under engine.
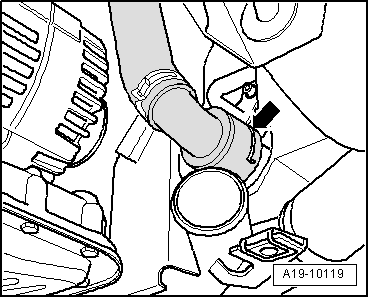
–  Detach coolant hose (bottom right) from radiator -arrow-.
  Note
  A19-10119
Observe rules for cleanliness when working on automatic gearbox → Rep. gr.37.
–  Place used oil collection and extraction unit -V.A.G 1782- under engine.
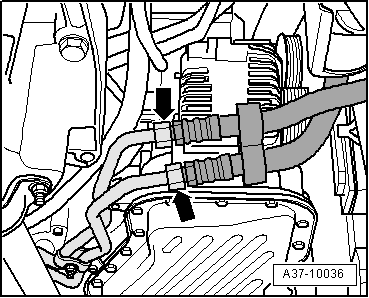
–  Disconnect ATF lines -arrows- at connections on right side of engine.
  A37-10036
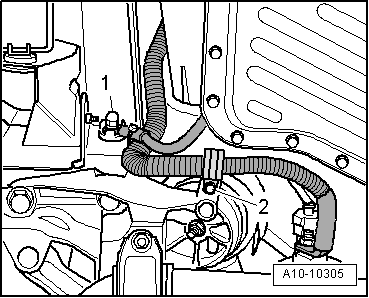
–  Unbolt earth cable -1- at longitudinal member (right-side).
–  Unbolt retainer -2- from console for engine mounting.
  A10-10305
–  Place drip tray for workshop hoist -VAS 6208- under engine.
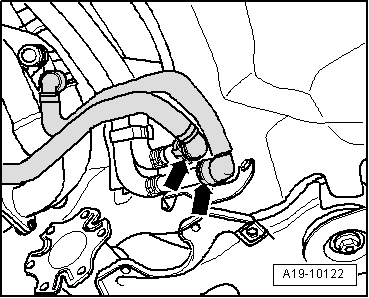
–  Disconnect coolant hoses -arrows- behind engine (right-side) and drain off remaining coolant.
  Note
Shown in illustration with gearbox removed.
  A19-10122
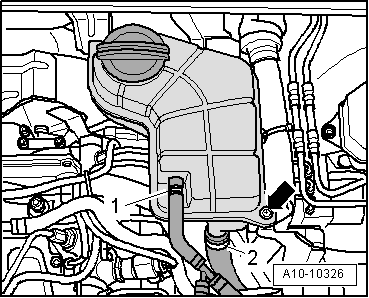
–  Disconnect coolant hoses -1- and -2- at coolant expansion tank.
–  Unbolt coolant expansion tank -arrow-.
–  Detach electrical connector at coolant shortage indicator switch -F66- on coolant expansion tank (bottom).
  A10-10326
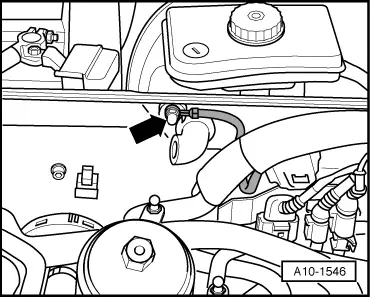
–  Unscrew earth connection at plenum chamber partition panel -arrow-.
  A10-1546
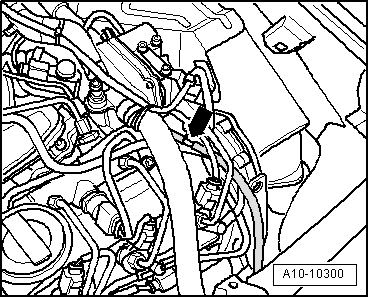
–  Disconnect vacuum hose going to vacuum reservoir -arrow-.
  A10-10300
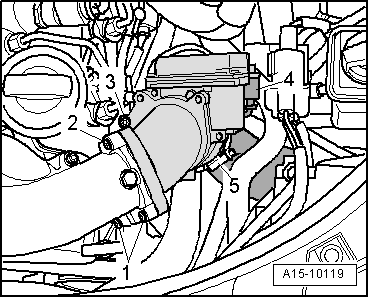
–  Unplug electrical connector -4-.
–  Detach air hose -5-.
–  Remove bolts -1 … 3- and detach throttle valve module -J338- from intake connecting pipe.
  A15-10119
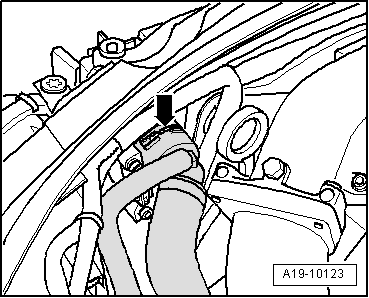
–  Disconnect coolant hose at top left of radiator -arrow-.
  Note
  A19-10123
Lay a cloth under the hydraulic lines to catch any escaping hydraulic fluid.
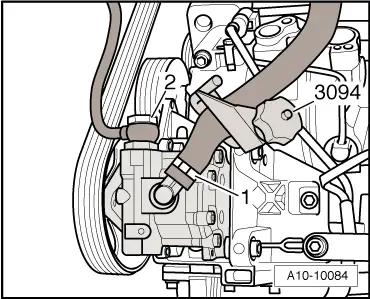
–  Clamp off hydraulic hose for power steering pump using a hose clamp -3094-.
–  Disconnect hydraulic hose -1- from power steering pump.
–  Disconnect hydraulic pressure line -2- from power steering pump and lay aside on top of longitudinal member.
  Note
  A10-10084
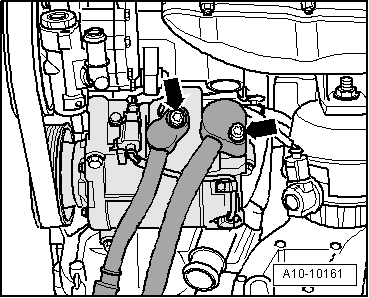
To prevent damage to the refrigerant lines, ensure that the pipes and hoses are not stretched, kinked or bent.
–  Remove bolts -arrows-.
  Note
The refrigerant lines are disconnected from the air conditioner compressor at a later stage.
  A10-10161
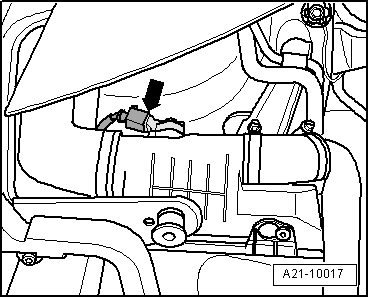
–  Unplug electrical connector -arrow- for charge pressure sender -G31- at charge air cooler (left-side).
–  Move wiring clear.
  Note
Shown in illustration with headlight removed.
  A21-10017
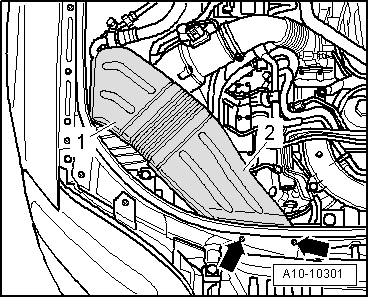
–  Remove bolts -arrows-.
–  Remove air ducts -1- and -2-.
  A10-10301
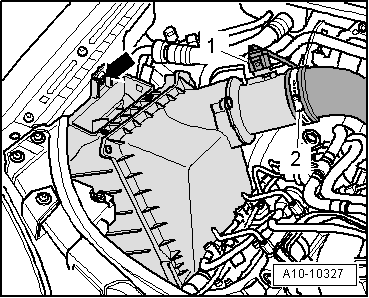
–  Unplug electrical connector -1- at air mass meter -G70-.
–  Detach air intake hose -2- at air mass meter.
–  Detach clip -arrow- and remove air cleaner housing together with air mass meter.
  A10-10327
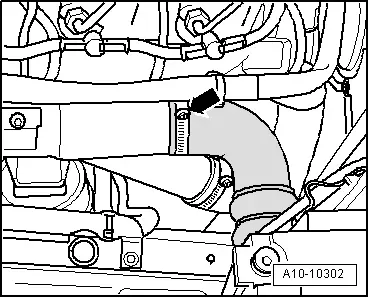
–  Disconnect air intake hose -arrow- from air pipe.
  A10-10302
–  Lay a clean cloth under the separating point to catch escaping fuel.
  Caution
Observe rules for cleanliness when working on the injection system → Chapter.
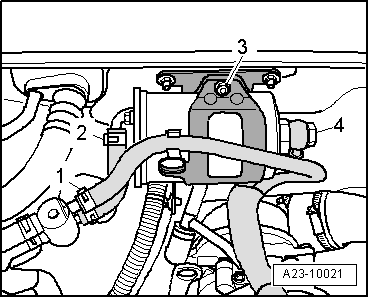
–  Disconnect fuel return hose -1-.
–  Unbolt fuel supply hose -4- from fuel filter.
–  Unscrew retaining nut -3-, open retainer and place fuel filter to one side.
  Note
Disregard -item 2-.
  A23-10021
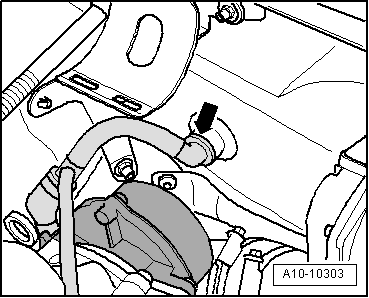
–  Detach vacuum hose going to brake servo -arrow- at plenum chamber partition panel.
  A10-10303
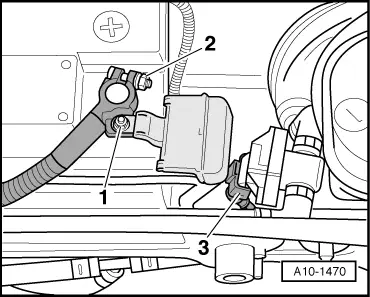
–  Unscrew nut -1- and detach strip fuse at positive terminal.
–  Disconnect positive cable -2- at positive battery terminal.
–  Pull out positive cable forwards through plenum chamber partition panel.
–  Move wiring harness clear and place on top of engine.
  Note
Disregard -item 3-.
  A10-1470
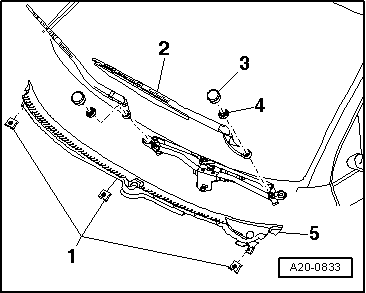
–  Lever off caps -3- on windscreen wiper arms with a screwdriver.
–  Slacken nuts -4- a few turns.
–  Release wiper arms -2- one by one by tilting them slightly on the wiper shafts.
–  Remove nuts completely and take off wiper arms.
  Note
Use puller (commercially available) to remove wiper arm if necessary.
  Caution
To avoid cracking the cowl panel trim -5- during removal, apply a small amount of soap solution to the joint between the windscreen and the cowl panel trim and pull the trim vertically up out of the windscreen surround, starting from the edge of the windscreen.
–  Pull off retaining clips -1- and detach cowl panel trim -5-.
  A20-0833
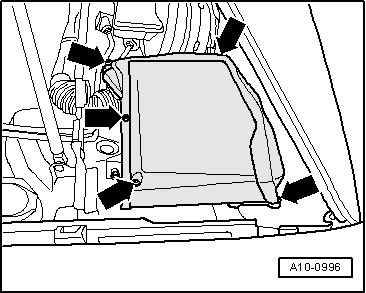
–  Remove cover for electronics box in plenum chamber -arrows-.
  A10-0996
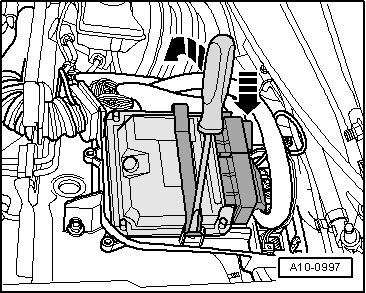
–  Using a screwdriver, carefully lever out retaining strap -arrow- and remove engine control unit from electronics box.
  Note
The engine control unit remains connected to the wiring harness.
  A10-0997
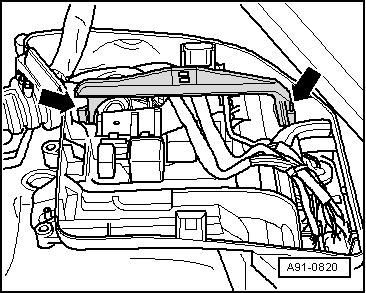
–  Release retaining hooks -arrows- outwards and remove retaining strap.
  A91-0820
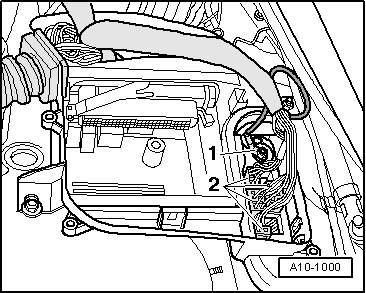
–  Unplug all electrical connectors at connector point -2-.
–  Unscrew electrical wiring -1-.
–  Move wiring harness clear.
  A10-1000
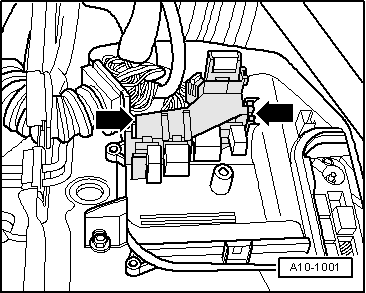
–  Release retainers -arrows- and push auxiliary relay carrier in electronics box upwards to remove.
–  Disengage engine wiring harness at electronics box and at plenum chamber partition panel.
–  Move engine wiring harness clear and lay on top of engine.
  A10-1001
–  Have a 2nd mechanic press the brake pedal.
  Caution
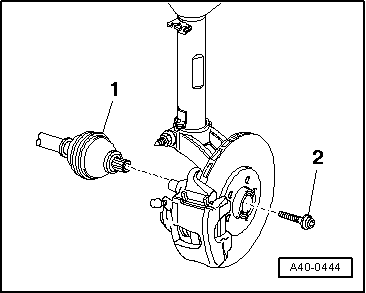
When slackening the flange bolt securing the drive shaft, the wheel bearing must not be under load (vehicle must not be standing on its wheels).
–  Unscrew flange bolt -2- from drive shaft -1- (left and right).
  A40-0444
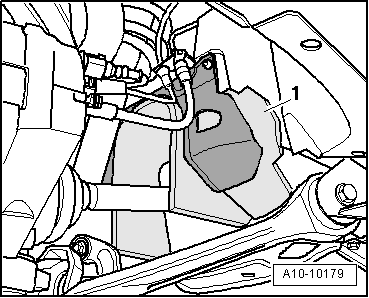
–  Remove noise insulation -1- in wheel housing (left and right).
  A10-10179
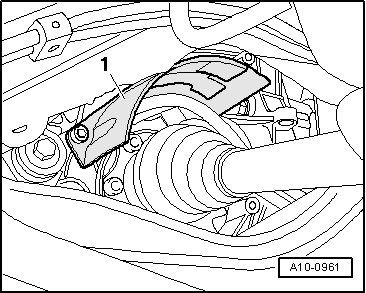
–  Unbolt heat shield -1- for drive shaft (left-side).
–  Unbolt drive shafts (left and right) from gearbox flange shafts.
  Note
The drive shafts are removed at a later stage.
  Note
  A10-0961
To prevent damage to the refrigerant lines, ensure that the pipes and hoses are not stretched, kinked or bent.
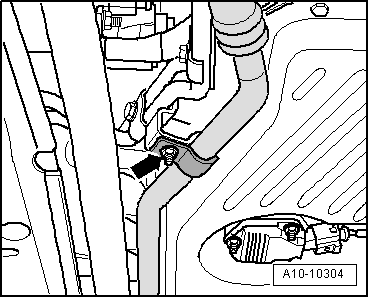
–  Unbolt retainer for refrigerant pipe (right-side) from sump -arrow-.
–  Detach refrigerant lines from AC compressor.
–  Tie up refrigerant line leading to reservoir (right side of vehicle) to body.
  Note
Seal open pipes and connections at air conditioner compressor with suitable caps (to prevent ingress of dirt and moisture).
  A10-10304
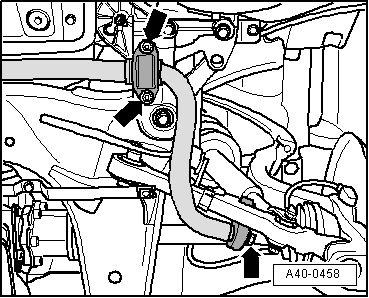
–  Unscrew nuts and bolts -arrows- evenly on both sides of vehicle.
–  Take out anti-roll bar.
  A40-0458
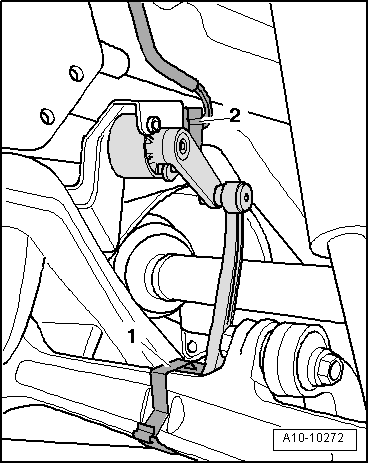
–  If fitted, unplug electrical connector -2- at front left vehicle level sender -G78-.
–  Unclip retaining clip -1- on operating rod for front left vehicle level sender -G78- at track control link (bottom).
  A10-10272
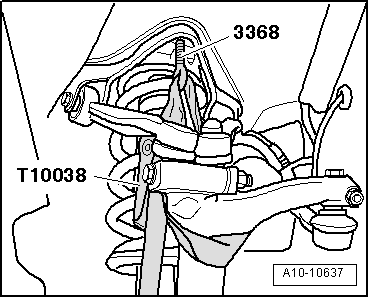
–  Working from engine compartment, remove outer securing bolt for suspension strut on both sides of vehicle.
–  Screw eye-head bolt -3368- from below into bore in suspension turret on both sides of vehicle.
  Caution
To avoid damaging the bonnet when it is shut, screw in eye-head bolt -3368- only until it is flush with the top surface of the suspension turret.
–  Tie up wheel bearing housing on each side using tensioning strap -T10038- as illustrated.
  A10-10637
  Caution
To prevent damage to the joints on the upper links, the weight of the wheel bearing housings must be supported before slackening the bottom securing bolts for the suspension struts.
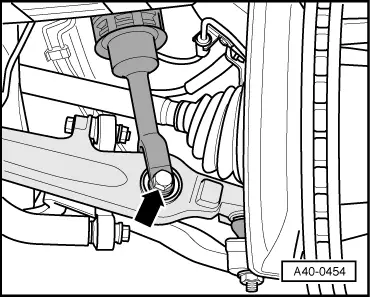
–  Unbolt suspension strut from track control link -arrow-.
  A40-0454
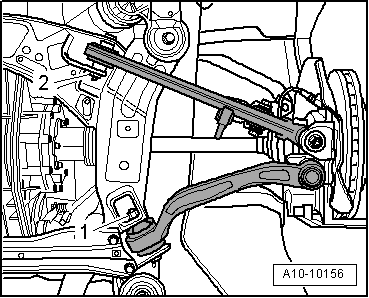
–  Unscrew nuts -1- and -2- on bolt connections securing track control link and guide link.
  Note
The bolts are removed from the subframe at a later stage.
–  Repeat procedure on other side of vehicle.
  A10-10156
Set up the scissor-type assembly platform as follows:
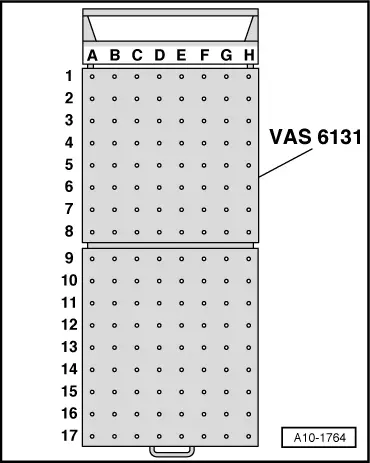
–  Set up scissor-type assembly platform -VAS 6131 A- with support set for Audi -VAS 6131/10- and supplementary set -VAS 6131/13- as follows:
  A10-1764
Platform coordinatesParts of support set for Audi -VAS 6131/10- and supplementary set -VAS 6131/13-
B3/10-1/10-4/10-5/10-11
F3/10-1/10-4/10-5/10-11
B10/10-1/10-2/10-5/10-8
G10/10-1/10-2/10-5/10-8
C15/10-1/10-3/10-5/10-7
F15/10-1/10-3/10-5/10-7
D17/10-1/10-3/10-5/13-2

–  Initially tighten the support elements on the assembly platform only hand-tight.
–  Adjust the scissor-type assembly platform -VAS 6131 A- so that it is horizontal.
l  Take note of spirit level (bubble gauge).
–  Place scissor-type assembly platform -VAS 6131 A- under engine/gearbox assembly.
   
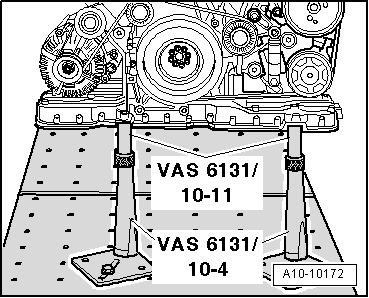
–  Position support elements from -VAS 6131/10- at front of engine, as shown in illustration.
–  Make sure that threaded spindles are screwed in completely.
  A10-10172
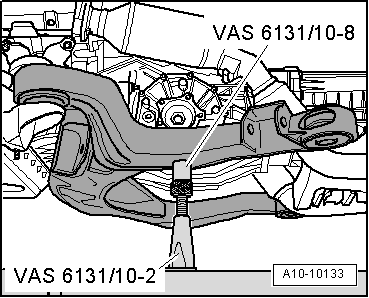
–  Position support elements from -VAS 6131/10- at left and right of subframe, as shown in the illustration.
  A10-10133
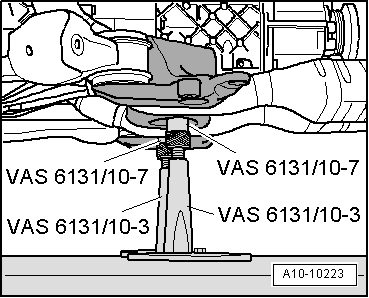
–  Position the support elements from -VAS 6131/10- at left and right of tunnel cross member, as shown in the illustration.
–  Turn all spindles for the support elements upwards until all locating lugs make contact with the mounting points.
  A10-10223
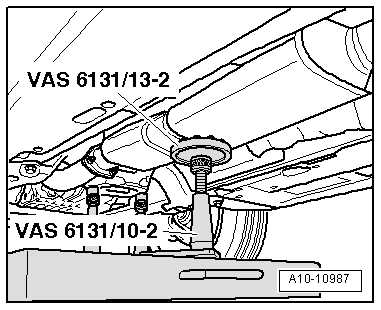
–  Position support elements from -VAS 6131/10- and -VAS 6131/13- at rear of gearbox, as shown in illustration.
–  Tighten base plates for support elements to 20 Nm on scissor-type assembly platform -VAS 6131 A-.
  A10-10987
–  Screw both spindles (at subframe) 2 turns upwards.
  A10-10133
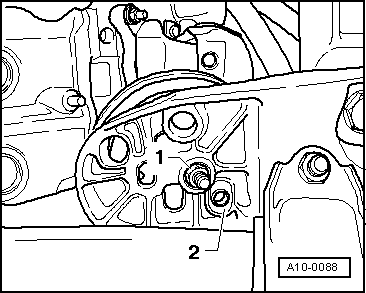
–  Mark positions of bolt connection -1- and locating sleeve -2- on bottom of engine mounting (right-side).
  Note
Different mounting holes are provided for the different engine versions.
–  Unscrew nuts -1- (bottom) at engine mountings (left and right).
  A10-0088
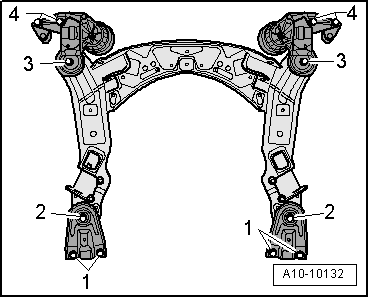
–  Remove bolts -1-.
–  Mark the installation position of the subframe and the two consoles for engine mountings on the longitudinal members with a felt-tip pen.
–  Unscrew bolts -2, 3, 4- in diagonal sequence and in stages.
–  Take out consoles for engine mounting (left and right).
  A10-10132
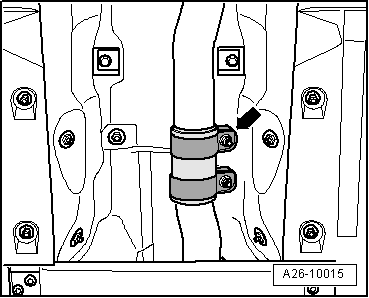
–  Disconnect exhaust system at clamp -arrow-.
  A26-10015
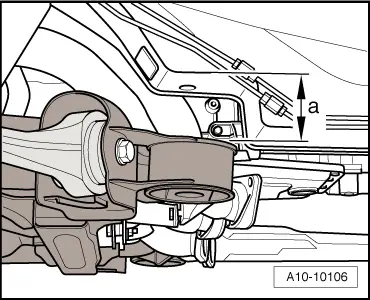
–  Lower the engine/gearbox assembly using scissor-type assembly platform -VAS 6131 A- initially only as far as distance -a-.
l  Distance -a- = 80 mm.
  A10-10106
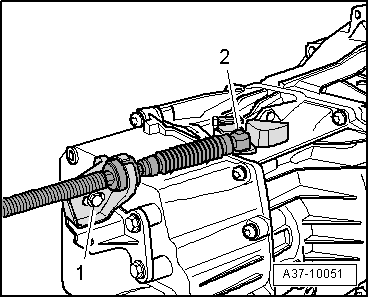
–  Mark installation position of support bracket for selector lever cable.
–  Unscrew bolt -1- for support bracket for selector lever cable.
–  Push ball socket -2- of selector lever cable off gearbox selector lever.
  Note
Take care not to bend or kink selector lever cable.
  A37-10051
–  Remove bolts for guide link -1- and track control link -2- from subframe.
  A10-10156
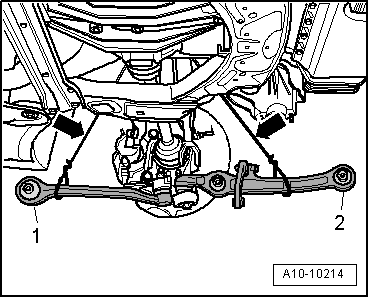
–  Pivot guide link -1- and track control link -2- outwards.
  Caution
The guide link and track control link must not be allowed to hang down without support. Tie up both links to wheel bearing housing as illustrated -arrows-.
–  Pivot wheel bearing housing outwards and remove drive shaft.
–  Repeat procedure on other side of vehicle.
  Note
t  Check that all hoses and wiring connections between engine, gearbox, subframe and body have been detached.
t  Carefully guide out engine/gearbox assembly with subframe from engine compartment when lowering to avoid damage.
–  Lower engine/gearbox assembly gradually.
  A10-10214

Separating engine from multitronic gearbox > < Removing and installing engine - vehicles with multitronic gearbox