
A4 Mk2
|
|
|
|
|
 Note
Note
|
|
|
|
|
|
Note
Note
|
|
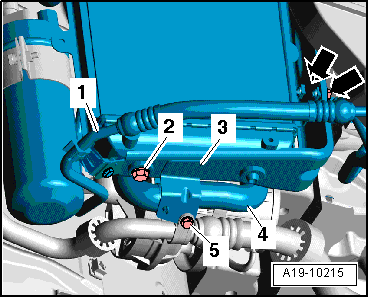
| Component | Nm |
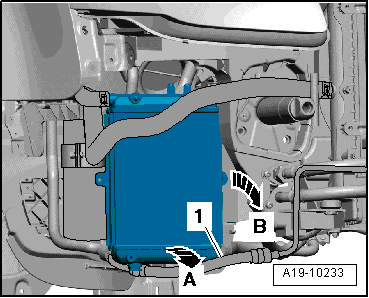
| Bottom bracket to longitudinal member | 9 |
| Auxiliary radiator to bottom bracket | 9 |