
A4 Mk2
|
|
|
 Caution
 WARNING
|
|
|
|
|
|
|
|
|
|
 Note
Note
|
|
|
|
Note
|
|
| Component | Nm | |
| Bracket for auxiliary radiator to bracket for secondary air pump | 10 | |
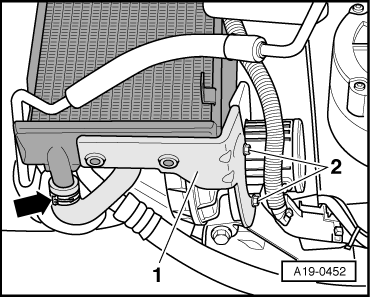
| Auxiliary radiator | Bracket | 10 |
| to: | Longitudinal member | 10 → Note |
| Fuel supply line to fuel rail | 22 | |
|