audi Workshop Repair Guides

Audi Workshop Service and Repair Manuals

Removing and installing lambda probe upstream of catalytic converter, bank 2 (left) > < Removing and installing intake manifold
Motronic injection and ignition system (8-cyl.)
Removing and installing lambda probe upstream of catalytic converter, bank 1 (right)
 
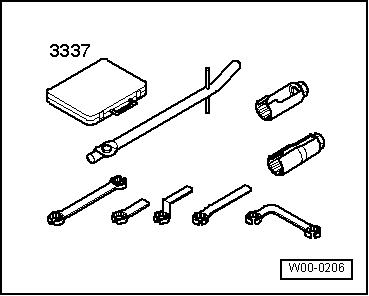
W00-0206

Special tools and workshop equipment required

  • ◆ Ring spanner set 3337

 
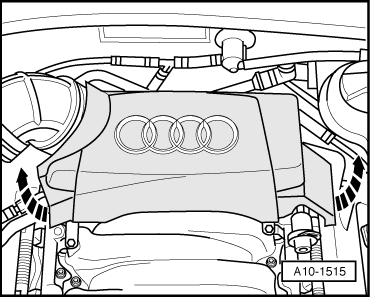
A10-1515

Removing

Note:

All cable ties unfastened or cut open on removal are to be re-attached in same position on installation.

  • ‒ → Detach rear engine cover -arrows-.
 
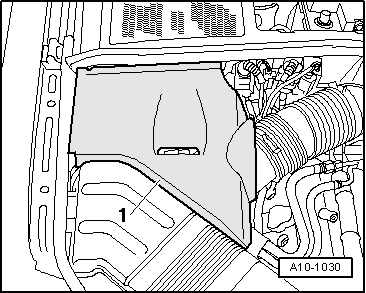
A10-1030
  • ‒ → Detach cover -1- on right of engine compartment.

 
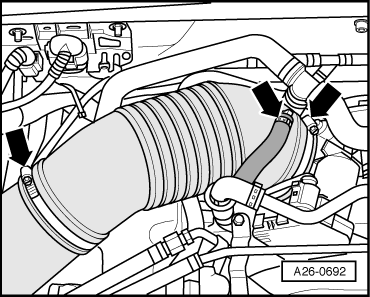
A26-0692
  • ‒ → Remove air hose -arrows-.
 
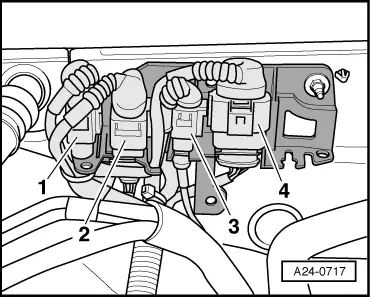
A24-0717
  • ‒ → Take connectors -1 ... 4- out of holder on right of bulkhead.
  • ‒ Unplug connector -2-.
  • ‒ Lay bare lambda probe wiring.

 
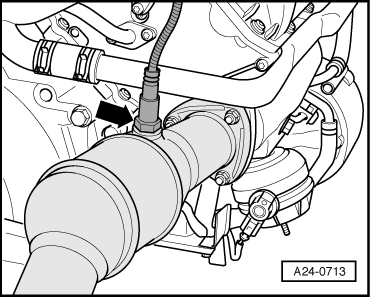
A24-0713
  • ‒ → Use special tool 3337 to screw out lambda probe -arrow-.

Note:

Illustration shows engine removed.

Installing

Install in reverse order, paying attention to the following:

Notes:

  • ◆ Thread of new lambda probe is coated with assembly paste which must not be allowed to ingress into openings in probe.
  • ◆ Re-attach all cable ties at same location on installation.
  • ◆ Secure all hose connections with standard hose clamps.

=> Parts List

Tightening torque

Component

Nm

Lambda probe in catalytic converter

55 1)

    1)    If a lambda probe is to be re-used, grease thread only with hot bolt paste. This must not be allowed to ingress into openings in probe. Hot bolt paste

=> Parts List

Removing and installing lambda probe upstream of catalytic converter, bank 2 (left) > < Removing and installing intake manifold