| t
| Hose -N 020 150 05- approx. 250 mm long |
| Note the following points regarding ceramic glow plugs: |

Caution | t
| Due to the special properties of the material used, ceramic glow plugs are easily damaged and require extra care when handling and removing/installing. |
| t
| Transport and store only in original packaging or packed separately in bubble wrap. |
| t
| Do not remove new ceramic glow plugs from packaging until they are ready to be fitted. |
| t
| Ceramic glow plugs are sensitive to knocks and bending. For this reason, ceramic glow plugs which have been dropped (even from a height of only about 2 cm) must not be installed, even if no damage is apparent (hair-line cracks may not be visible). |
| t
| Always install a new ceramic glow plug if you are not sure the old one is in perfect condition. |
| t
| Damaged glow plugs (e.g. heater pin of the glow plug is damaged) will invariably cause engine damage. |
| t
| If the heater pin of the glow plug is damaged, the fragments must be removed from the combustion chamber before starting the engine for the first time, otherwise this will invariably cause mechanical damage (piston seizure). If necessary, the cylinder head must be removed. |
| t
| To check compression, select function “Self-diagnosis compatible systems” in “Guided Fault Finding” (vehicle diagnosis, testing and information system -VAS 5051B-). |
| t
| The ceramic glow plugs must not be removed when checking cylinder compression. |
| t
| The software of the engine control unit is specifically adapted to either the ceramic or the metal glow plugs, so it is important to install the correct type. |
| t
| Mixed installation of ceramic glow plugs and metal glow plugs on the same engine is not permissible. |
|
| –
| Before removal, the ceramic glow plugs must be burnt clean using the “Final control diagnosis” function (vehicle diagnosis, testing and information system -VAS 5051B-). |
| –
| Detach electrical connectors at glow plugs. |
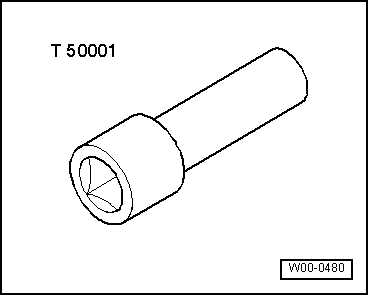
Caution | When loosening a ceramic glow plug, do not exceed the maximum release torque of 20 Nm. When loosening, always use socket -T50001- and a torque wrench. |
|
| –
| Carefully slacken glow plug. Do not exceed the maximum release torque of 20 Nm. |
| If the glow plug cannot be unscrewed with the maximum permitted torque of 20 Nm: |
| –
| Apply a suitable release agent (commercially available) and then try to unscrew the glow plug again. |

Note | If it is still not possible to slacken the glow plug with the maximum release torque of 20 Nm after applying the release agent, remove the cylinder head and then unscrew the glow plug. |
| –
| Fit hose -N 020 150 05- (approx. 250 mm long) onto glow plug and unscrew glow plug, taking care to keep it straight. |
| –
| Carefully pull ceramic glow plug out from above using hose. Take care to prevent glow plug from contacting other parts. |
Caution | t
| IMPORTANT: always observe the precautions listed above. |
| t
| The threads in the cylinder head and on the ceramic glow plugs must be dry, and free of oil and grease. |
|
| –
| Clean combustion deposits out of glow plug openings in cylinder head before installing glow plugs. |
| –
| Screw in ceramic glow plugs finger-tight. |
Caution | It is most important to keep to the specified tightening torque for the glow plugs (threads dry, and free of oil and grease). The heater pins of the glow plugs can break if this torque setting is not observed, which would invariably cause engine damage. |
|
| Check function of ceramic glow plugs after installation and before starting engine for the first time. |
| –
| Connect multimeter (resistance test) to contact and body of glow plug. |
| l
| Specification: less than 1 Ω, |
| If specification is exceeded (resistance more than 1 Ω): |
| –
| Remove ceramic glow plug again and check whether the heater pin is broken. |
Caution | If the heater pin is broken, the fragments must be completely removed from the combustion chamber before starting the engine for the first time, otherwise this will invariably cause mechanical damage (piston seizure). If necessary, the cylinder head must be removed. |
|
| –
| Re-attach electrical connectors, making sure that they are securely seated. |
| –
| Additionally check ceramic glow plugs via self-diagnosis vehicle diagnosis, testing and information system -VAS 5051B-. |
| 1.
| Interrogate and erase fault memory of engine control unit. Do not start engine. |
| 2.
| Perform final control diagnosis. |
| 3.
| Interrogate fault memory of engine control unit once again. Do not start engine. |
Note | The engine must not be started if the fault memory has registered a fault relating to the ceramic glow plugs. |
| –
| Check electrical wiring and connectors, make sure connectors are securely seated. |
|
|
|

