
A4 Mk2
| High-pressure pump on vehicles up to 09.2005 - exploded view |

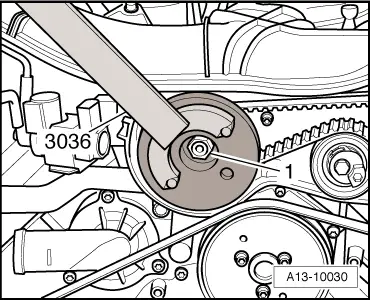
| 1 - | Damper weight |
| q | Use counterhold tool -3036- when loosening and tightening central nut → Fig. |
| 2 - | Nut |
| q | 70 Nm |
| q | Use counterhold tool -3036- when loosening and tightening → Fig. |
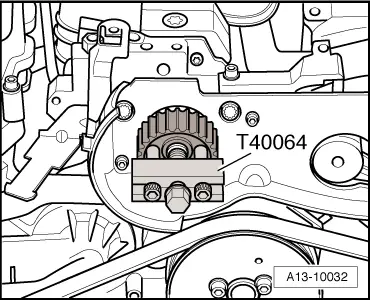
| 3 - | Toothed belt sprocket for high-pressure pump |
| q | Remove using puller -T40064- → Fig. |
| 4 - | Bolt |
| q | 23 Nm |
| 5 - | High-pressure pump |
 Caution
|
| q | Removing and installing: vehicles up to 09.2005 → Chapter |
| q | Fuel system must be bled after installing high-pressure pump → Chapter. |
| 6 - | Seals |
| q | Renew |
| 7 - | Fuel supply line |
| 8 - | Banjo bolt |
| q | 25 Nm |
| 9 - | Banjo bolt |
| q | 25 Nm |
| 10 - | Seals |
| q | Renew |
| 11 - | Fuel return line |
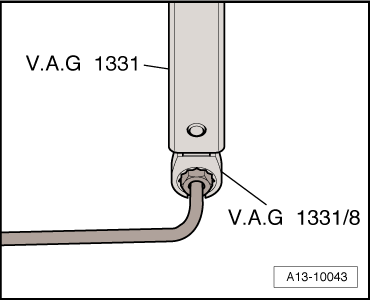
| 12 - | Union nut for injection pipe |
| q | Tighten to 25 Nm |
| q | Tighten using ring insert (open-end) -V.A.G 1331/8- → Fig. |
| 13 - | Bolt |
| q | 23 Nm |
| 14 - | Bolt |
| q | 23 Nm |
| 15 - | Bracket for high-pressure pump |
| 16 - | Bolt |
| q | 23 Nm |
| 17 - | Front bracket for high-pressure pump |
| 18 - | Bolt |
| q | 9 Nm |
|
|
|
|
|
|