| –
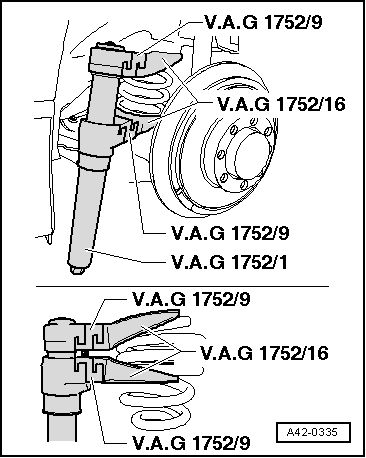
| Attach spring compressor -V.A.G 1752/1- with adapters -V.A.G 1752/9- and rear axle spring retainers (A4) -V.A.G 1752/16- to coil spring. If necessary, insert spring retainers individually into coils of spring, then secure to spring compressor. Take care not to damage trapezium link. |
| 4 coils of spring must be compressed. |
| If this is not possible, compress 3 coils only and then turn the spring so that the specified 4 coils can be compressed. |

WARNING | Ensure that coil spring is correctly seated in rear axle spring retainers (A4) -V.A.G 1752/16- (accident risk). |
|
| –
| Tighten spring compressor as far as it will go, and take out spring. |

Note | t
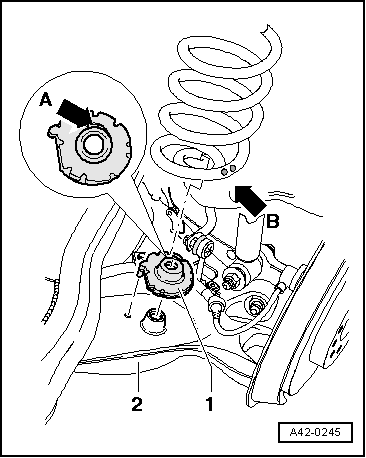
| When installing a new spring, ensure that the tapered end faces downwards. |
| t
| Arrow B: Coloured markings must be at the bottom |
|
|
|