audi Workshop Repair Guides

Audi Workshop Service and Repair Manuals

Servicing shock absorber > < Shock absorber
Removing and installing shock absorber
Special tools and workshop equipment required
   
t  Spring compressor -V.A.G 1752/1-
t  Adapter -V.A.G 1752/9-
t  Rear axle spring retainers (A4) -V.A.G 1752/16-
t  Torque wrench - V.A.G 1331-
t  Torque wrench -V.A.G 1332-
Removing
Discharging system on vehicles with Dynamic Ride Control (DRC II) → Chapter.
–  Remove wheel.
–  Remove coil spring → Chapter.
  W00-0500
–  Unscrew nut -1- and pull out bolt (shown without splash plate)
–  Remove bolts -2-.
  Note
Wheel housing liner does not have to be removed.
–  Take out shock absorber.
Installing
  Note
Renew bolts and self-locking nuts ⇒ instructions in exploded views from → Chapter onwards.
  A42-0246
–  Tighten bolts -2- → Item or → Item, respectively.
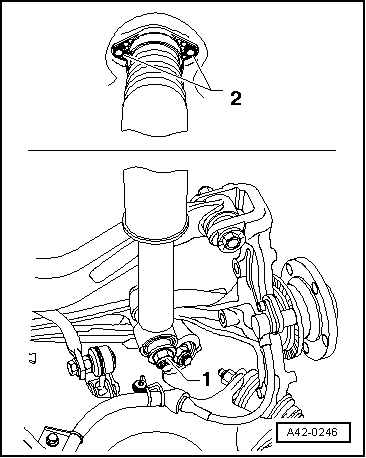
Note installation position at bottom mounting → Fig..
–  Bonded rubber bushes can only be turned to a limited extent. The mountings of the suspension links must therefore only be tightened when the suspension is in the unladen position → Chapter.
–  Tighten bolt connection -1- → Item (front-wheel drive) or → Item (four-wheel drive).
–  Install coil spring → Chapter.
Charging system on vehicles with Dynamic Ride Control (DRC II) → Chapter.
–  Fit and secure wheel → Wheels and tyres; Rep. Gr.44.
  A42-0246

Servicing shock absorber > < Shock absorber