audi Workshop Repair Guides

Audi Workshop Service and Repair Manuals

Vehicles with 1.9 ltr. TDI engine to 05.2003 > < Vehicles with 4.2 ltr. MPI engine - Audi S4
Vehicles with 4.2 ltr. FSI engine - Audi RS4
Special tools and workshop equipment required
   
t  Used oil collection and extraction unit -V.A.G 1782-
  W00-10211
t  Drip tray for workshop hoist -VAS 6208-
Removing
–  With ignition switched off, disconnect earth wire at battery → Chapter.
–  Draw off power steering hydraulic fluid from reservoir with used oil collector and extractor -V.A.G 1782-.
  WARNING
Hot vapour/coolant may escape when opening the expansion tank. Cover the cap with a cloth and open carefully.
–  Open cap of coolant expansion tank.
  W00-10228
–  Remove front right wheel.
–  Unfasten bolts/quick-release fasteners -1- and -2- and detach front noise insulation.
–  Remove front right wheel housing liners → Rep. Gr.66.
–  Remove front bumper cover → Rep. Gr.63.
  A10-1519
–  Remove right air duct -arrow- in front of auxiliary radiator.
  A10-1481
–  Place used oil collector and extractor -V.A.G 1782- beneath engine.
–  Drain off engine oil.
–  Screw out bolts -arrows- at oil pipes for oil cooler at top part of sump.
–  Pull oil pipes out of top part of sump.
  A17-10093
–  Remove left air duct -arrow- in front of auxiliary radiator.
  A10-1480
–  Screw out bolt -arrow- at top holder for auxiliary radiator on left at lock carrier.
  A10-10389
–  Place drip tray for workshop hoist -VAS 6208- beneath engine.
–  Screw out drain plug -arrow- at housing for thermostat and drain off coolant at engine.
  A19-10194
–  Additionally screw out drain plug -arrow- at front coolant pipe and drain off remaining coolant.
  A19-10195
–  Unfasten hose clamp -arrow- and detach coolant hose at bottom from radiator.
  A10-10415
–  Place used oil collector and extractor -V.A.G 1782- beneath engine.
–  Disconnect hydraulic pipes to rear left cooling pipe at lock carrier -arrows-.
  A10-1520
–  Screw out bolts -arrows-.
–  Remove air ducts -1- and -2-.
  A10-10301
–  Detach upper coolant hose -arrow- from radiator.
  A19-0414
–  Detach cover -1- on left of engine compartment.
  A10-1031
–  Remove connectors -1- and -2- from holder and unplug.
–  Lay bare wires to lock carrier.
  A10-10390
–  Unplug headlight connector -arrow- on both sides of vehicle.
  A10-0953
–  Unplug connector -arrow- for airbag sensors on left and right at lock carrier.
–  Lay bare wiring.
–  Detach bonnet cable at lock carrier → Rep. Gr.55.
  A10-1521
–  Unplug connector -arrow- for fan on right.
  A19-0415
–  Screw out bolts -arrows- at air ducts on left and right of radiator.
  WARNING
The air conditioner refrigerant circuit is not to be opened.
  Note
  A19-10249
So as not to damage condenser and refrigerant pipes/hoses, take care to avoid straining, kinking or bending pipes and hoses.
–  Unplug connector -1- at high pressure sender -G65-.
–  Screw out bolts -arrows-.
–  Detach condenser and swivel downwards with pipes connected.
  A19-0393
–  Detach right coolant hose -arrow- at radiator.
  A19-10196
–  Screw out bolts -arrows- at lock carrier on left and right.
–  Pull off bonnet seal at lock carrier and wing flanges.
  A10-1047
–  Screw out bolts at impact absorbers -arrows- on left and right.
  Note
A second mechanic is required for detaching the lock carrier.
–  Detach lock carrier, set it down and secure in position.
  Note
  A10-0956
Prior to removal, mark direction of poly V-belt with chalk or a felt-tip pen. Running a used belt in the opposite direction could destroy it.
–  To slacken off poly V-belt, swivel tensioner in -direction of arrow- using a lever with 3/8” drive.
  Note
t  Make sure shaft of lever is long enough to permit full insertion of the lever in the tensioner.
t  “Stahlwille 425QR” for example is suitable for this purpose.
–  Detach poly V-belt from alternator pulley.
–  Release tensioner.
  A13-10304
–  Screw out bolts -arrows-.
–  Detach tensioning roller -1- at top part of sump.
  A13-10306
–  Screw out bolt -2- at holder for coolant pipe.
–  Unfasten hose clamp and detach coolant hose -1- to alternator.
–  Screw out bolts -3- and -4-.
–  Detach alternator from holder and pull to front.
  Note
t  If alternator sticks in holder, screw bolt back in again down to the last 2 turns.
t  Tap carefully on bolt heads with flat side of hammer to release threaded bushes of alternator mount.
  A27-10004
–  Detach coolant hose -1- at alternator.
–  Unplug connector -5-.
–  Screw out bolt -4- and detach heat shield.
  Note
Make sure the coolant pipes do not slip out, as the O-rings have to be replaced if the coolant pipes are disconnected. If necessary, screw holder -3- back on again after detaching heat shield.
–  Unscrew wire -2- at alternator.
–  Detach alternator.
  A27-10002
Installing
Install in reverse order, paying attention to the following:
  Note
Secure all hose connections with standard clamps → Parts catalogue.
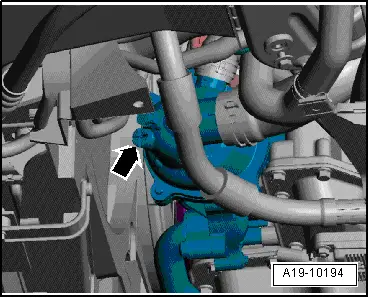
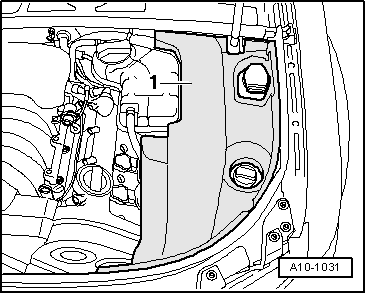
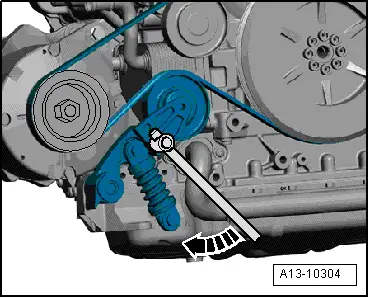
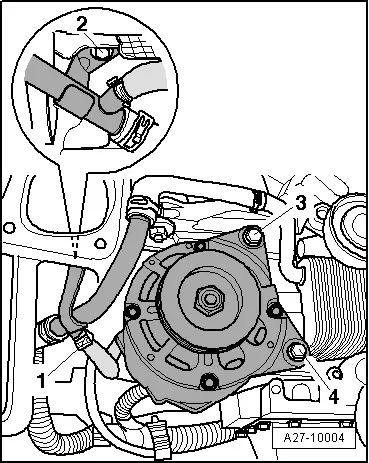
–  To facilitate positioning of alternator, drive back bushings for securing bolts slightly.
  Note
Stiff alternator mount bushes must be released as otherwise the clamping force of the bush will not be adequate even if tightened to correct torque.
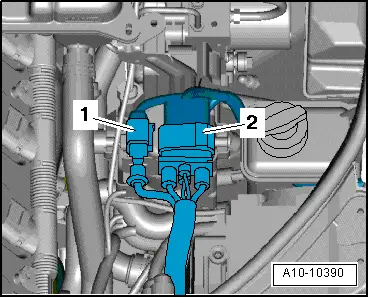
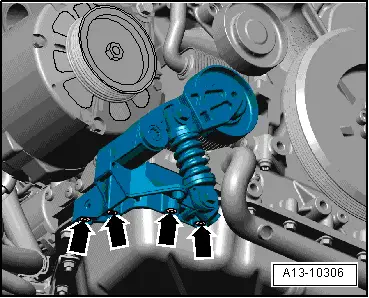
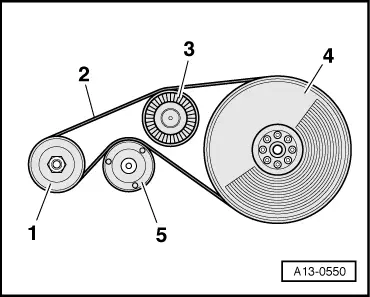
–  Make sure poly V-belt is properly positioned and correctly routed.
1 - Alternator
2 - Poly V-belt
3 - Idler wheel
4 - Vibration damper
5 - Tensioning roller
–  Install lock carrier with attachments → Rep. Gr.50.
–  Install front bumper cover → Rep. Gr.63.
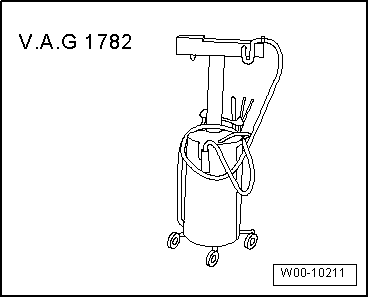
–  Before starting engine for the first time, pour hydraulic fluid into the power steering reservoir; the vane pump must not be allowed to run dry.
–  Pour in engine oil and check oil level → Rep. Gr.17.
–  Connect battery. Action to be taken → Anchor.
–  Fill with coolant → Rep. Gr.19.
–  Start engine and check that belt runs properly.
–  Headlight adjustment → Booklet803
Tightening torques
  A13-0550
ComponentNm
Holder for coolant pipes to alternator9
Terminal 30/B+ to alternator16
Alternator to engine22
Tensioner to top part of sump9


Vehicles with 1.9 ltr. TDI engine to 05.2003 > < Vehicles with 4.2 ltr. MPI engine - Audi S4