
A4 Mk3
|
|
|
|
|
|
|
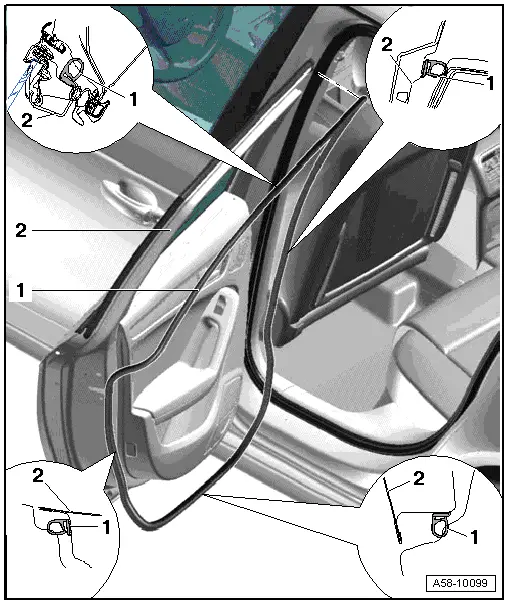
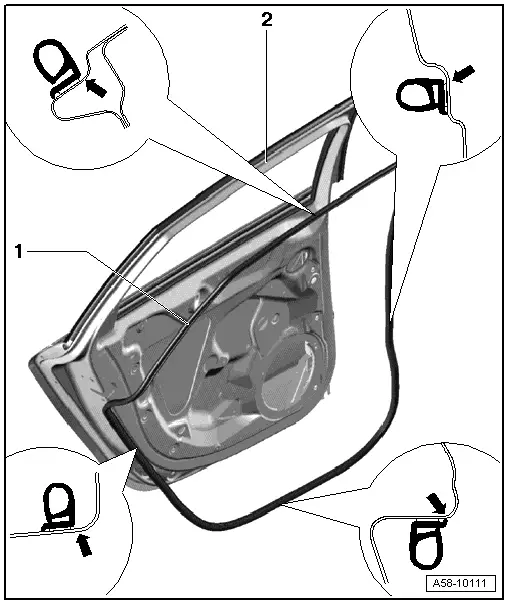
| Removing and installing inner door seal |
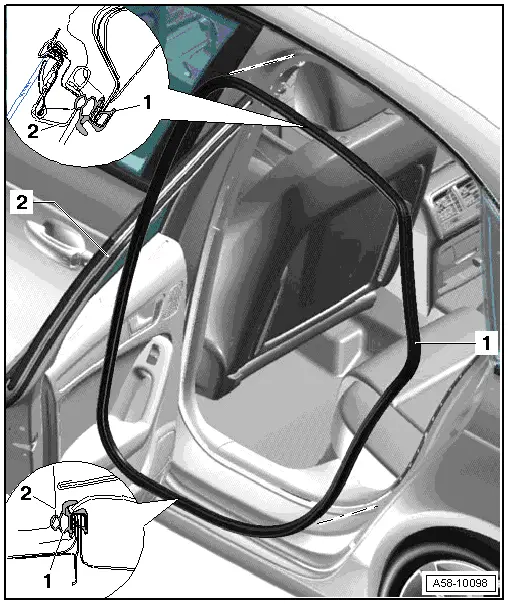
| 1 - | Inner door seal |
| q | Remove trim for window frame → Rep. gr.70. |
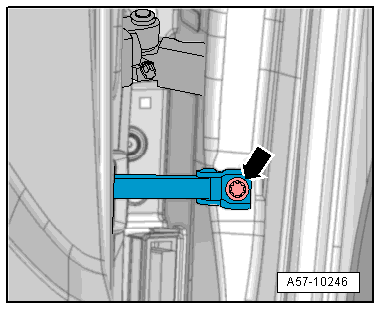
| q | Detach door arrester from B-pillar. |
| q | Fitted on body flange all around |
| q | To remove, detach from body flange. |
| q | When installing, align seal with vulcanised butt joint on lower hinge and press onto vehicle body flange by hand. |
| 2 - | Door |
| Renewing outer door seal |
 Note
Note| t | The vehicle and the outer door seal must be at room temperature. |
| t | The complete outer door seal is bonded on and can only be renewed. |
| t | Bonding surfaces must be free of dust and grease (clean with cleaning solution -D 009 401 04-). |
| t | Apply primer -D 355 205 A2- to bonding surfaces using applicator -D 009 500 25- and allow to flash off. |
| t | The water drain holes are positioned correctly when they are on the underside of the door. |
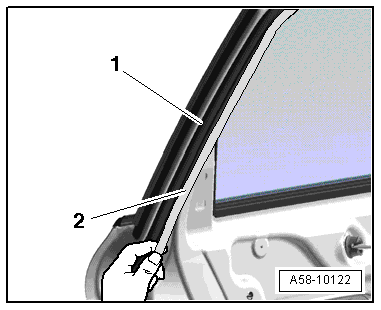
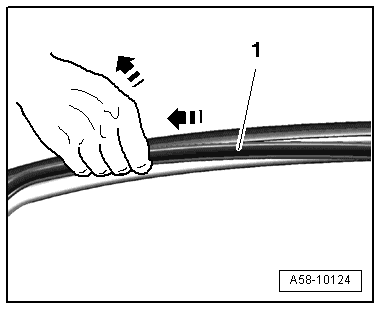
| 1 - | Outer door seal |
Note| t | Prior to removal, mark position of seal on door e.g. with adhesive tape. |
| t | To prevent any residual adhesive from remaining on door, first stretch seal lengthwise and only then pull seal off door. |
| – | Pull seal slightly off door at top of window frame and cut through with scissors or similar (commercially available). |
| q | Removing |
| – | First stretch seal lengthwise and then gradually pull off upwards → Anchor. |
| q | Installing |
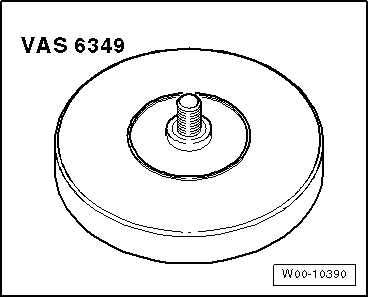
| – | Clean bonding surface with cleaning solution -D 009 401 04-; if necessary use adhesive strip remover -VAS 6349- to remove any adhesive residue. |
| – | Apply primer -D 355 205 A2- to bonding surface using applicator -D 009 500 25- and allow to flash off. |
| – | Detach door arrester from body → Anchor. |
| – | Fasten outer door seal behind door arrester. |
| – | Secure door arrester again. |
| – | Secure outer door seal to window frame (top left and right) in correct position with adhesive tape → Item. |
| – | When positioned correctly, the water drain holes (2x) in the outer door seal are located on the underside of the door. |
Note| When pressing on outer door seal, start in centre at bottom and gradually continue towards front and rear. |
| – | Peel off protective film in area of underside of door. |
| – | Press outer door seal onto underside of door in centre and continue outwards to both sides. |
| – | Gradually peel protective film off further on both sides and press on outer door seal. |
| – | Press on outer door seal upwards along A-pillar and B-pillar. |
| – | Finally press on outer door seal at top along window frame. |
 Caution
|
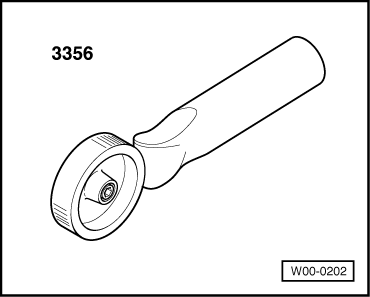
| – | Press on base of outer door seal → Item using roller -3356-. |
Caution
|
| 2 - | Door |
|
|
|
|
|
|
|
|
|
|
Note
|
|
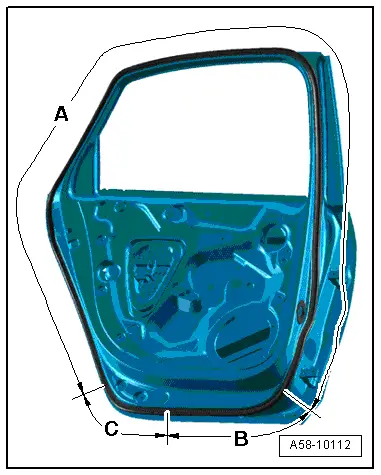
| Outer door seal on new door |
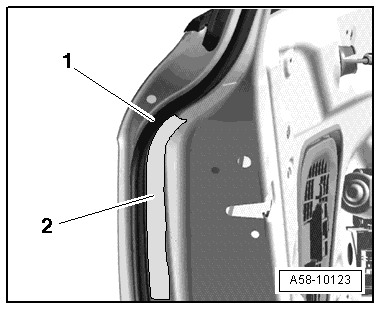
Note| t | When installing, seal must be pressed on in transition area of inner/outer radius of door shell contour, as shown in detail views -arrows-. |
| t | To make installation easier, make marks at these locations and press on seal. |
| t | Adhesive areas on inner and outer radius → Anchor |
| 1 - | Outer door seal |
| q | After making marks at transition areas between radius and straight sections, perform the remaining installation steps as described previously → Anchor. |
| q | Position outer door seal with its rear edge in transition area of inside radius to straight section, running from rear bottom edge of door to front bottom edge of door (as shown in detail views). |
| q | On the underside of the door to the embossing, the front edge of the seal must be positioned at the runout of the outer radius. |
| – | Press base of seal firmly into place all around door shell using roller -3356- → Item. |
| 2 - | Door |
|
|
| Pressing on outer door seal |

| 1 - | Rear door |
| 2 - | Outer door seal |
| – | When installing outer door seal, first secure it to top of window frame with adhesive tape -arrows-. |
Caution
|
| – | Fold outer door seal upwards, as shown in detail view, and press base on firmly all around using roller -3356-. |