audi Workshop Repair Guides

Audi Workshop Service and Repair Manuals

Removing and installing trim (tunnel side) > < Removing and installing backrest adjuster
Removing and installing trim (sill side)
  Note
Removal and installation can be carried out with the front seat installed.
   
Removing
–  Move seat to highest position.
–  Remove backrest adjuster → Chapter.
–  Remove seat height adjuster → Chapter.
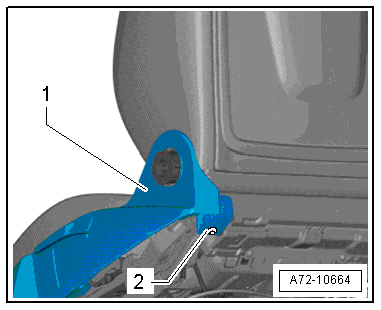
–  Remove spreader rivet -2- for trim -1- (sill side).
  A72-10664
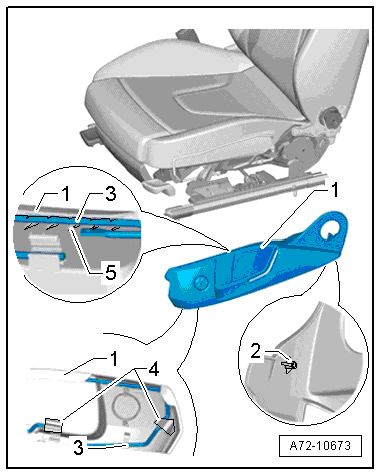
–  Unfasten clips -4- (2x).
–  Unclip trim -1- at retaining bracket -3-.
–  Disengage trim in area of backrest adjuster at backrest and seat fitting.
–  Detach trim from retaining bracket towards top front.
  Note
When detaching trim, take care not to damage retainers -5- and lug -2-.
  A72-10673
Equipment version with four-way lumbar support:
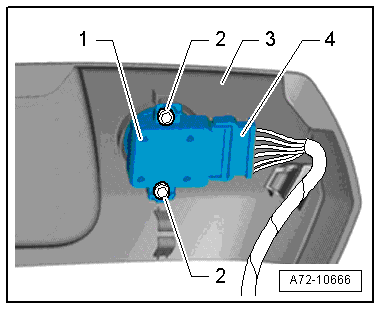
–  Unplug electrical connector -4- from driver seat lumbar support adjustment switch -E176--item 1- at trim -3- (sill side).
All seat versions with manual adjustment (continued):
–  Detach trim (sill side).
  A72-10666
Installing
Installation is carried out in the reverse order; note the following:
  Note
t  Make sure lug -2- is correctly positioned.
t  Make sure trim -1- (sill side) is properly engaged at retaining bracket -3- and that lockable clips -4- are fastened.
  Note
  A72-10673
Make sure wire is as close as possible to connector -4-.
  A72-10666

Removing and installing trim (tunnel side) > < Removing and installing backrest adjuster