audi Workshop Repair Guides

Audi Workshop Service and Repair Manuals

Exploded view of D-pillar trim > < Exploded view of C-pillar trim
Removing and installing C-pillar trim
  Note
Removal and installation are identical on the left and right.
Special tools and workshop equipment required
   
t  Removal lever -80 - 200-
Removing
  WARNING
Observe safety regulations for pyrotechnic components → Chapter.
–  Remove luggage compartment side trim → Chapter.
–  Remove outer belt guide (rear) → Chapter.
  W00-0353
–  Remove fastener -1-.
–  Unclip C-pillar trim -item 2- in direction of -arrow A- using removal lever -80 - 200-.
–  Pull out C-pillar trim downwards -arrow B- and detach.
Installing
  WARNING
t  Observe safety regulations for pyrotechnic components → Chapter.
t  Take care not to trap curtain airbag when fitting C-pillar trim.
  A70-10229
Installation is carried out in the reverse order; note the following:
  Note
t  If there are still trim clips in the body mounting points, they must be removed and inserted in the trim when installing.
t  Check clip for damage or deformation and renew if necessary.
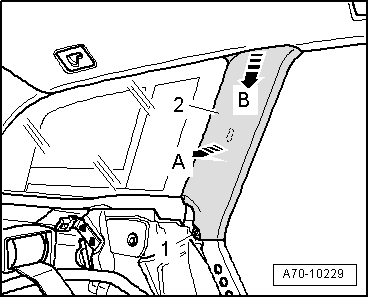
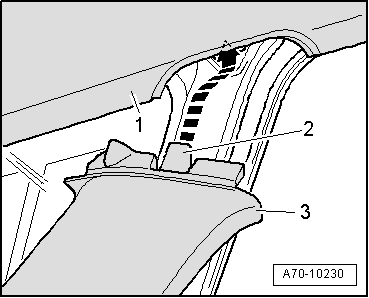
–  When installing C-pillar trim -item 3-, make sure that retaining tab -2- engages in body cut-out -arrow- and in headliner -1-.
–  First apply C-pillar trim to centring pin and then press it on until it engages audibly.
–  Fit rubber lip of door seal at door opening over edge of trim.
  A70-10230

Exploded view of D-pillar trim > < Exploded view of C-pillar trim