audi Workshop Repair Guides

Audi Workshop Service and Repair Manuals

Removing and installing vibration damper > < Removing and installing tensioner for poly V-belt
Removing and installing bracket for ancillaries
Special tools and workshop equipment required
   
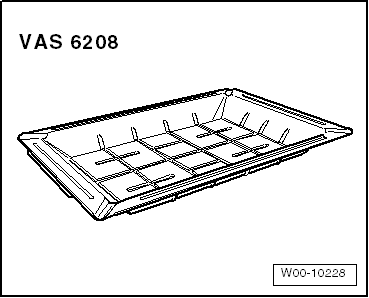
t  Drip tray for workshop hoist -VAS 6208-
Removing
  WARNING
Hot steam/hot coolant can escape - risk of scalding.
t  The cooling system is under pressure when the engine is hot.
t  Cover filler cap on coolant expansion tank with a cloth and open carefully to dissipate pressure.
–  Drain coolant → Chapter.
  W00-10228
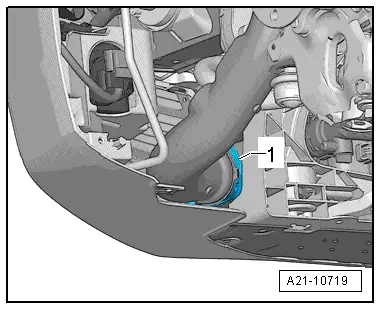
–  Open hose clip -1- and detach air hose.
  A21-10719
  Caution
If a used belt runs in the opposite direction when it is refitted, this can cause breakage.
Before removing, mark direction of rotation of poly V-belt with chalk or felt-tip pen for re-installation.
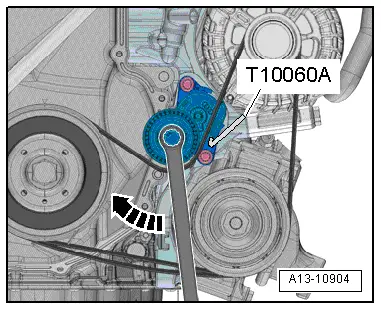
–  To slacken poly V-belt turn tensioner in direction of -arrow-.
–  Lock tensioner with locking pin -T10060 A-.
–  Take off poly V-belt.
  Note
  A13-10904
Place a cloth underneath bracket for ancillaries to catch any escaping oil.
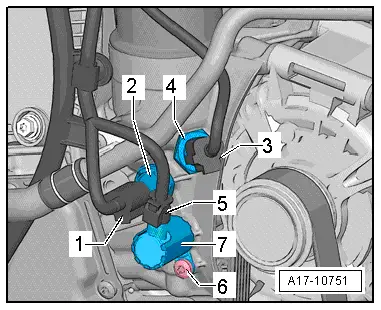
–  Unplug electrical connectors -1 and 3- from oil pressure switch -F22- and oil pressure switch for reduced oil pressure -F378-.
–  Unplug electrical connector -5- at piston cooling jet control valve -N522-.
  A17-10751
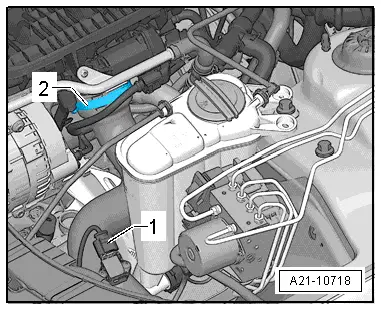
–  Unplug electrical connector -1- for charge pressure sender -G31- and move clear.
–  Open hose clip -2- and detach air hose.
  A21-10718
–  Unscrew bolts -1- and -2- and swivel coolant pipe (front) upwards.
–  Remove alternator → Electrical system; Rep. gr.27.
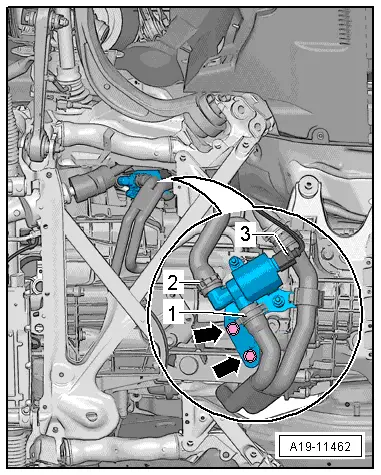
  A19-11462
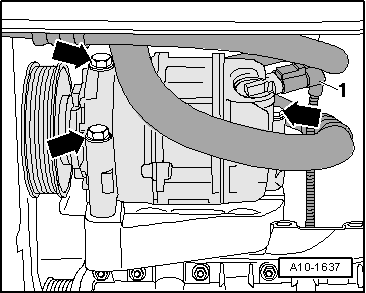
–  Unplug electrical connector -1- for magnetic clutch on air conditioner compressor.
  WARNING
Risk of injury caused by refrigerant.
The air conditioner refrigerant circuit must not be opened.
–  Remove bolts -arrows- for air conditioner compressor.
  Caution
Danger of damage to refrigerant lines and hoses.
Do NOT stretch, kink or bend refrigerant lines and hoses.
–  Tie up air conditioner compressor together with refrigerant hoses to longitudinal member (refrigerant hoses remain connected).
–  Remove oil filter → Booklet812, A5 → Booklet811.
  A10-1637
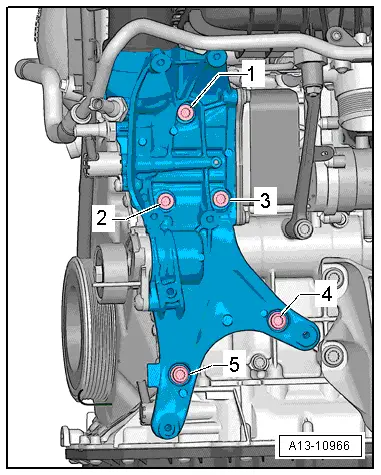
–  Unscrew bolts -1 ... 5- and detach bracket for ancillaries from coolant pump housing.
Installing
Installation is carried out in the reverse order; note the following:
l  Tightening torques → Chapter „Cylinder block (pulley end) - exploded view“
  Note
t  Renew the bolts tightened with specified tightening angle.
t  Renew O-rings and gaskets.
  A13-10966
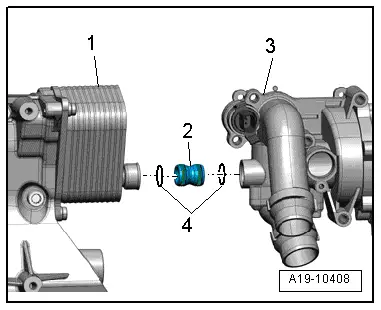
–  Lubricate O-rings -4- with coolant additive, for coolant additive refer to → Electronic parts catalogue.
–  Insert connection -2- into coolant pump housing -3-.
–  Push bracket for ancillaries -1- onto connection, fit bolts and tighten; tightening sequence → Fig..
–  Install air conditioner compressor → Rep. gr.87.
–  Install alternator → Electrical system; Rep. gr.27.
–  Install poly V-belt → Chapter.
–  Fill up with coolant → Anchor.
–  Install oil filter and check oil level; A4 → Booklet812, A5 → Booklet811.
  A19-10408

Removing and installing vibration damper > < Removing and installing tensioner for poly V-belt