
A4 Mk3
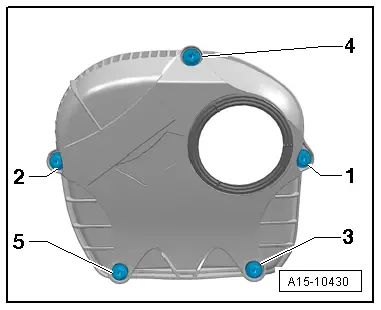
| Timing chain covers - exploded view |

| 1 - | O-ring |
| q | Renew |
| q | Lubricate before installing |
| 2 - | Guide tube for oil dipstick |
| 3 - | Bolt |
| q | 9 Nm |
| 4 - | Bolt |
| q | 9 Nm |
| 5 - | Camshaft control valve 1 -N205- |
| q | Removing and installing → Chapter |
| 6 - | Oil seal |
| q | Lubricate before installing |
| q | Renew if damaged |
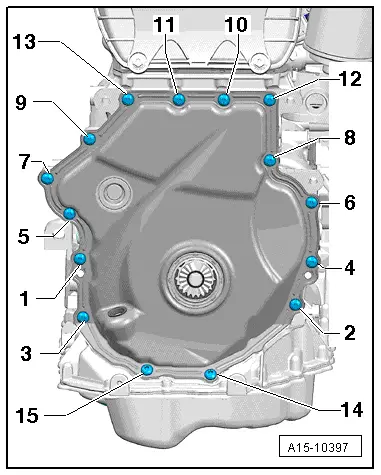
| 7 - | Bolt |
| q | Tightening sequence → Fig. |
| 8 - | Timing chain cover (top) |
| q | Removing and installing → Fig. |
| 9 - | Gasket |
| q | Renew if damaged |
| 10 - | O-ring |
| q | Renew |
| q | Lubricate before installing |
| 11 - | Dowel pins |
| q | For centring cover |
| 12 - | Timing chain cover (bottom) |
| q | Removing and installing → Chapter |
| 13 - | Bolt |
| q | Renew |
| q | Tightening sequence → Fig. |
| 14 - | Oil seal |
| q | For vibration damper |
| q | Renewing → Chapter |
| 15 - | Sealing plug |
| q | Renew |
|
|
|
|