Audi Workshop Service and Repair Manuals
HOME
FEATURES
MENU
INDEX
ABOUT US
Cylinder head >
< Balance shaft - exploded view
A4 Mk3
Power unit
6-cylinder direct petrol injection engine with supercharger (3.0 ltr. 4-valve), mechanics
Engine cylinder head, valve gear / Chain drive
Removing and installing balance shaft
Removing and installing balance shaft
Removing and installing balance shaft
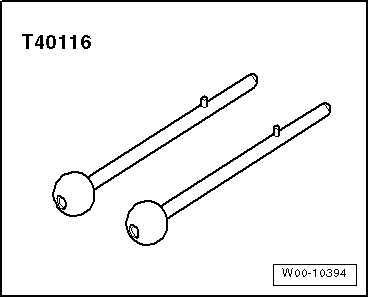
Special tools and workshop equipment required
t
Locating pins -T40116-
Removing
l
Gearbox removed
→ Rep. gr.34
.
–
Remove sealing flange (pulley end)
→ Chapter
.
–
Remove timing chain cover (bottom)
→ Chapter
.
–
Remove drive chain for auxiliary drives
→ Chapter
.
–
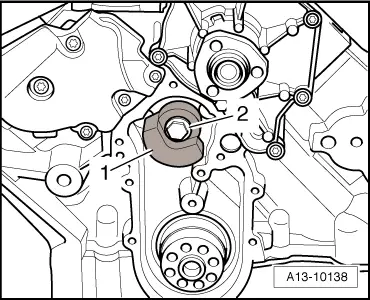
Use locating pin -T40116- to lock balance weight
-1-
in position at rear of engine.
–
Unscrew bolt
-2-
and detach balance weight from balance shaft.
–
Unscrew bolt
-2-
(counterhold balance weight
-1-
with a suitable pin) and detach balance weight at front of engine from balance shaft.
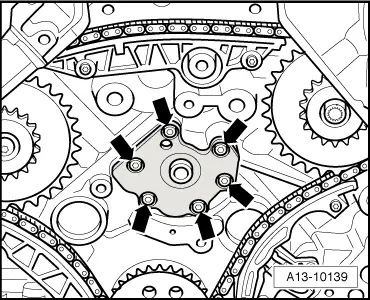
–
Unscrew bolts
-arrows-
and detach bearing plate for balance shaft at rear of engine.
–
Pull balance shaft to rear out of cylinder block.
Installing
l
Tightening torque
→ Chapter „Balance shaft - exploded view“
l
Crankshaft
-1-
locked in „TDC“ position with locking pin -T40069-.
Installation is carried out in the reverse order; note the following:
Note
Balance weights can only be fitted on balance shaft in one position.
–
Install drive chain for auxiliary drives
→ Chapter
.
–
Install timing chain cover (bottom)
→ Chapter
.
–
Install sealing flange (pulley end)
→ Chapter
.
Power unit
6-cylinder direct petrol injection engine with supercharger (3.0 ltr. 4-valve), mechanics
Engine cylinder head, valve gear / Chain drive
Removing and installing balance shaft
Cylinder head >
< Balance shaft - exploded view

 Note
Note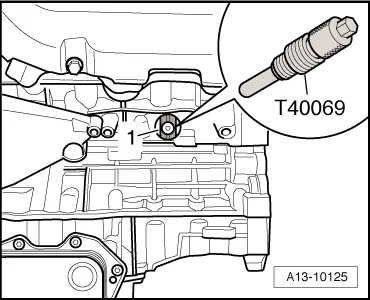
 Note
Note