Audi Workshop Service and Repair Manuals
HOME
FEATURES
MENU
INDEX
ABOUT US
Balance shaft - exploded view >
< Drive chain for oil pump and high-pressure pump - exploded view
A4 Mk3
Power unit
6-cylinder TDI engine (3.0 ltr. 4-valve common rail - generation II), mechanics
Engine cylinder head, valve gear / Chain drive
Removing and installing drive chain for oil pump and high-pressure pump
Removing and installing drive chain for oil pump and high-pressure pump
Removing and installing drive chain for oil pump and high-pressure pump
Special tools and workshop equipment required
t
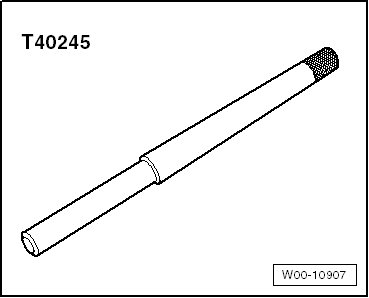
Locking pin -T40245-
Removing
l
Gearbox removed.
l
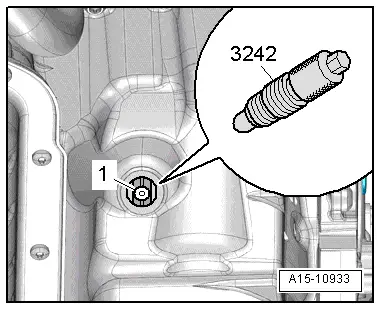
Crankshaft
-1-
locked in „TDC“ position with locking pin -3242-.
–
Remove timing chain cover (bottom)
→ Chapter
.
–
Remove camshaft timing chain
→ Chapter
.
–
Remove both guide rails (top) for camshaft timing chain.
–
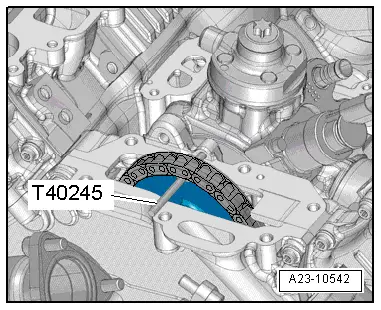
Lock chain sprocket for high-pressure pump in position using locking pin -T40245-.
–
Wrap insulating tape around tip and shaft of 3.3 mm Ø drill bit to avoid cuts.
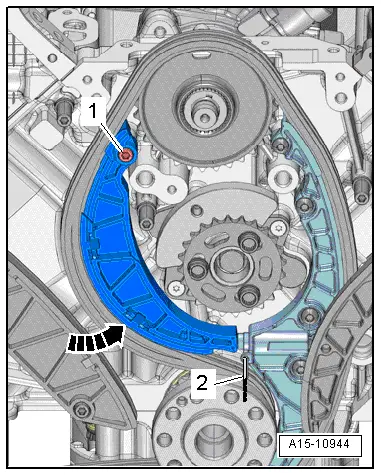
–
Press tensioning rail of chain tensioner in direction of
-arrow-
and lock chain tensioner by inserting 3.3 mm Ø drill bit
-item 2-
.
–
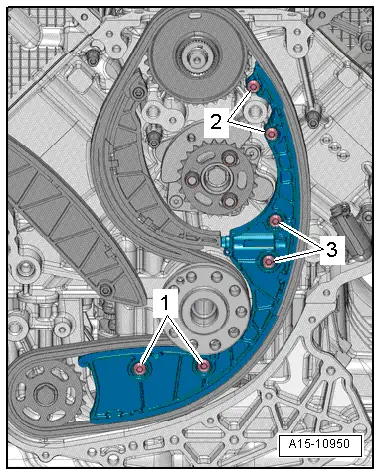
Unscrew bolt
-1-
and remove tensioning rail.
–
Remove bolts
-1, 2, 3-
and take off chain tensioner for drive chain for oil pump and high-pressure pump.
–
Detach drive chain for oil pump and high-pressure pump.
Installing
l
Tightening torques
→ Chapter „Drive chain for oil pump and high-pressure pump - exploded view“
l
Crankshaft
-1-
locked in „TDC“ position with locking pin -3242-.
l
Chain sprocket for high-pressure pump locked in position using locking pin -T40245-.
Installation is carried out in the reverse order; note the following:
–
Install camshaft timing chain
→ Chapter
.
–
Install timing chain cover (bottom)
→ Chapter
.
Power unit
6-cylinder TDI engine (3.0 ltr. 4-valve common rail - generation II), mechanics
Engine cylinder head, valve gear / Chain drive
Removing and installing drive chain for oil pump and high-pressure pump
Balance shaft - exploded view >
< Drive chain for oil pump and high-pressure pump - exploded view