audi Workshop Repair Guides

Audi Workshop Service and Repair Manuals

Instruments, GCI|Horns > < Removing and installing 12 V socket 3U19 - Avant
Renewing 12 V socket 3U19
Renewing 12 V socket 3 -U19-
Special tools and workshop equipment required
   
t  Puller -T40148-
  W00-10578
Removing
–  Open cover in luggage compartment side trim (right-side).
–  Unplug electrical connector.
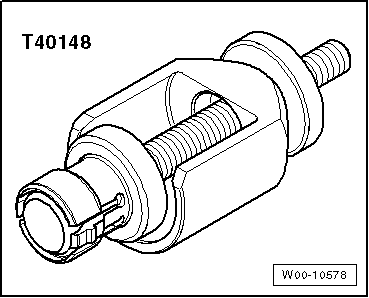
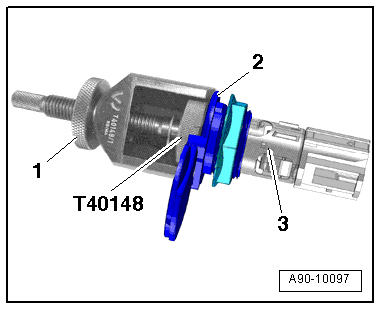
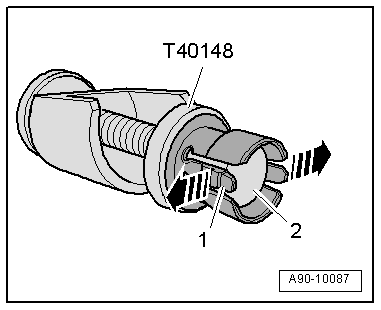
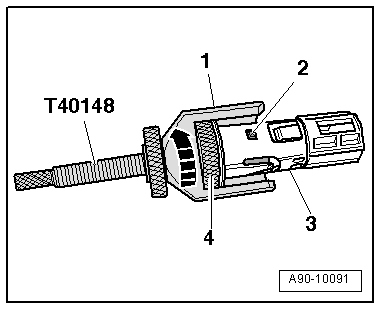
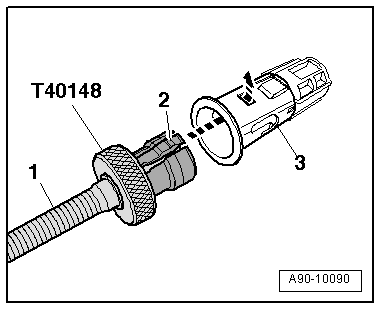
–  Release tabs -2- on puller -T40148- must engage in recesses in 12 V socket 3 -U19--item 3--arrow-; for this purpose, push threaded rod -1- downwards as far as stop.
  A90-10090
–  Open cover of mounting -2- and hold in this position.
–  Insert puller -T40148- into 12 V socket 3 -U19--item 3- as far as stop.
–  Turn knurled wheel -1- on puller -T40148- clockwise as far as stop.
  A90-10097
l  The piston -2- moves upwards and the release tabs -1- on puller -T40148- spread apart -arrows-.
–  Remove 12 V socket 3 -U19- from mounting.
  A90-10087
Installing
Installation is carried out in the reverse order; note the following:
–  Detach support -1- from puller -T40148-.
–  Push piston downwards and hold in this position.
–  Turn knurled wheel -4- on puller -T40148- anti-clockwise -arrow-; this will open release tabs -2- on 12 V socket 3 -U19--item 3- and puller -T40148- can be removed.
  A90-10091

Instruments, GCI|Horns > < Removing and installing 12 V socket 3U19 - Avant