
A5
|
|
|
|
|
| – | Heat the rigid epoxy foam cartridge for 30 minutes in a water bath with a constant temperature of approx. 60 °C. |
| If available, the cartridge can be heated at 60° C in a stove. |

| 1 - | 2-pack structural foam cartridge |
| – | Open the cap |
| 2 - | Static mixer |
| 3 - | Extension hose |
| 4 - | Adapter |
 Note
Note| The adapter is required for applying the foam. |
| 5 - | Union nut |
| – | Screw with the static mixer -2 - onto the structural foam cartridge -1 -. |
| Steps 1-6 of the foam filling operation using the twin cartridge gun -VAS 6453- |

| Preparing the extension hose |
| – | Mark the hose at 20 mm, 60 mm and 100 mm. |

| – | Mask the adjacent rivet holes with commercially available adhesive tape. |
| – | Use a Ø 6 mm bit to drill off the clinch bolt. |
| – | Seal the hole. |
| To avoid the need for a top coat, apply a thin layer of one-pack wash primer LLS MAX 101-104 (use a brush if applicable) and allow to dry for 10 -15 minutes. Forced drying with a hairdryer or infrared dryer is not permissible. |
| Then apply two-pack filler LLS MAX 201. |
| On completion of the flash-off time, harden under an infrared lamp at 60° C for approx. 5 minutes. |
| – | Start with the foam filling operation, perform steps 1 - 3 as shown. |

| – | Mark the hole for the foam filling operation (95 mm -5 mm from the rivet for the decorative roof trim) and mark the centre of and centre punch the hole - a -. |
| – | Use a Ø 6 mm bit to drill the hole. |
| – | Countersink the hole with a 90° cutter. |
| – | Seal the hole. |
| To avoid the need for a top coat, apply a thin layer of one-pack wash primer LLS MAX 101-104 (use a brush if applicable) and allow to dry for 10 -15 minutes. Forced drying with a hairdryer or infrared dryer is not permissible. |
| Then apply two-pack filler LLS MAX 201. |
| On completion of the flash-off time, harden under an infrared lamp at 60° C for approx. 5 minutes. |
| – | Start with the foam filling operation, perform steps 4 -6 as shown. |

| Step 1 |
Note| To facilitate insertion between the outer and inner panels, flatten the extension hose -arrows-. |
| – | Insert approx. 100 mm of the extension hose vertically into the opening for the clinch bolt at the front. |
| – | Start with the foam filling operation and apply foam as far as the first mark (graduation 11). |

| Step 2 |
| – | After reaching the first mark, the hose must be pulled out by approx. 40 mm. |
| – | Proceed with the foam filling operation as far as the second mark (graduation 16). |

| Step 3 |
| – | After reaching the second mark, the hose must be pulled out by approx. 40 mm. |
| – | Proceed with the foam filling operation as far as the third mark (graduation 23). |
| Pull the extension hose out of the opening. |
| – | Use a cloth to wipe off any surplus rigid epoxy foam. |
Note| To ensure that the decorative roof trim can be inserted, the two-pack rigid epoxy foam must be removed from the holes for the rivet. |

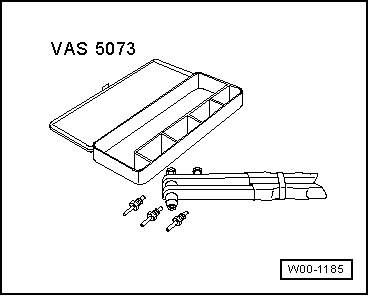
| Insert the clinch bolt using the pop rivet nut pliers -VAS 5073-. |

| Step 4 |
| – | Insert approx. 100 mm of the extension hose vertically into the opening of the drilled hole at the rear. |
| – | Start with the foam filling operation and apply foam as far as the fourth mark (graduation 31). |

| Step 5 |
| – | After reaching the mark, the hose must be pulled out by approx. 40 mm. |
| – | Proceed with the foam filling operation as far as the fifth mark (graduation 37). |

| Step 6 |
| – | After reaching the mark, the hose must be pulled out by approx. 40 mm. |
| – | Proceed with the foam filling operation and use up the whole cartridge. |
| – | Use a cloth to wipe off any surplus rigid epoxy foam. |

| – | Coat the pop rivet nut and the hexagon socket head bolt (M4) with body sealant, e.g. Terolan Hell. |
| – | Insert the M4 pop rivet nut using the pop rivet nut pliers -VAS 5073-. |
| – | Screw in the M4 hexagon socket head bolt as far as it will go and fill the hole with body sealant. |
| – | Use a cloth to wipe off any surplus Terolan Hell body sealant. |

Note
Note
|