audi Workshop Repair Guides

Audi Workshop Service and Repair Manuals

Exploded view - servicing gearbox housing > < Exploded view - centre differential housing
Exploded view - servicing gearbox cover
   
Exploded view - servicing gearbox cover
Special tools and workshop equipment required
t  Crankshaft seal installing tool -VW 204 B-
t  Drift -VW 207 C-
t  Press tool -VW 408 A-
t  Press tool -VW 411-
t  Press tool -VW 412-
t  Tube -VW 420-

   
t  Tube -VW 423-
t  Thrust piece -VW 434-
t  Sleeve -VW 472/2-
t  Thrust pad -VW 512-
t  Guide pin -10 - 15-
t  Press tool -40 - 21-

   
t  Thrust plate -3005-
t  Drift -3138-
t  Extension -3161-
t  Assembly tool -3346-
t  Assembly tool -3347-
t  Shock absorber set -T10001-

   
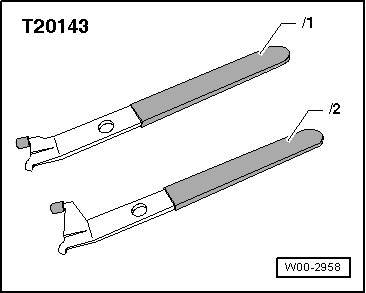
t  Extractor tool -T20143-
  W00-2958
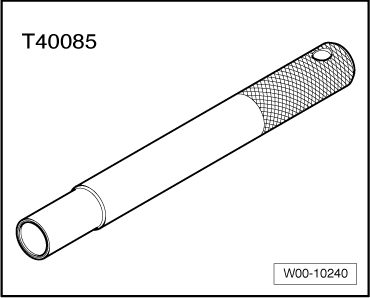
t  Drift -T40085-
  W00-10240
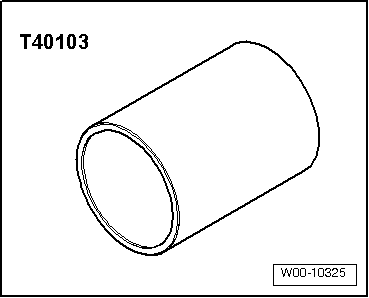
t  Pressure sleeve -T40103-
t  Sealing paste -AMV 188 001 02-
t  Sealing grease -G 052 128 A1-
  W00-10325
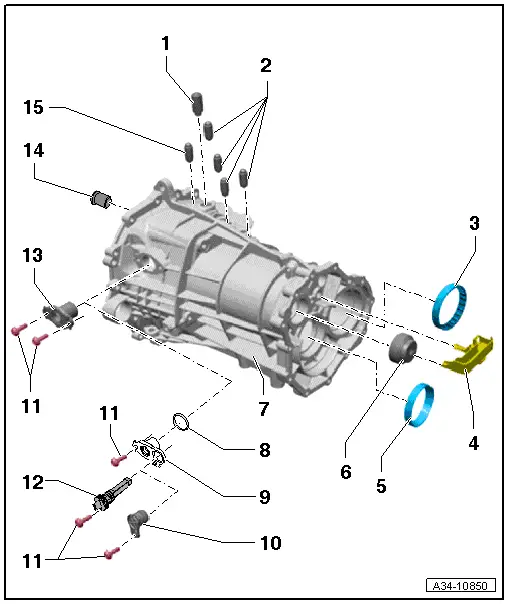
1 - Large locking bush
q   For selector shaft
q   Removing and installing → Fig.
q   Installation depth → Fig.
2 - Locking bush
q   For selector plate / selector fork
q   At present there is no provision for removing and installing
3 - Needle bearing
q   Bearing for side shaft
q   Drive out of gearbox cover using drift -3138-
q   Always renew
q   Driving in → Fig.
q   Peen to secure after installing → Fig.
4 - Oil collector
q   Fit in holes in gearbox cover and roller bearing → Item
5 - Tapered roller bearing outer race
q   Bearing for spur gear in gearbox cover
q   Pressing out → Fig.
q   Pressing in → Fig.
6 - Roller bearing
q   Bearing for input shaft
q   Pressing out → Fig.
q   Pressing in → Fig.
7 - Gearbox cover
8 - O-ring
q   Only installed in gearboxes with sealing cap/selector shaft in conjunction with gearbox neutral position sender -G701- or sealing plug
q   Always renew
9 - Sealing cap
q   For selector shaft in conjunction with gearbox neutral position sender -G701- or sealing plug
q   Not fitted on all versions
q   Select correct version according to gearbox code letters → Electronic parts catalogue
q   Exploded view → Fig.
q   Removing and installing oil seal for selector shaft → Fig.
q   Removing ball sleeve for selector shaft → Fig.
q   Installing ball sleeve for selector shaft → Fig.
10 - Sealing plug
q   Not fitted on all versions
q   Select correct version according to gearbox code letters → Electronic parts catalogue
q   Renew O-ring on sealing plug; select correct version according to gearbox code letters → Electronic parts catalogue
11 - Bolt
q   10 Nm and then turn 45° further
q   Aluminium bolts (M8; 22 mm long)
q   Always renew
12 - Gearbox neutral position sender -G701-
q   Not fitted on all versions
q   Select correct version according to gearbox code letters → Electronic parts catalogue
q   Renew O-ring on gearbox neutral position sender -G701-; select correct version according to gearbox code letters → Electronic parts catalogue
13 - Sealing cap
q   For selector shaft without gearbox neutral position sender -G701- or sealing plug
q   Not fitted on all versions
q   Select correct version according to gearbox code letters → Electronic parts catalogue
q   Removing and installing → Fig.
q   Exploded view → Fig.
q   Removing and installing oil seal for selector shaft → Fig.
q   Removing ball sleeve for selector shaft → Fig.
q   Installing ball sleeve for selector shaft → Fig.
14 - Bearing bush
q   For 3rd/4th gear selector plate / selector fork
q   Pressing out → Fig.
q   Pressing in → Fig.
15 - Small locking bush
q   For selector shaft
q   At present there is no provision for removing and installing

   
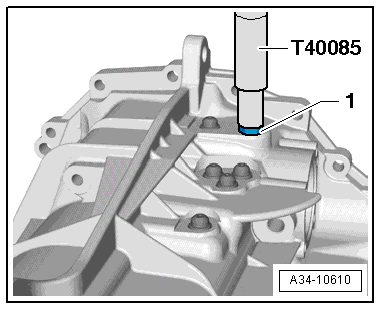
Removing and installing large locking bush -1- for selector shaft
l  The selector shaft must be removed.
l  If the gearbox has not been dismantled, put a cloth in the aperture for the selector shaft to stop the locking bush from dropping into the gearbox.
–  Drive out large locking bush inwards (i.e. into gearbox cover) using drift -T40085-.
–  Drive in locking bush to correct installation depth → Fig. using drift -T40085-.
  A34-10610
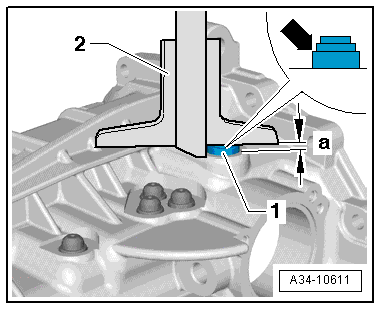
Installation depth of large locking bush -1- in gearbox cover
–  Check installation depth -a- = 5 ± 0.2 mm using depth gauge-2-.
l  Apply depth gauge to first shoulder -arrow- of locking bush.
  A34-10611
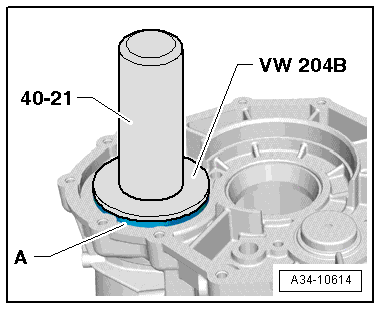
Driving in needle bearing onto stop in gearbox cover
  Note
Eliminate peening depressions if necessary.
Install the needle bearing so the lettering (side with thicker metal) faces towards the installing tool -VW 204 B-.
–  Secure needle bearing after pressing in by peening into gearbox cover → Fig..
  A34-10614
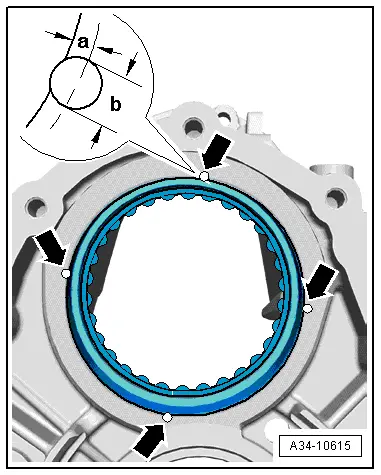
Securing needle bearing in gearbox cover by peening
–  Use blunt punch with ball-shaped end (ball Ø approx. 5 mm) to peen in position.
–  The needle bearing is secured with 4 peening positions spaced 90° apart around the circumference -arrows-.
Observe position and Ø of peening positions:
t  Dimension -a- = 2 mm
t  Dimension -b- = 3 mm
  A34-10615
Pressing tapered roller bearing outer race out of gearbox cover
  A34-10612
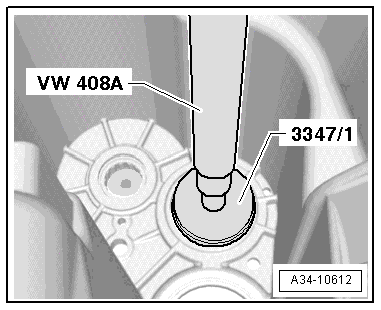
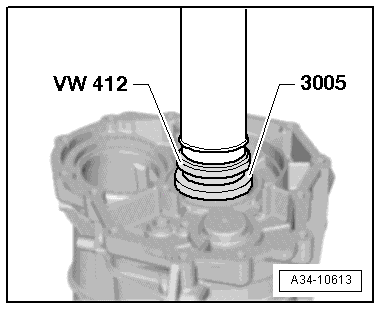
Pressing tapered roller bearing outer race into gearbox cover (press onto stop)
  A34-10613
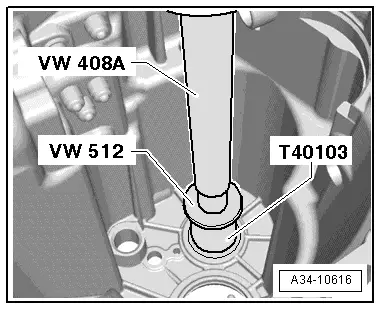
Pressing roller bearing for input shaft out of gearbox cover
  A34-10616
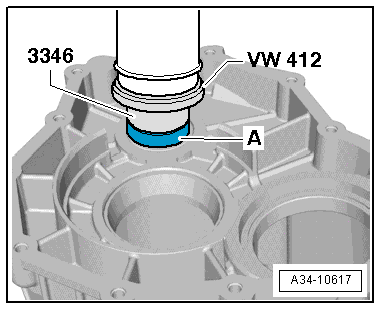
Pressing roller bearing -A- for input shaft into gearbox cover (press onto stop)
l  Install with the shoulder of the roller bearing facing towards the open side of thrust piece -3346-.
  A34-10617
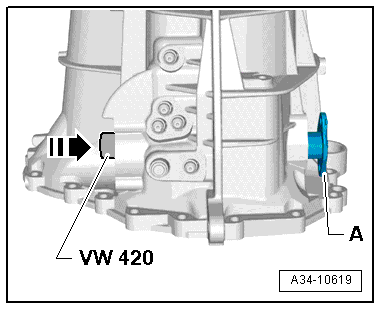
Removing and installing sealing cap -A- for selector shaft
l  Selector shaft is removed.
–  Remove bolts securing sealing cap -A- to gearbox cover.
–  Carefully knock out sealing cap in direction of -arrow- using tube -VW 420-.
–  Clean sealing surfaces of sealing cap and gearbox cover.
–  Apply sealing paste -AMV 188 001 02- evenly and secure sealing cap with new bolts → Item.
  A34-10619
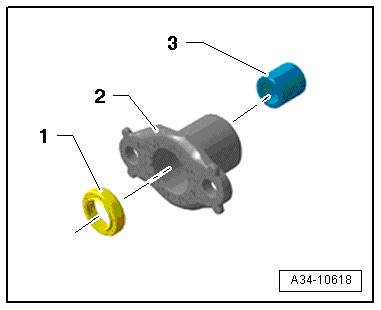
Exploded view - sealing cap for selector shaft
1 - Oil seal for selector shaft; removing and installing → Fig.
2 - Sealing cap
3 - Ball sleeve for selector shaft; removing → Fig., installing → Fig.
  A34-10618
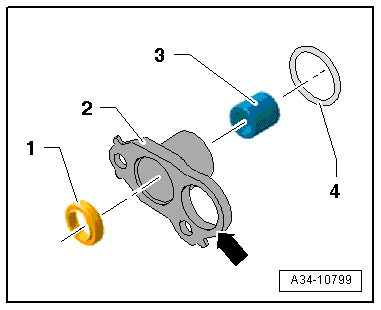
Exploded view - sealing cap for selector shaft with aperture -arrow- for gearbox neutral position sender -G701- or sealing plug
1 - Oil seal for selector shaft; removing and installing → Fig.
2 - Sealing cap
3 - Ball sleeve for selector shaft; removing → Fig., installing → Fig.
4 - O-ring
  A34-10799
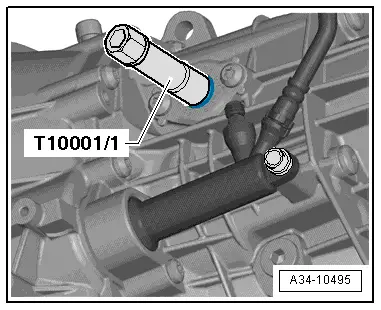
Removing and installing oil seal for selector shaft
–  Prise out oil seal with extractor tool -T20143/1-.
–  Lightly oil outer circumference of oil seal.
–  Pack space between sealing lip and dust lip half-full with sealing grease -G 052 128 A1-.
–  Drive in oil seal using -T10001/1- or tube -VW 423-.
l  Installation depth: 2 mm below top edge of sealing cap
  A34-10495
Pressing ball sleeve for selector shaft out of sealing cap
  A34-10620
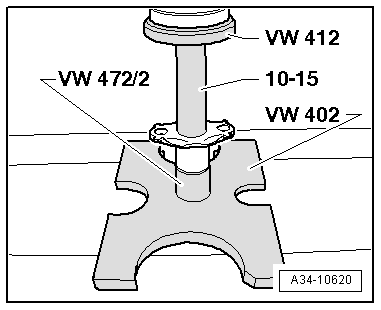
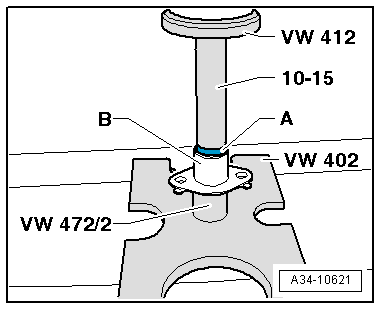
Pressing ball sleeve -A- for selector shaft into sealing cap -B- (press in until flush)
Fit ball sleeve so that side with lettering (thicker metal) faces guide pin -10 - 15-.
  A34-10621
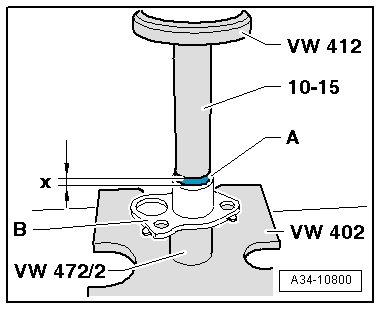
Pressing ball sleeve -A- for selector shaft into sealing cap -B- (press in to dimension -x-)
Fit ball sleeve so that side with lettering (thicker metal) faces guide pin -10 - 15-.
l  Installation depth -x- = 2.5 ± 0.5 mm
  A34-10800
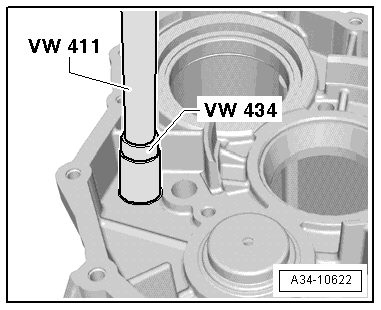
Pressing bearing bush for 3rd/4th gear selector plate / selector fork out of gearbox cover
  A34-10622
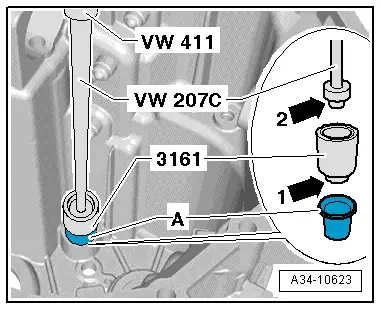
Pressing bearing bush -A- for 3rd/4th gear selector plate / selector fork into gearbox cover (press onto stop)
–  Insert shoulder -arrow 1- of extension -3161- into bearing bush -A-.
–  Insert shoulder -arrow 2- of drift -VW 207 C- in extension -3161- and press in bearing bush onto stop.
  A34-10623

Exploded view - servicing gearbox housing > < Exploded view - centre differential housing