audi Workshop Repair Guides

Audi Workshop Service and Repair Manuals

Removing and installing centre differential housing and centre differential > < Exploded view - front final drive and oil seals
Pressing vibration damper onto rear splined shaft
Special tools and workshop equipment required
t  Tube -VW 284/1- from assembly tool for spring clips -VW 284-
t  Installing sleeve -VW 455-
t  Tube -T40104/2- from removal and assembly tools -T40104-
t  Thrust plate -VW 402-
   
Requirements
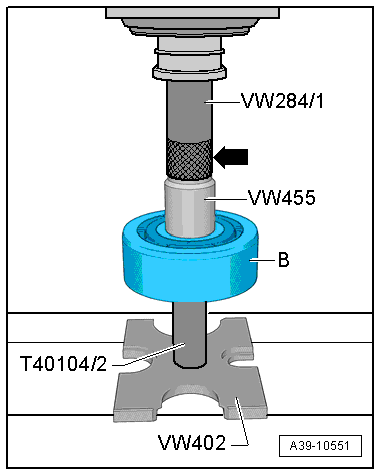
If rear splined shaft with vibration damper must be renewed, rear splined shaft -A- and vibration damper -B- may be delivered as separate parts if ordered via → Electronic parts catalogue.
Only then is it necessary to press vibration damper onto rear splined shaft.
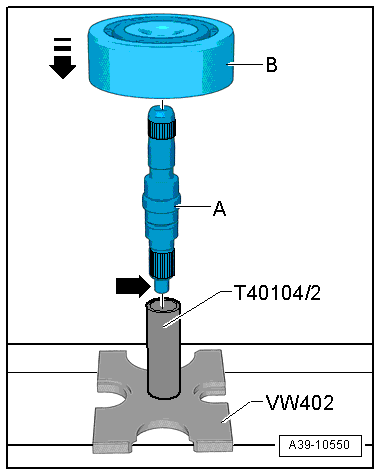
  Caution
Risk of damage to components.
The vibration damper must not be reused after it is pressed off the rear splined shaft, otherwise a secure fit of the vibration damper on the rear splined shaft is no longer assured. The vibration damper can become detached from the rear splined shaft and cause damage to the gearbox and other components.
  A39-10550
Procedure
–  Place tube -T40104/2- onto thrust plate -VW 402- with opening facing upwards.
–  Insert new rear splined shaft -A- into tube -T40104/2- with narrow end -arrow- pointing downwards.
–  Fit new vibration damper -B-.
  A39-10550
–  Using installing sleeve -VW 455- and tube -VW 284/1-, press vibration damper -B- on to stop.
  Note
Installation location tube -VW 284/1-: fluted section -arrow- points downwards.
  A39-10551

Removing and installing centre differential housing and centre differential > < Exploded view - front final drive and oil seals