audi Workshop Repair Guides

Audi Workshop Service and Repair Manuals

Removing and installing centre differential housing and centre differential - propshaft with splines on gearbox end > < Removing and installing centre differential housing and centre differential
Removing and installing centre differential housing and centre differential - bolted propshaft
Special tools and workshop equipment required
   
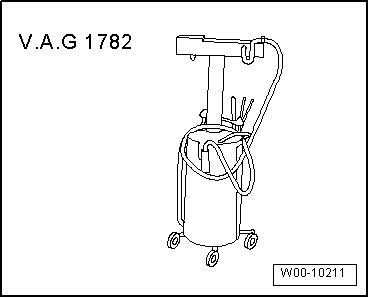
t  Used oil collection and extraction unit -V.A.G 1782-
t  For sealant, refer to → Electronic parts catalogue
  W00-10211
Removing with gearbox in vehicle
The centre differential housing can also be removed when the gearbox is in the vehicle.
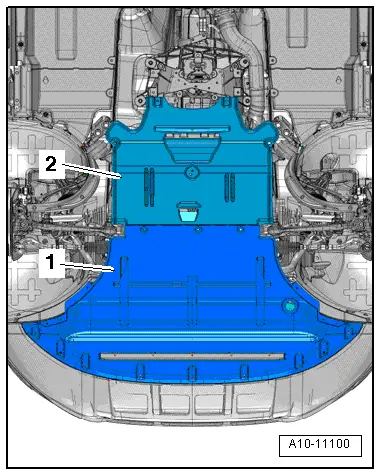
–  Make preparations according to specific model → 7-speed dual clutch gearbox 0B5 (S tronic); Rep. gr.39.
Removing with gearbox removed
–  Secure gearbox to engine and gearbox support -VAS 6095- → Chapter.
Continued for gearbox removed or installed
  A10-11100
–  Place used oil collection and extraction unit -V.A.G 1782- below gearbox.
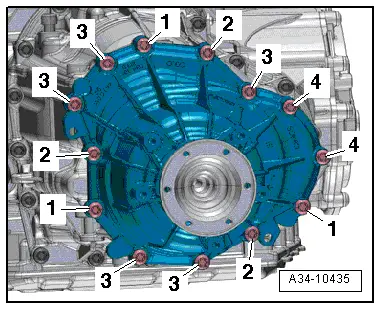
–  Remove bolts -1 … 4- and carefully detach centre differential housing; gear oil (MTF) will drain off.
  A34-10435
  Caution
Risk of damage to the centre differential.
t  Pull the centre differential housing slowly and carefully towards the rear off the gearbox. The centre differential may otherwise fall out of the gearbox.
t  A centre differential which has fallen to the ground can no longer be installed.
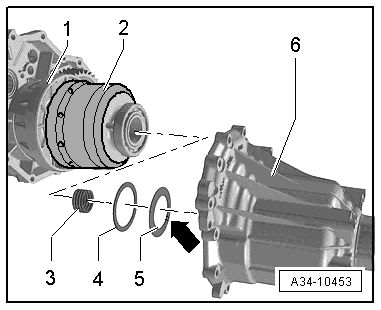
–  Remove spring -3-, shim(s) -4- and dished spring -5-.
–  Detach centre differential -2- towards rear.
  A34-10453
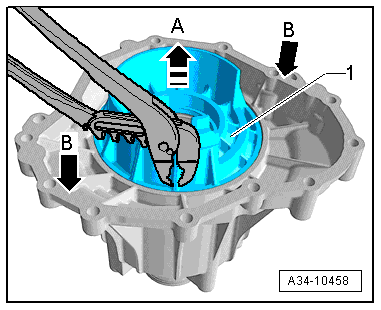
If bearing plate -1- remains behind in centre differential housing, proceed as follows:
  Caution
Risk of damage to the sealing surface of the centre differential housing.
Tap the housing in several places with a hammer.
–  Grip one of the side ribs on bearing plate -1- with pliers and pull off in direction of -arrow A-.
–  While doing so, carefully tap alternate sides of housing -arrows B- with a rubber-headed hammer.
Installing
Installation is carried out in reverse sequence; note the following:
l  Tightening torques → Chapter „Exploded view - centre differential housing - bolted propshaft“
  Note
Renew the bolts for the centre differential housing.
–  Thoroughly clean both housing joint surfaces; they must be free from oil and grease.
  A34-10458
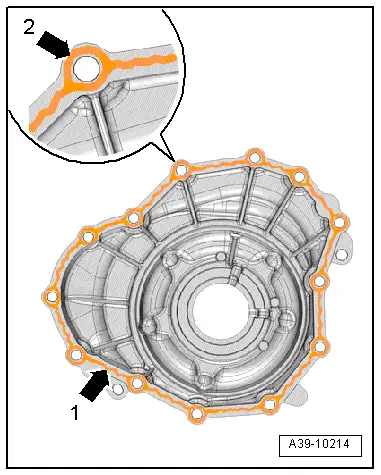
–  Apply bead of sealant -arrow 1- evenly and not too thick on housing joint surface; for sealant refer to → Electronic parts catalogue.
–  To avoid contact corrosion, apply a ring of sealant around each bolt hole -arrow 2-.
–  Lightly lubricate fitting surfaces for bearing plate with gear oil (MTF).
  A39-10214
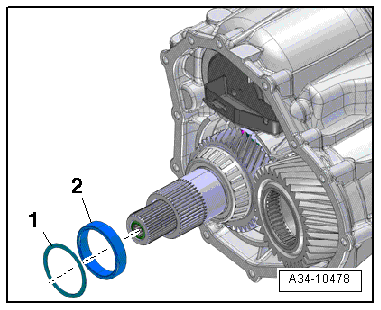
–  Check that spacer sleeve -2- and shim -1- are fitted on output shaft.
  A34-10478
–  Lightly lubricate surfaces of both races on outside of bearing plate with a small quantity of gear oil (MTF).
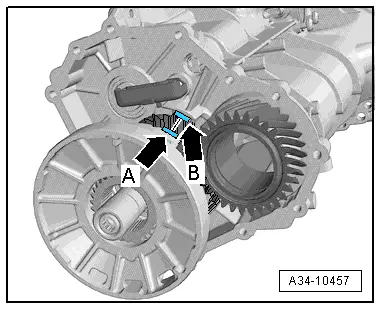
–  Insert bearing plate.
l  Installation position: shoulder of bearing plate -arrow A- must engage in recess on intermediate gearbox housing -arrow B-.
  A34-10457
–  Fit centre differential -2- onto gearbox -1-.
–  Insert spring -3- in centre differential.
–  Apply a small quantity of grease to dished spring -5- and shim(s) -4- and secure in place in centre differential housing -6-.
l  Installation position of dished spring: convex side (which curves outwards) faces flange shaft.
  A34-10453
–  Press centre differential housing fully onto intermediate gearbox housing, keeping it centred, and hold in place.
–  Tighten bolts for centre differential housing → Fig..
  A34-10435

Removing and installing centre differential housing and centre differential - propshaft with splines on gearbox end > < Removing and installing centre differential housing and centre differential