audi Workshop Repair Guides

Audi Workshop Service and Repair Manuals

Oil filter housing, oil pressure switch > < Removing and installing oil pump
Removing and installing sump (top section)
Special tools and workshop equipment required
t  Safety goggles
t  Electric drill with plastic brush
t  Sealant → Electronic parts catalogue
Removing
l  Engine secured to engine and gearbox support → Chapter.
–  Remove timing chain cover (bottom) → Chapter.
–  Remove oil pump → Chapter.
   
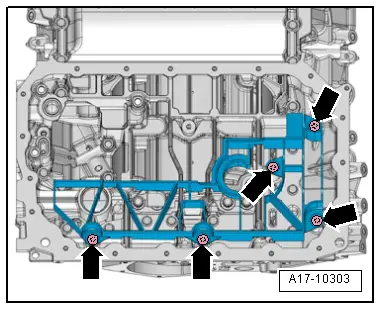
–  Remove bolts -arrows- and detach baffle plate (bottom).
  A17-10303
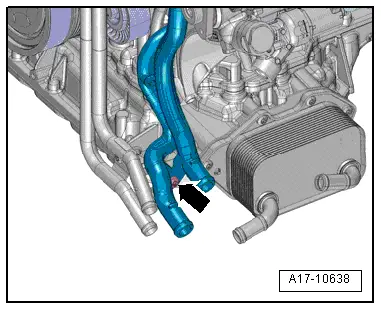
–  Remove bolt -arrow- for coolant pipes (front left).
  A17-10638
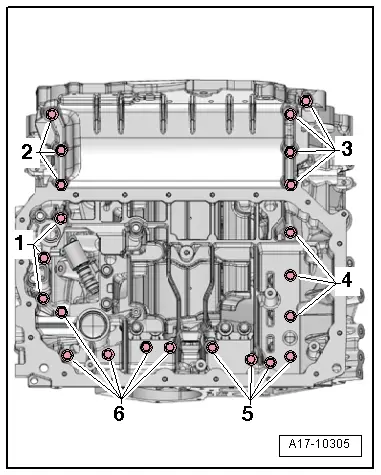
–  Remove bolts -1 ... 6- for sump (top section).
–  Carefully release sump (top section) from bonded joint and pry sump off dowel pins on cylinder block.
Installing
l  Tightening torques → Chapter „Sump (bottom section), sump (top section), oil pump, engine oil cooler - exploded view“
  Note
Renew gasket and O-ring.
  A17-10305
–  Remove old sealant from grooves on sump (top section) and from sealing surfaces.
  Caution
Protect lubrication system and bearings against contamination.
Cover exposed parts of the engine.
  WARNING
Protect eyes against injuries.
Wear safety goggles.
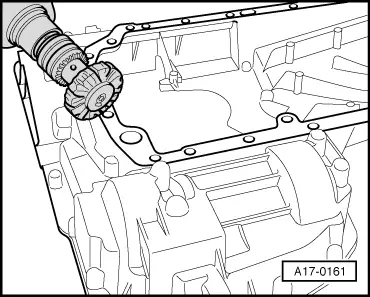
–  Remove sealant residue from sump (top section) and cylinder block using rotating plastic brush or similar.
–  Clean surfaces; they must be free of oil and grease.
  Note
  A17-0161
Note the use-by date of the sealant.
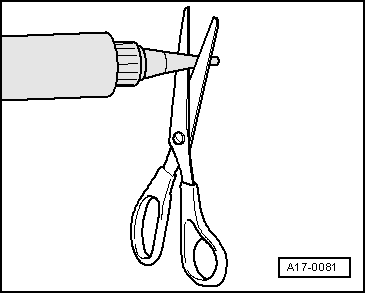
–  Cut off nozzle of tube at front marking (nozzle Ø approx. 1.5 mm).
  A17-0081
  Caution
Make sure lubrication system is not clogged by excess sealant.
The sealant bead must not be thicker than specified.
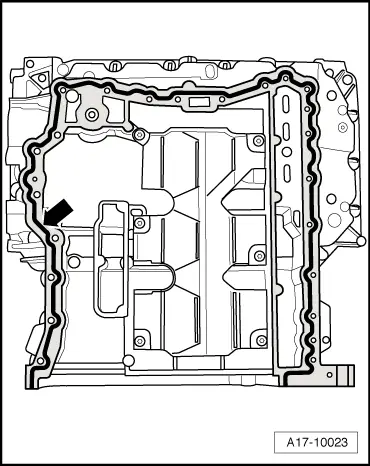
–  Apply bead of sealant -arrow- onto clean sealing surface of sump (top section) as shown in illustration.
l  The grooves on the sealing surfaces must be completely filled with sealant.
l  The bead of sealant must project 1.5 … 2.0 mm above the sealing surface.
  Note
The sump (top section) must be installed within 5 minutes after applying the sealant.
  A17-10023
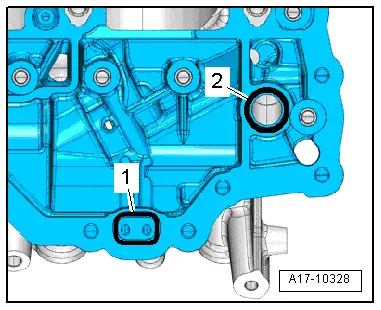
–  Fit seal -1- and O-ring -2- in retaining frame.
  A17-10328
–  Check that dowel sleeves are fitted, fit sump (top section) and tighten bolts → Fig..
Remaining installation steps are carried out in reverse sequence; note the following:
–  Secure coolant pipes (left-side) → Chapter.
–  Install oil pump → Chapter.
–  Install timing chain cover (bottom) → Chapter.
  A17-10305

Oil filter housing, oil pressure switch > < Removing and installing oil pump