Audi Workshop Service and Repair Manuals
HOME
FEATURES
MENU
INDEX
ABOUT US
Engine cylinder head, valve gear >
< Pistons and conrods
A5
Power unit
6-cylinder TDI engine (2.7 ltr.; 3.0 ltr. 4-valve common rail), mechanics
Enginecrankshaft group, pistons
Cylinder block (pulley end)
Renewing crankshaft oil seal (pulley end)
Renewing crankshaft oil seal (pulley end)
Special tools and workshop equipment required
t
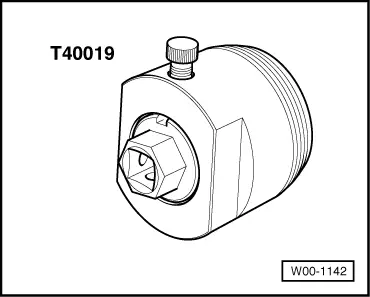
Oil seal extractor -T40019-
t
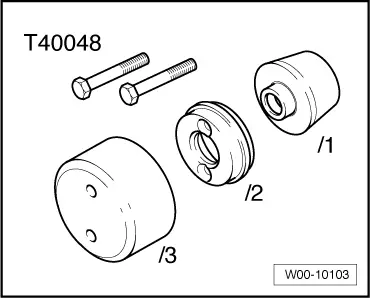
Assembly appliance -T40048- with -T40048/4-
t
Bolts M8x55 mm (2x)
Procedure
–
Remove vibration damper with poly V-belt pulley
→ Chapter
.
–
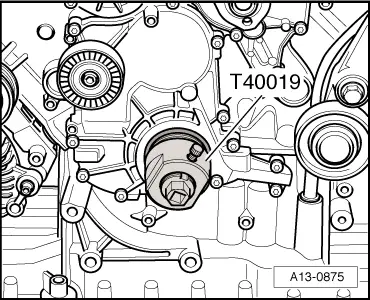
Adjust inner part of oil seal extractor -T40019- so it is flush with the outer part and lock in position with knurled screw.
–
Lubricate threaded head of oil seal extractor, place it in position and screw it into oil seal as far as possible (applying firm pressure).
–
Loosen knurled screw and turn inner part against crankshaft until the oil seal is pulled out.
–
Clamp flats of oil seal extractor in vice and use pliers to remove oil seal.
–
Clean contact surface and sealing surface.
–
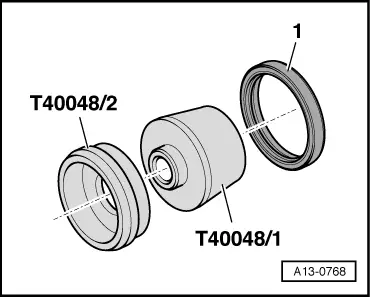
Fit assembly aid -T40048/1- onto assembly sleeve -T40048/2- and slide oil seal
-1-
onto assembly sleeve.
–
Detach assembly aid.
–
Fit assembly sleeve -T40048/2- on crankshaft and slide oil seal
-1-
into sealing flange (pulley end).
Note
Leave assembly sleeve -T40048/2- in position on crankshaft when pressing in seal.
–
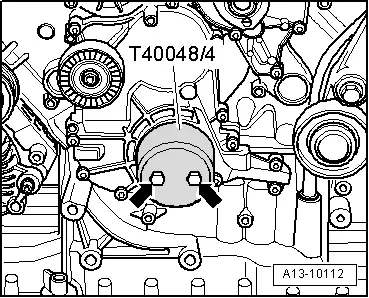
Apply press sleeve -T40048/4- (installation depth 5 mm) to crankshaft using M8×55 mm bolts
-arrows-
.
–
Initially hand-tighten bolts.
–
Tighten bolts alternately,
1
/
2
turn at a time, to press in oil seal onto stop.
Remaining installation steps are carried out in reverse sequence; note the following:
–
Install vibration damper with poly V-belt pulley
→ Chapter
.
Power unit
6-cylinder TDI engine (2.7 ltr.; 3.0 ltr. 4-valve common rail), mechanics
Enginecrankshaft group, pistons
Cylinder block (pulley end)
Engine cylinder head, valve gear >
< Pistons and conrods
 Note
Note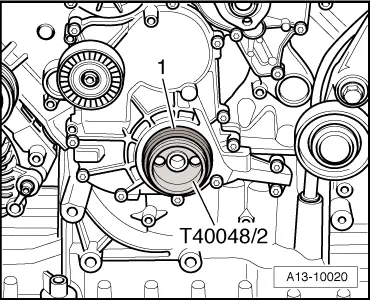
 Note
Note