
A5
| Exhaust manifold - exploded view |
 Note
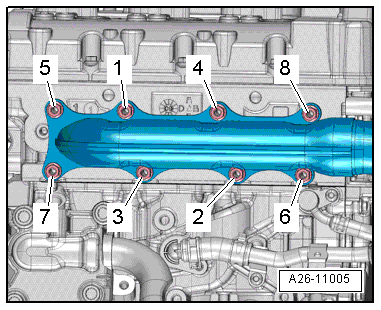
Note| The illustration shows the exhaust manifold for cylinder bank 2 (left-side). |

| 1 - | Nut |
| q | Renew |
| q | Coat thread with high-temperature paste; for high-temperature paste refer to → Electronic parts catalogue |
| q | 25 Nm |
| 2 - | Exhaust manifold |
| q | Removing and installing: left-side → Chapter, right-side → Chapter |
| 3 - | Gasket |
| q | Renew |
| 4 - | Gasket |
| q | Renew |
| 5 - | Bolt |
| q | Renew |
| q | Coat thread with high-temperature paste; for high-temperature paste refer to → Electronic parts catalogue |
| q | 30 Nm + 90° further |
Note
|
|
| Stage | Nuts | Tightening torque |
| 1. | -1 … 9- | Screw in nuts by hand until they make contact |
| 2. | -1 … 9- | 15 Nm |
| 3. | -1 … 9- | 25 Nm |