audi Workshop Repair Guides

Audi Workshop Service and Repair Manuals

Radio system (USA) > < Internet access control unitJ666 (from model year 2012 onwards)
Calibrating reversing cameraR189
Calibrating reversing camera -R189-
–  Ensure requirements are met → Anchor.
–  Connect → Vehicle diagnostic tester.
Fit wheel centre mounting -VAS 6350/1-:
–  Check the bolt hole circle pattern on the wheels.
–  Prepare wheel centre mountings -VAS 6350/1- as required.
–  To do so, secure three wheel bolt adapters to each wheel centre mounting -VAS 6350/1- to match the hole circle.
–  Position paddles on both wheel centre mountings -VAS 6350/1- and secure each paddle with clamping bolt.
–  Fit wheel centre mountings -VAS 6350/1- onto wheel bolts on rear wheels.
   
The wheel centre mountings -VAS 6350/1- are kept in position by the O-rings in the adapters.
  Note
When fitting the wheel centre mountings -VAS 6350/1- onto the wheels, make sure that they are not mounted on any „anti-theft“ wheel bolts that might be installed.
–  Using clamping bolts, adjust paddles so that they are free to move just slightly above the ground. Make sure the paddles can move freely.
–  Set up and align calibration unit -VAS 6350/4- → Chapter.
Measuring gap:
–  Switch on the spacing laser -VAS 6350/2- with the ON button.
  N94-10685
The following display appears and the spacing laser -VAS 6350/2- will be switched on.
  N94-10681
–  Hold spacing laser -VAS 6350/2--2- on one side of calibration unit -VAS 6350/4- so that it is flush at bracket. Spacing laser -VAS 6350/2--2- must make firm contact with bracket.
–  Make sure that laser beam from spacing laser -VAS 6350/2--2- hits lower, larger part of paddle -1-.
If this is not the case, position of paddles must be corrected accordingly using clamping bolts on wheel centre mounting -VAS 6350/1-.
–  Hold spacing laser -VAS 6350/2- in locating bracket on calibration unit -VAS 6350/4- with one hand while laser beam is visible on paddle.
–  Briefly operate the ON button to measure distance.
  N94-10684
Display readout
–  Make a note of the displayed value.
–  Perform same measuring procedure for rear wheel on other side of calibration unit -VAS 6350/4-.
Measured distance value must be identical on both sides.
If values are not identical:
–  Adjust calibration unit -VAS 6350/4- until values on both sides are identical.
When adjusting calibration unit -VAS 6350/4-, make sure that linear laser -VAS 6350/3- on calibration unit -VAS 6350/4- still hits centre of Audi rings and spirit level display also remains in the centre. If necessary, readjust.
Measuring dimension -H-:
  N94-10682
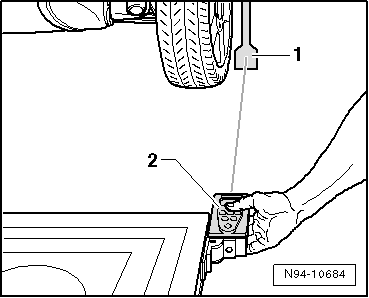
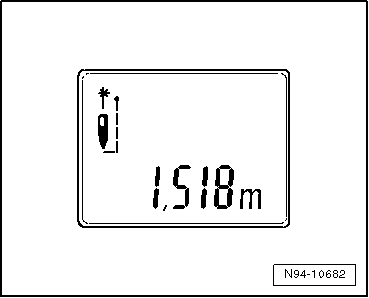
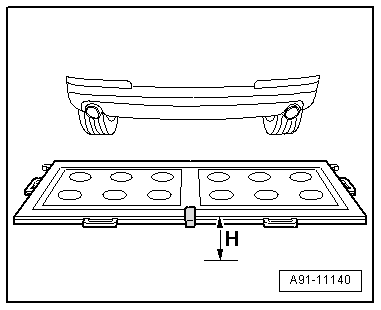
–  Measure height of calibration unit -VAS 6350/4-: dimension -H- (top edge of platform - floor).
Now enter measured distance value and height in millimetres in → Vehicle diagnostic tester.
Performing calibration
→ Vehicle diagnostic tester is connected.
–  Select Guided Fault Finding mode.
–  In the „Vehicle selection“ menu, select the relevant data for the vehicle.
–  Using the GoTo button, select the following menu options in succession:
t  Selecting function/component
t  Body
t  Electrical system
t  01 - Self-diagnosis compatible systems
t  6C - Reversing camera system/J772
t  6C - Reversing camera system control unit, functions
t  6C - Calibration (Rep. gr. 91)
Further assistance is given by → Vehicle diagnostic tester during calibration procedure.
  WARNING
Make sure no light is reflected on calibration platform.
Reflected light impairs the view of the reversing camera -R189- and therefore it may be impossible to perform calibration.
  A91-11140

Radio system (USA) > < Internet access control unitJ666 (from model year 2012 onwards)