
1 Series E81 130i (N52K) 3-door
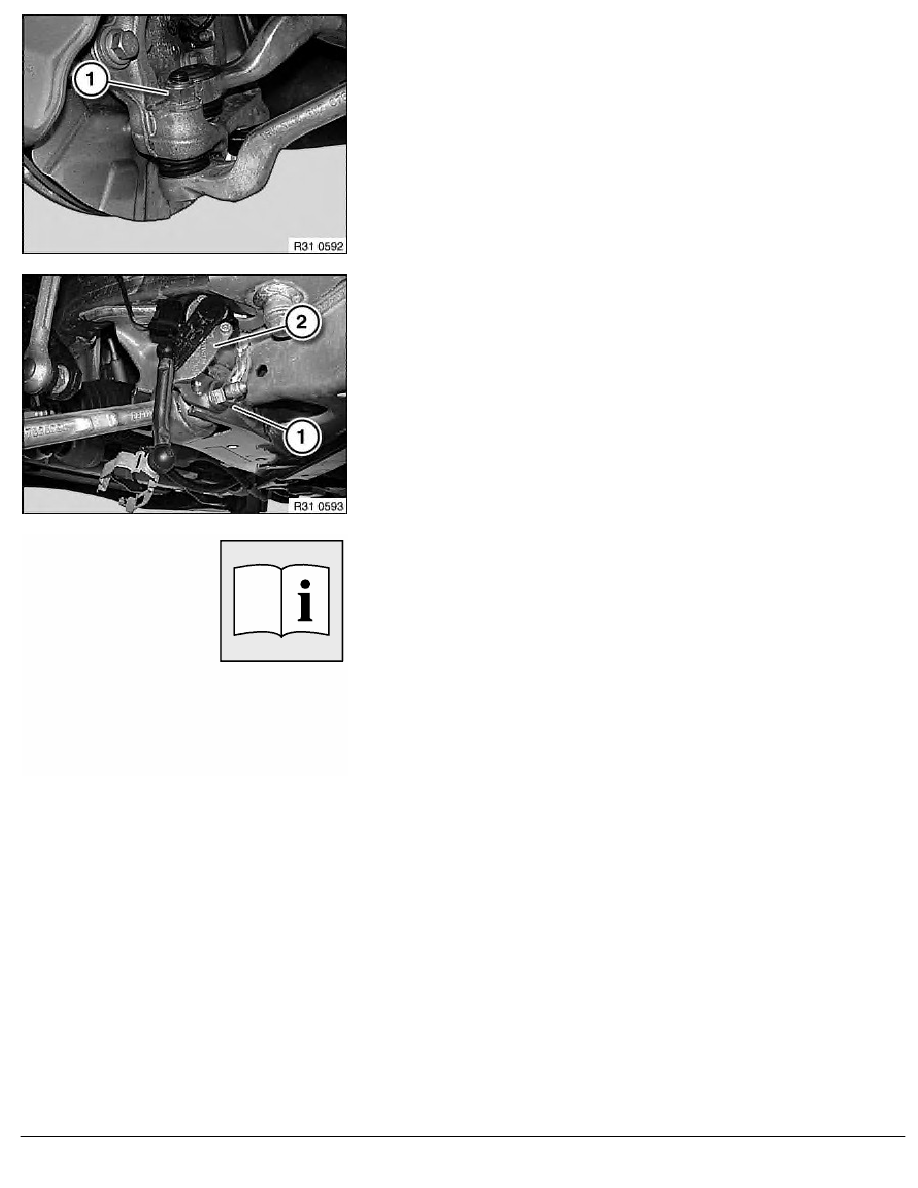
Release nut (1); if necessary, grip at Torx socket (T40).
Installation:
Keep control arm to swivel bearing connection clean and free from
oil and grease.
Replace self-locking nut.
Tightening torque 31 12 4AZ
.
Slacken nut (1).
Remove screw towards front; if necessary remove bracket (2)
with ride-height sensor.
Take off control arm.
Installation:
Screw head must point in direction of travel.
Replace self-locking nut.
Tighten down bolt connection in normal position.
Tightening torque 31 12 3AZ
.
After installation:
•
Perform chassis alignment check
•
Carry out steering angle sensor adjustment/adjustment for
active front steering
RA Removing and installing/replacing left or right control arm
BMW AG - TIS
22.01.2013 04:55
Issue status (12/2007) Valid only until next DVD is issued
Copyright
Page - 2 -