
1 Series E81 130i (N52K) 3-door
51 47 ...
Removing and installing/replacing left or right
underbody panelling
Necessary preliminary tasks:
Only if removing left underbody panelling:
•
Remove rear underbody protection
Note:
Prior to removing, pay attention to the exact installation position
with respect to the adjoining components.
The operation is described on the left side; proceed in the same
way for the right side.
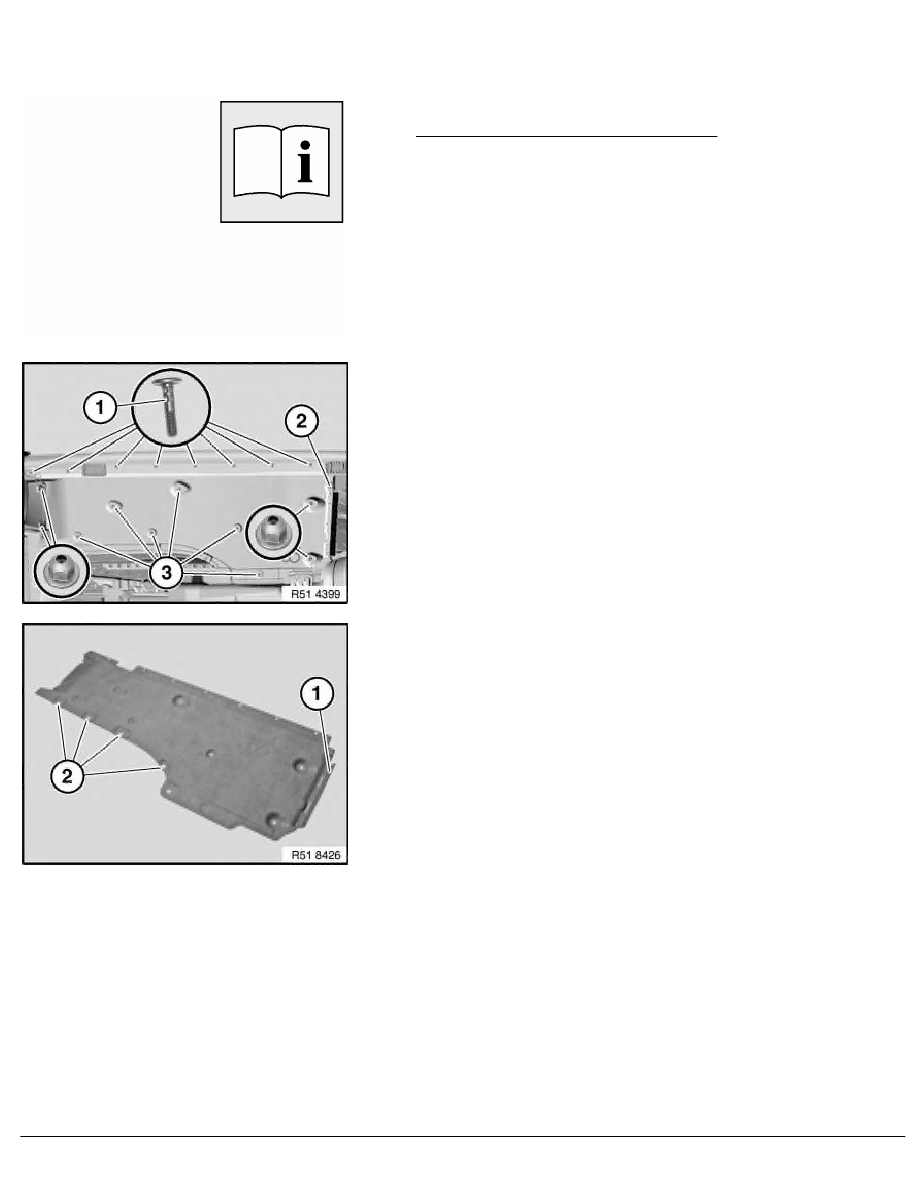
Release plastic nuts.
Release clips (1).
Unfasten screws (2 and 3).
Feed underbody panelling out of front wheel arch trim and remove
towards bottom.
Installation:
If necessary, replace faulty clips (1) and plastic nuts.
Replacement:
•
Modify lip (1)
•
Modify sheet nuts (2)
Installation:
If necessary, replace faulty metal nuts (2).
RA Removing and installing/replacing left or right underbody panelling
BMW AG - TIS
22.01.2013 07:46
Issue status (12/2007) Valid only until next DVD is issued
Copyright
Page - 1 -