
1 Series 128i (N52K) Coupe
Preparation of new part:
Open weld joints in areas (1).
Installation:
Adjust new parts to fit with straightening attachment or universal
mount.
Weld new part in area (1) with additional MAG weld seams.
Installation:
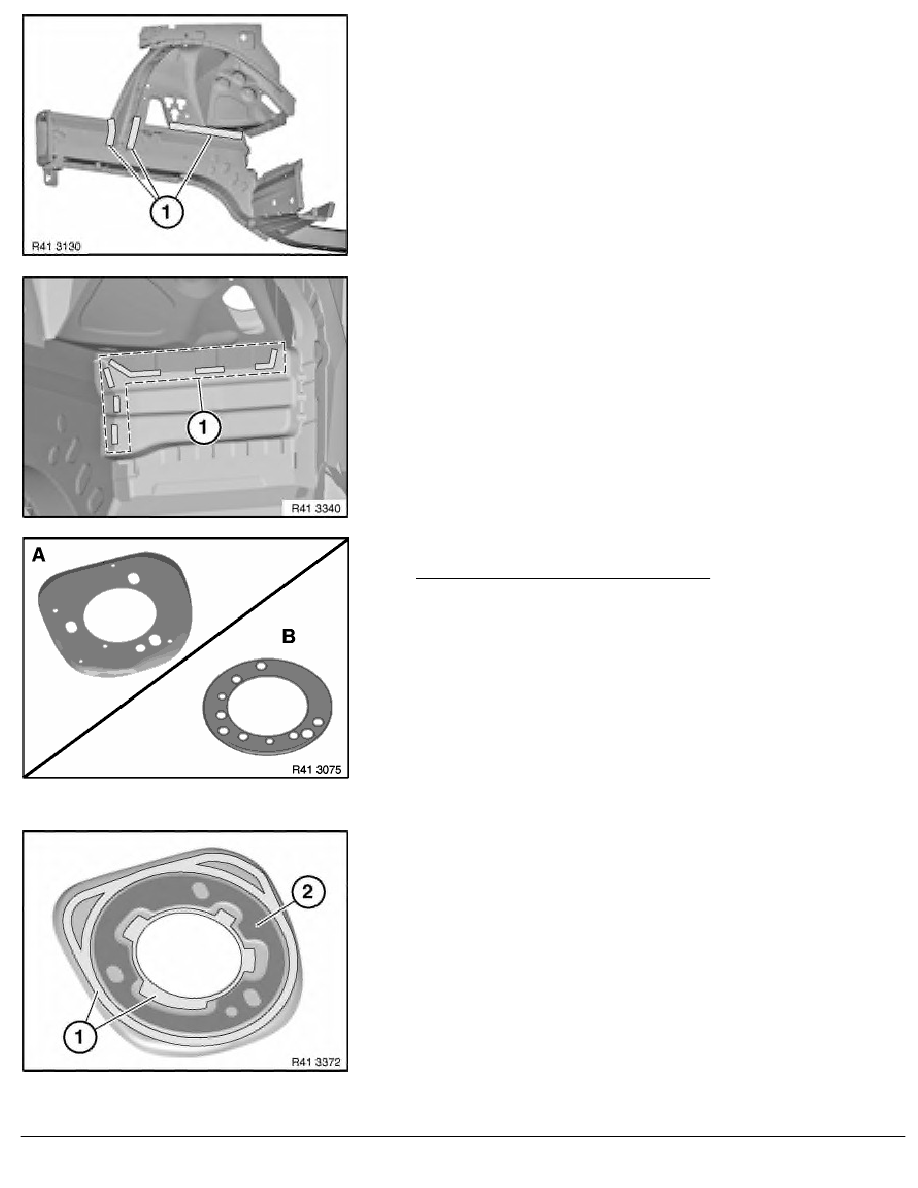
Vehicles with spring support plate insert:
Different plate inserts are fitted, depending on the model.
•
Version (A) riveted or glued
•
Version (B) screwed
Important!
Use only identical plate inserts on both sides of the vehicle.
Riveted version:
If damaged, the plate inserts must always be replaced with glued
versions on both sides of the vehicle.
Glued version:
Adhesive/contact surfaces of plate insert must be free of sealing
compound, final paint coat and underseal.
Do not grind off KTL coating.
Read and comply with General cementing instructions.
Use adhesive gun 41 3 102 in conjunction with Sikaforce-7888
(sourcing reference: BMW Parts Service).
Apply adhesive in areas (1). Do not apply any adhesive in area
(2).
Secure plate insert with 3 screws and nuts for 2 hours at min. 20
°
C.
Important!
RA Replacing front left wheel arch
BMW AG - TIS
17.01.2013 18:12
Issue status (12/2007) Valid only until next DVD is issued
Copyright
Page - 3 -