
3 Series E36 318i (M42) SAL
Check bearing clearance:
Only carry out this step for control purposes.
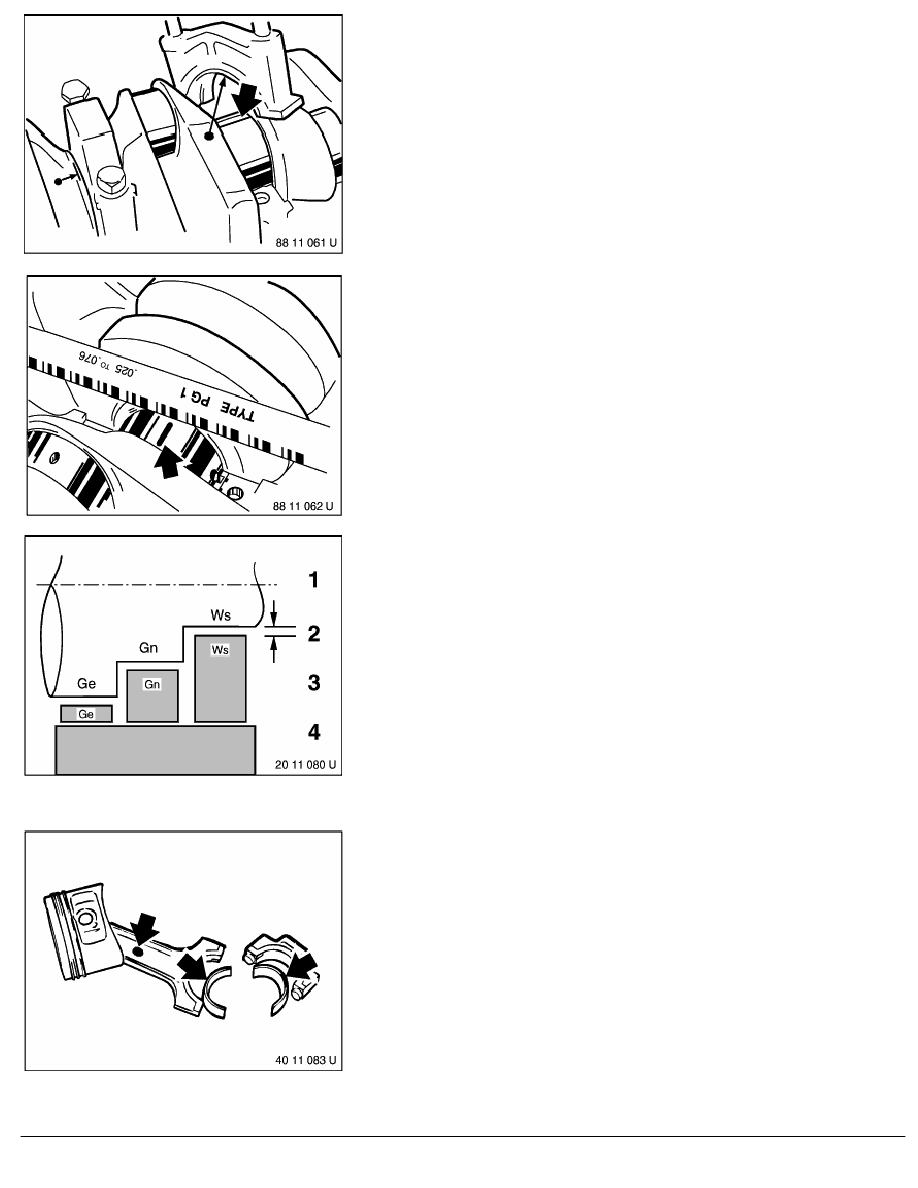
Install crankshaft. Place Type PG 1 Plastigage (Special Tool 00 2
590) on crankshaft wiped clean of oil and tighten bearing cap bolts
as specified. For tightening torque,
refer to Technical Data
Do not turn crankshaft.
Remove bearing cap and read bearing clearance,
refer to Technical Data
Read according to width of the flattened Plastigage with help of
supplied scale.
Install new bearing shells or bearing shells with a different colour
code to correct the bearing play.
Overview
Colour Code/Shaft Diameter/Bearing Shell Thickness Survey
Triple-classification colour codes:
Ge Yellow
Gn Green
Wh White
1.
Crankshaft
2.
Bearing play
3.
Bearing-shell thickness
4.
Journal diameter
Replacing conrod bearing shells:
Red or blue conrod bearing shells are installed as standard
according to the colour-code mark on the connecting rod for a
relevant grinding size or crankshaft.
Install only red bearing shells of the relevant grinding size for
replacement crankshafts.
RA Replacing crankshaft - crankshaft removed (M42)
BMW AG - TIS
23.01.2013 08:59
Issue status (12/2007) Valid only until next DVD is issued
Copyright
Page - 3 -