
3 Series E36 318tds (M41) TOUR
Note:
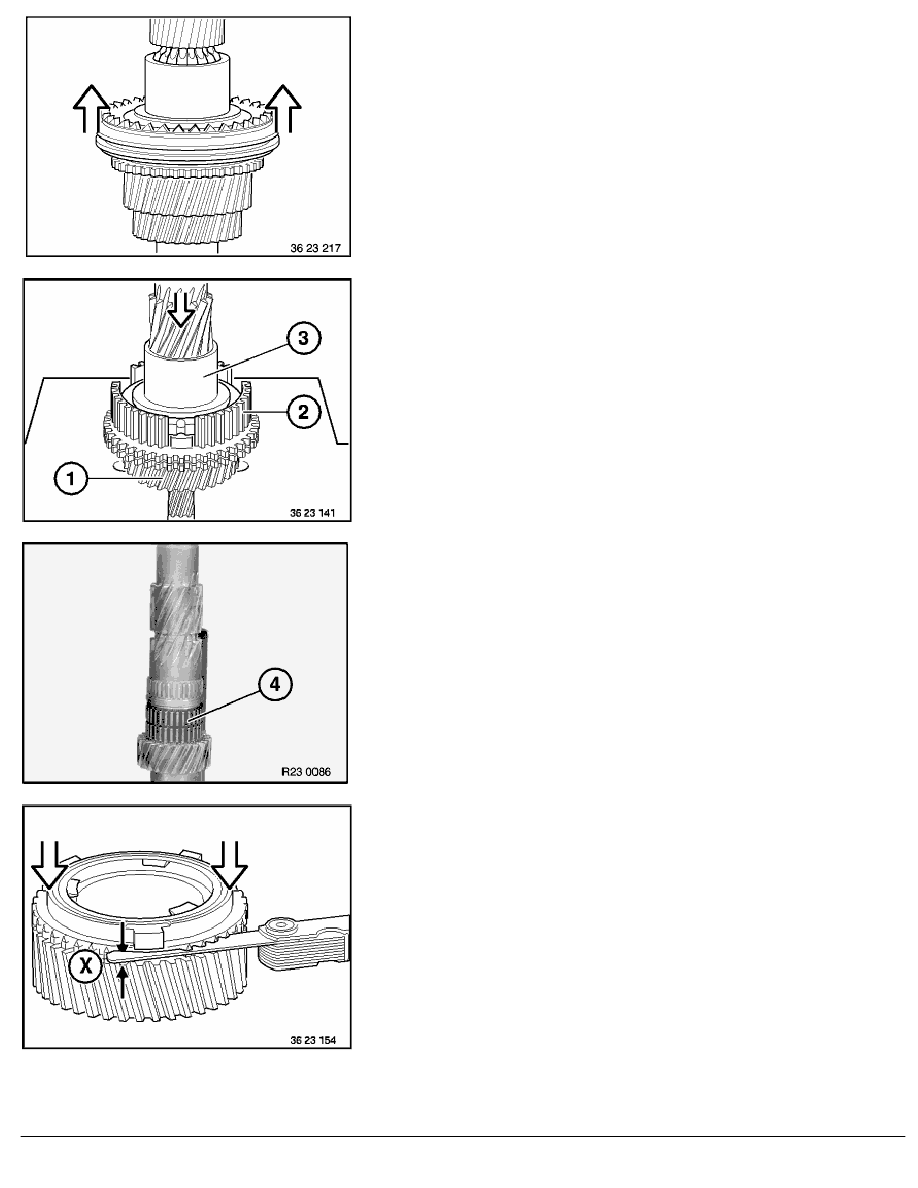
When removing the sliding sleeve, the pressure pieces, balls
and springs drop out.
Pull 3rd/4th gear sliding sleeve upward.
Press 3rd gear (1), guide sleeve (2) and bearing bush (3) off the
countershaft.
Remove needle bearing (4).
Check synchronizer unit for signs of wear.
For this purpose, determine gap measurement X between
synchronizer ring and the corresponding gears.
Measure near the detent lugs.
Uniformly press synchronizer ring in direction of taper.
Gap measurements of the individual gear wheels,
refer to Technical Data.
RA Dismantling and assembling all synchronizer units (S5D 200G/ E36 M41)
BMW AG - TIS
06.02.2013 22:45
Issue status (12/2007) Valid only until next DVD is issued
Copyright
Page - 11 -