
3 Series E46 316i (M43TU) SAL
Important!
If measurement (A) is not strictly adhered to, this will result in
impaired vehicle handling and early rubber mount wear!
Coat control arm pin and rubber mount bushing with soap water.
Mixture ratio: 1 part soap to 20 parts water.
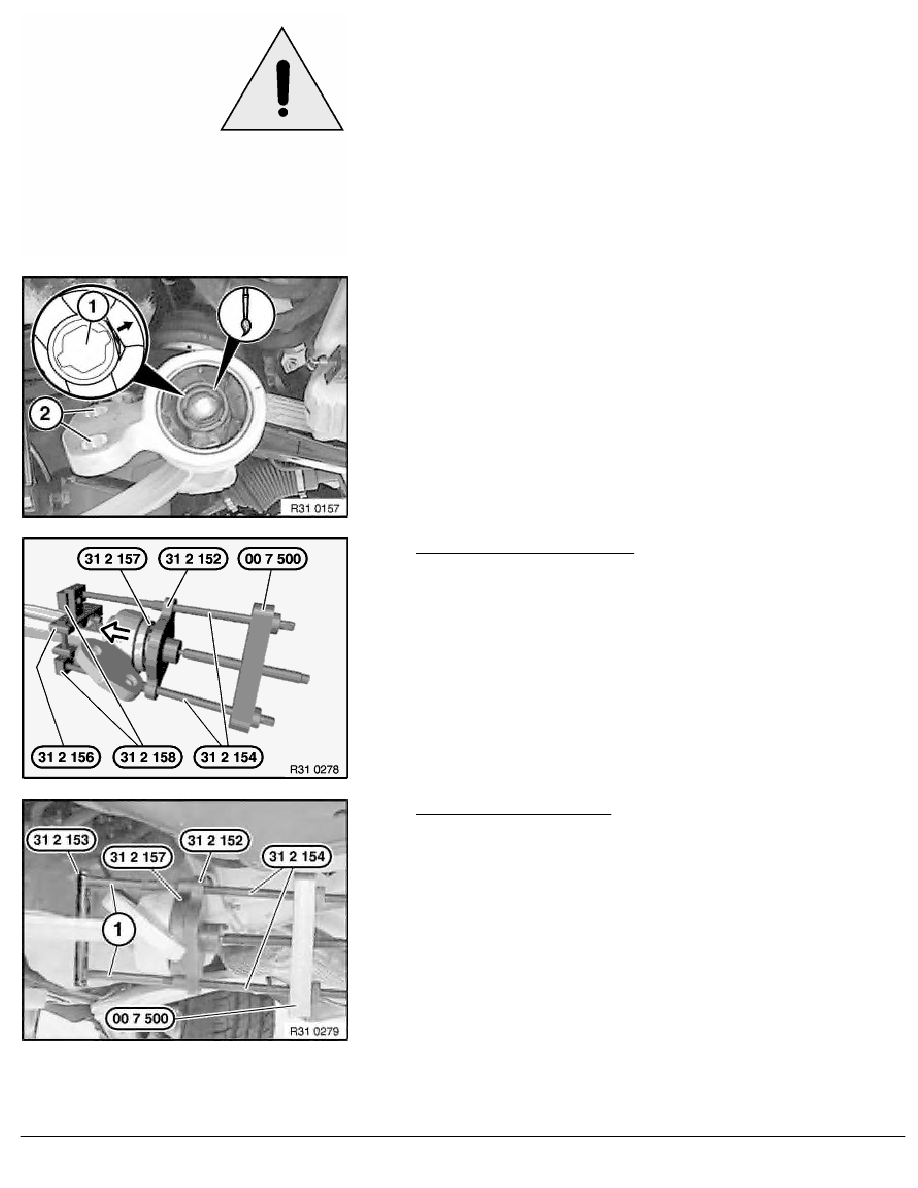
Ensure positive locking (1) of bushing and control arm pin.
The larger diameters of the bores (2) point to the engine carrier.
Control arm without openings:
Secure special tools 31 2 156 and 31 2 158 to control arm
until hand-tight.
Install new bracket with special tools 00 7 500 and 31 2 152 ,
31 2 154 , 31 2 157 onto control arm up to applied marking.
Relieve tension on special tool. Check position of rubber mount to
marking (measurement A) and correct if necessary.
Control arm with openings:
Attach special tool 31 2 153 with extensions (1) from puller set
to control arm opening.
Install new bracket with special tools 00 7 500 and 31 2 152 ,
31 2 154 , 31 2 157 onto control arm up to applied marking.
Relieve tension on special tool. Check position of rubber mount to
marking (measurement A) and correct if necessary.
RA Removing and installing/replacing both brackets for control arm
BMW AG - TIS
19.01.2013 12:26
Issue status (12/2007) Valid only until next DVD is issued
Copyright
Page - 4 -