
3 Series E46 316i (M43TU) SAL
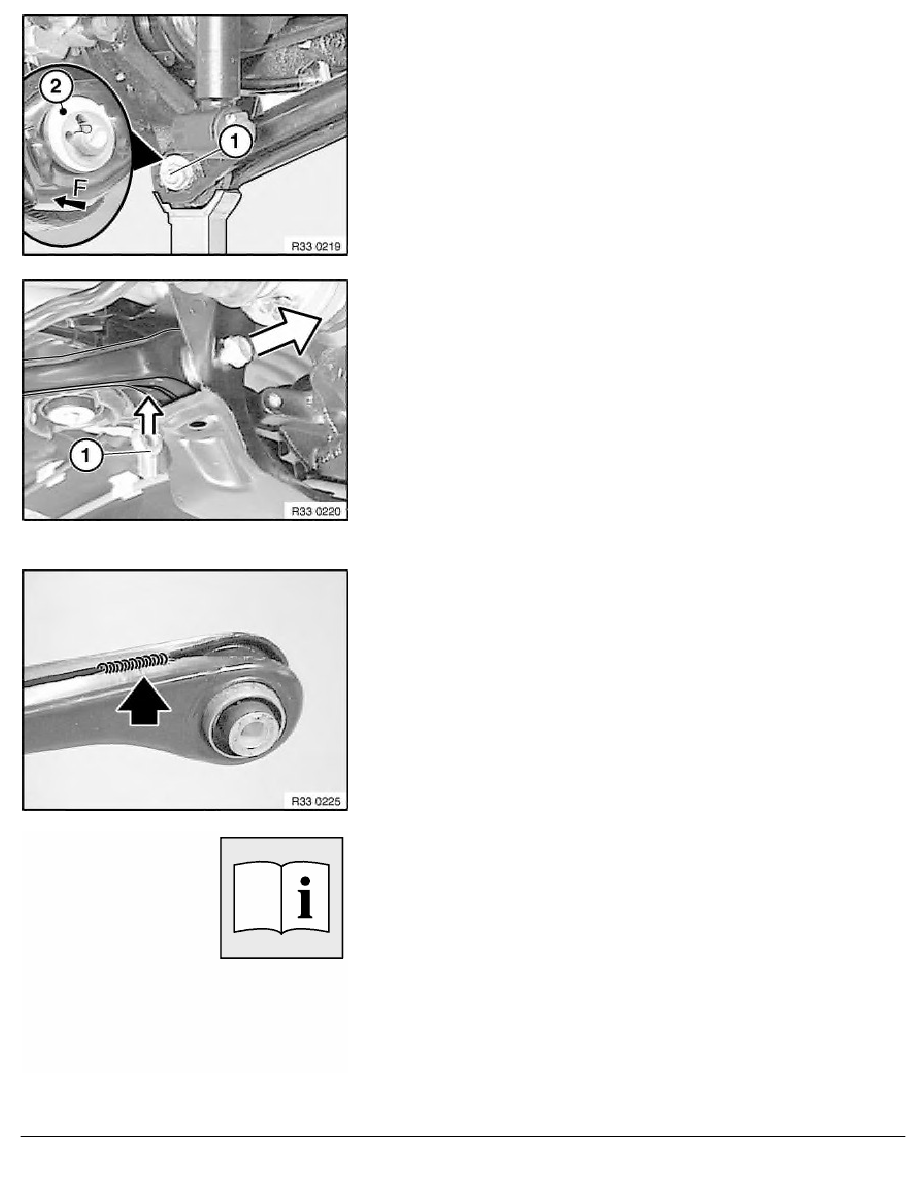
Release nut (1) and remove eccentric washer (2).
Remove eccentric screw towards front.
Installation:
Note insertion direction of eccentric screw.
Replace eccentric screw and carry over marking from old part.
Align eccentric screw by means of marking to lower control arm.
Fit eccentric washer (2).
Replace nut (1).
Tightening torque 33 32 11AZ
.
Release screw and remove thread plate (1) downwards.
Support rear differential with workshop jack.
Release bolts of rear axle suspension at rear.
Slacken bolts of rear axle suspension at front.
Press rear differential upwards with workshop jack.
Pull out bolt.
Remove lower control arm at side.
Installation:
Insert thread plate (1) into opening in rear axle carrier.
Tightening torque 33 32 15AZ
.
Installation:
Weld seam of control arm must point upwards.
After installation:
•
Lower workshop jack and remove.
•
Check that output shaft is correctly seated in rear differential.
•
Perform chassis alignment check
RA Removing and installing/replacing lower control arm
BMW AG - TIS
19.01.2013 13:08
Issue status (12/2007) Valid only until next DVD is issued
Copyright
Page - 2 -