
3 Series E46 316i (M43TU) SAL
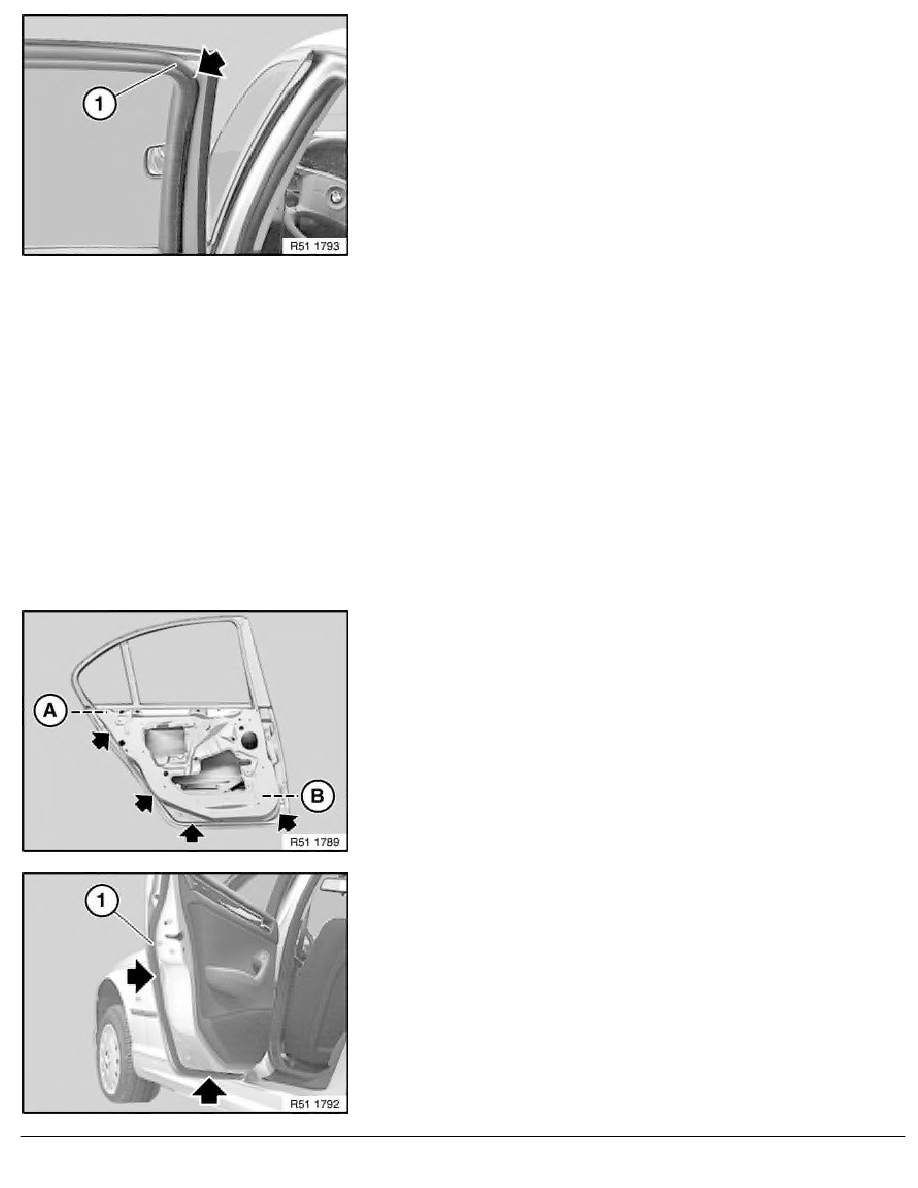
Hang seal (1) with open lip facing inwards over door and pull off
positioning aid protection (liner) from seal in stages.
Caution!
Do not touch adhesive areas.
Stick on seal (1) as follows:
-
Position white or yellow seal marking on door window frame
at top front.
-
Gently press down seal without stretching approx. 1.5 mm
next to door seam and positioning edges up to above-
mentioned area A ... B.
-
Check positioning of seal, correct if necessary. (Dip max.
3o cm)
Note:
After gentle pressing, the seal can be detached again up to 3
times. Do not dirty adhesive area.
-
Press down seal vertically to adhesive area up to above-
mentioned area A ... B.
Caution!
It is not the time spent pressing, but rather the pressure head
(approx. 10 ... 15 N/cm
2
) that is decisive.
Separation of seal after pressing destroys the adhesive layer.
-
Detach remaining protective film (liner) from seal.
In area A ... B, apply a thin and even coat of profile rubber
adhesive (sourcing reference: BMW Service) to adhesive area on
rear door and seal.
Width of adhesive area approx. 8 mm
Distance of adhesive area to:
-
Door seam approx. 1.5 mm
-
Edges of positioning aids approx. 1.5 mm
Air drying time approx. 10 ... 15 minutes
Lay seal (1) without stretching as follows and vertically press down
hard to adhesive area:
-
Next to door seam approx. 1.5 mm
-
If necessary, edges of positioning aids just covering
RA Removing and installing/replacing seal on rear door, left or right
BMW AG - TIS
19.01.2013 15:21
Issue status (12/2007) Valid only until next DVD is issued
Copyright
Page - 4 -