
3 Series E46 318d (M47TU) TOUR
Fit and secure side panel.
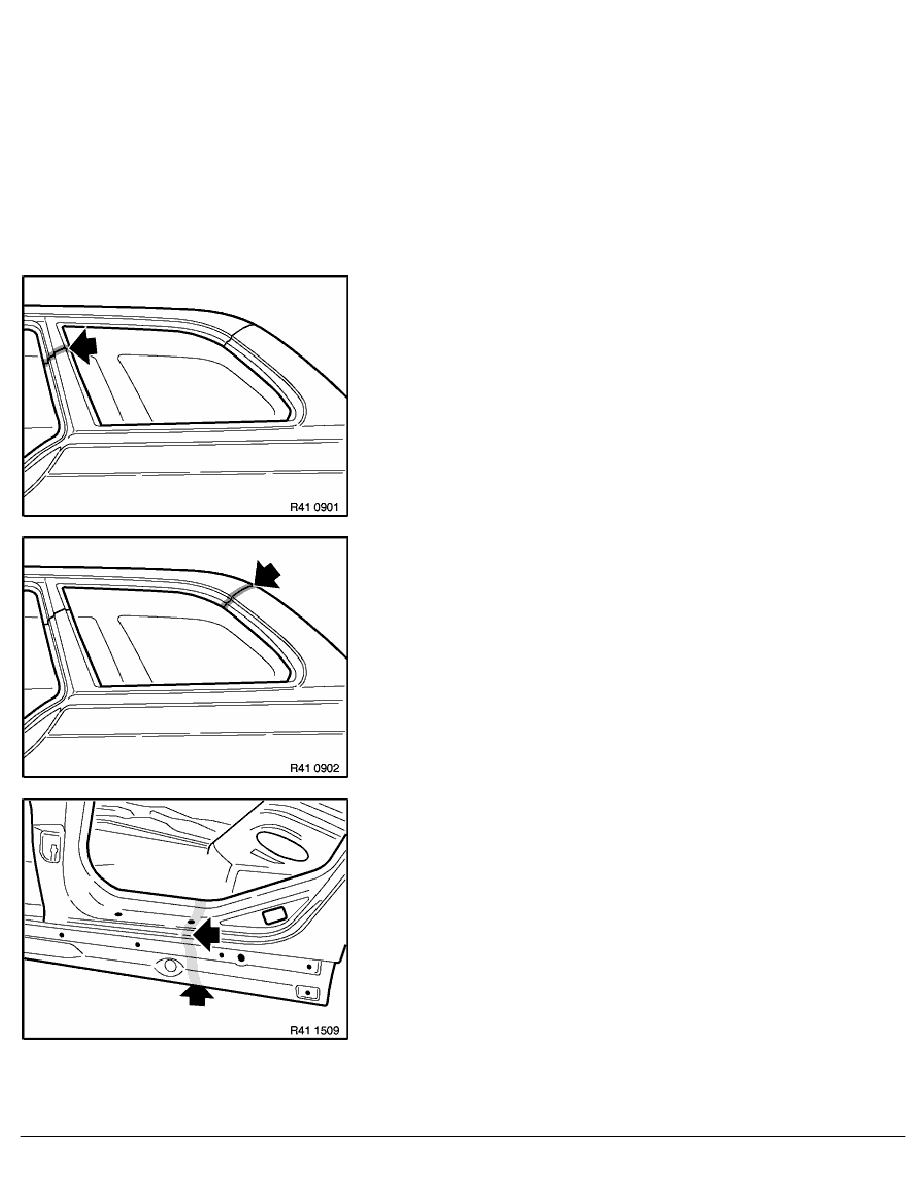
Arrange individual welding spots so close together on connection
point for C-pillar that a continuous seam is created.
Caution!
Locate welding spots in a way which prevents distortion
caused by heat elongation. Ensure that welded areas have
cooled down sufficiently.
Danger of distortion!
Arrange individual welding spots so close together on connection
point for D-pillar that a continuous seam is created.
Caution!
Locate welding spots in a way which prevents distortion
caused by heat elongation. Ensure that welded areas have
cooled down sufficiently.
Danger of distortion!
Arrange individual welding spots so close together on connection
point for side member cover that a continuous seam is created.
Caution!
Locate welding spots in a way which prevents distortion
caused by heat elongation. Ensure that welded areas have
cooled down sufficiently.
Danger of distortion!
RA Replacing rear left side wall (part replacement C- and D-pillar, top) (touring)
BMW AG - TIS
11.02.2013 21:05
Issue status (12/2007) Valid only until next DVD is issued
Copyright
Page - 11 -