
3 Series E46 318i (M43TU) TOUR
Note:
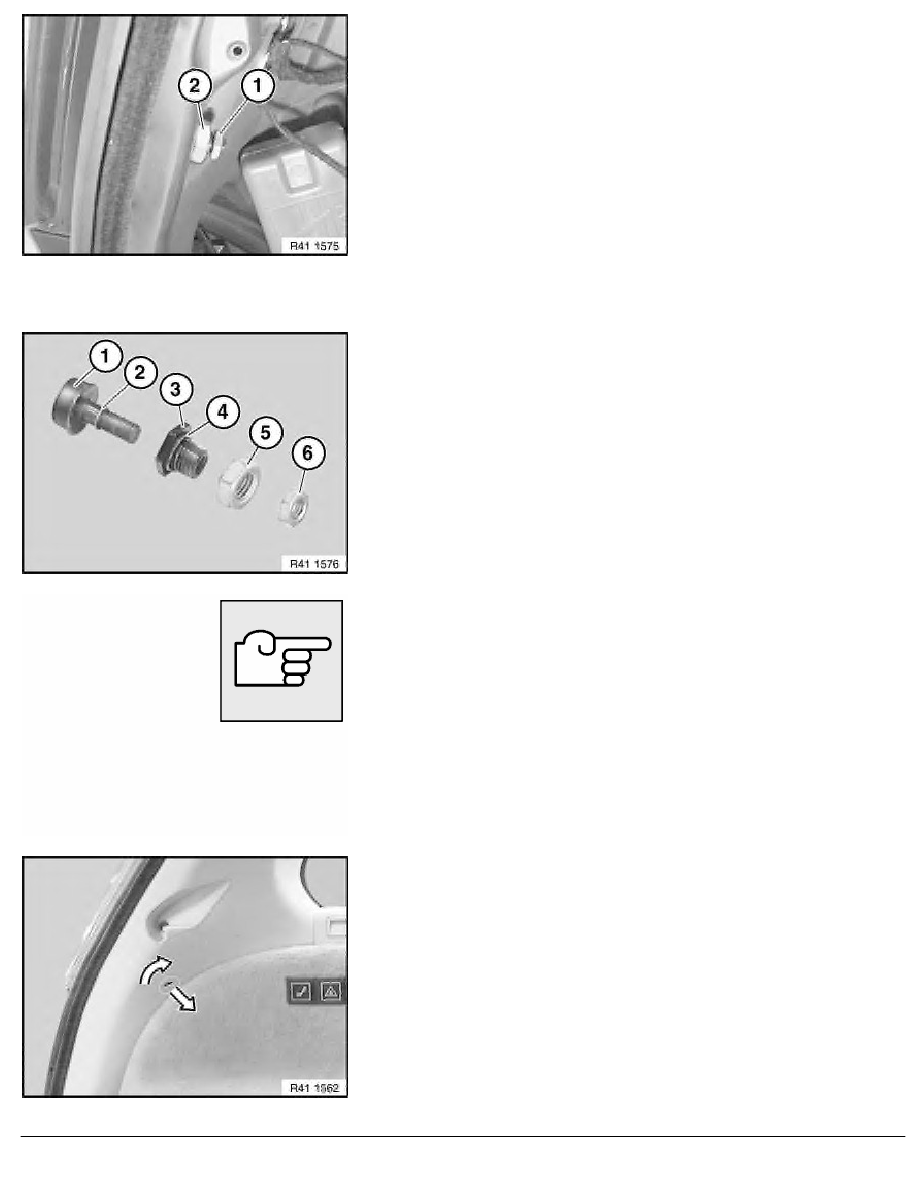
For purposes of clarity, D-pillar panel is shown removed.
To replace side buffers, release lock nut (1) of adjustable buffer.
Release nut (2) of guide of adjustable buffer; in so doing, grip
guide of adjustable buffer in water drain.
Remove complete buffer.
Installation:
Tightening torque of lock nut (1) of adjustable buffer,
refer to Technical Data 41 62 4AZ.
Tightening torque of nut (2) of guide of adjustable buffer,
refer to Technical Data 41 62 3AZ.
Structure of side buffers:
1.
Adjustable buffer
2.
O-ring of adjustable buffer
3.
Guide of adjustable buffer (screw-mounted in body)
4.
O-ring of guide of adjustable buffer
5.
Nut of guide of adjustable buffer
6.
Lock nut of adjustable buffer
Installation:
During installation, make sure the O-ring of the guide of the
adjustable buffer and the O-ring of the adjustable buffer are
fitted and not damaged.
Water could otherwise leak into the passenger compartment!
Screw in side buffers fully.
For this purpose, unlock cover in D-pillar panel by turning through
90
°
and then lift out.
RA Adjusting trunk lid to fit (touring)
BMW AG - TIS
11.02.2013 21:53
Issue status (12/2007) Valid only until next DVD is issued
Copyright
Page - 2 -