
3 Series E46 328Ci (M52TU) COUPE
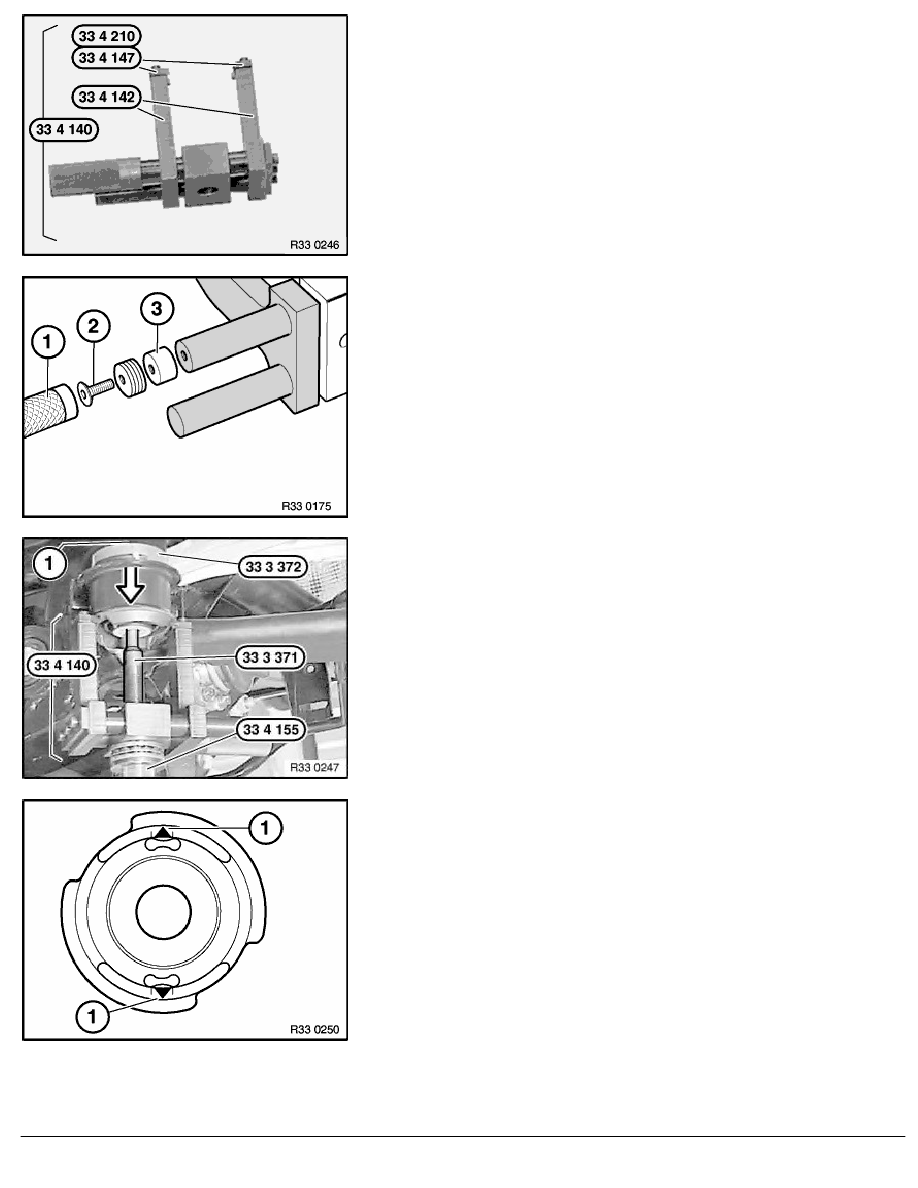
Assemble special tool 33 4 140 with 33 4 142 and
33 4 147 / 33 4 211 (Compact).
Unscrew feed handle (1). If necessary, mount extension
piece (3) on special tool 33 4 145 with new screw (2).
Position special tools 33 4 140 , 33 4 155 , 33 3 371 ,
33 3 372 and nut (1) on openings of rubber mount.
Note:
Ensure it is correctly supported on bushing of rear axle carrier.
Using a hot air blower, heat bearing bushing at max. 600
°
C outlet
temperature for approx. 2 minutes.
Pull out rubber mount by turning special tool 33 4 155 .
Coat rubber mount with Circolight anti-friction agent.
Important!
When rubber mount is fitted, arrows (1) must point down
longitudinal axis of vehicle.
RA Replacing two additional rubber mounts for rear axle carrier (rubber mount at re
BMW AG - TIS
15.02.2013 03:48
Issue status (12/2007) Valid only until next DVD is issued
Copyright
Page - 2 -