
3 Series E92 316i (N43) COUPE
Installation:
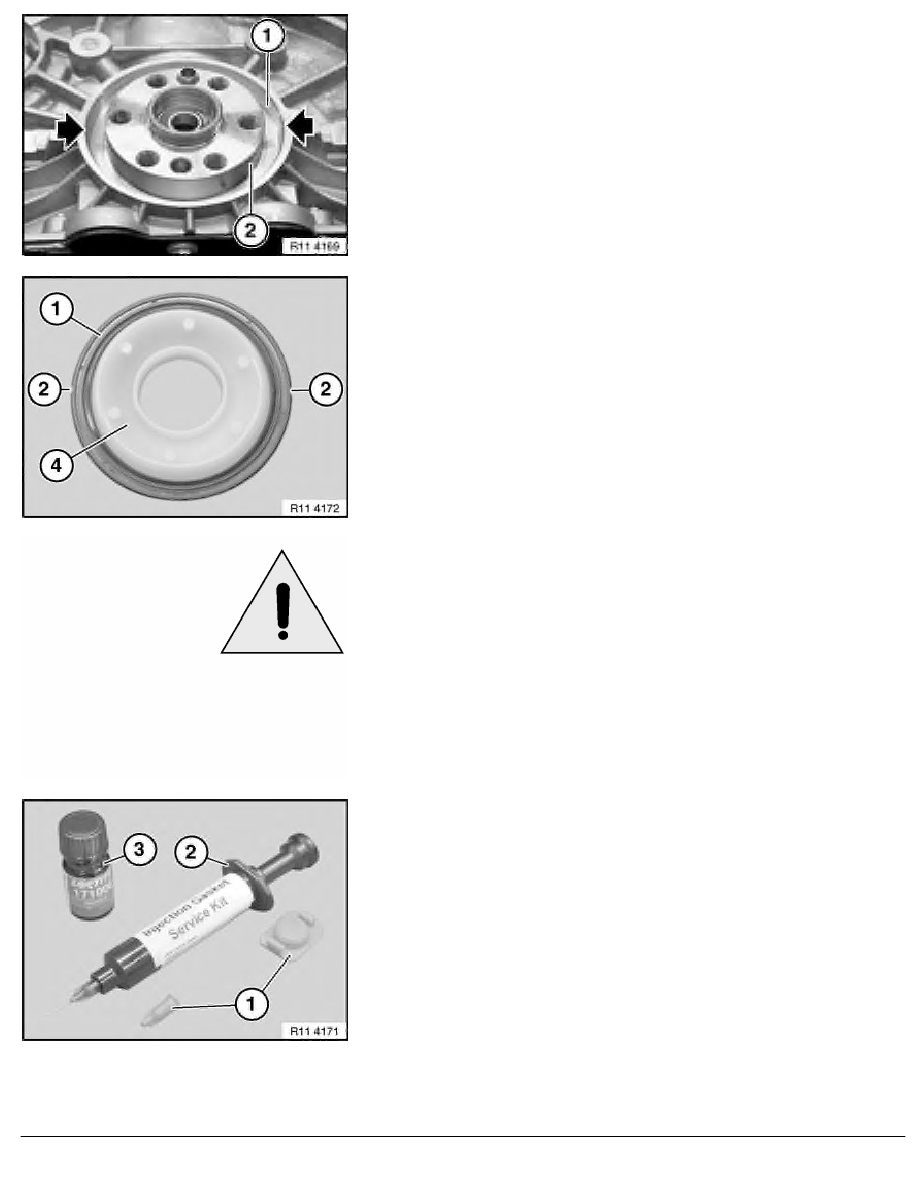
Clean sealing surface (1) and degrease thoroughly in area of
housing partition.
Apply a light coat of oil to running surface (2) of crankshaft seal.
Note:
Support sleeve (4) is supplied with radial seal (1).
When radial seal (1) is installed, only support sleeve (4) may be
used as a slip sleeve.
Crankshaft seal (1) has a groove (2) on both left and right sides.
Important!
After installation, grooves (2) must be filled with sealing
compound.
Important!
The seal between the engine block and crankshaft seal is
described below.
The engine block will not be leakproof at the outside of the
crankshaft seal if you fail to comply with the individual work
steps and the work sequence.
Note:
The required parts are available from the BMW Parts Service
(Electronic Parts Catalogue ETK).
Remove screw caps (1) from injector (2).
Screw on needle and insert plunger.
Injector (2) contains the sealing compound Loctite,
manufacturer's number 128357.
Bottle (3) contains the primer Loctite, manufacturer's
number 171000.
RA Replacing crankshaft seal (N43B16)
BMW AG - TIS
20.01.2013 09:52
Issue status (12/2007) Valid only until next DVD is issued
Copyright
Page - 2 -