
3 Series E92 335xi (N54) COUPE
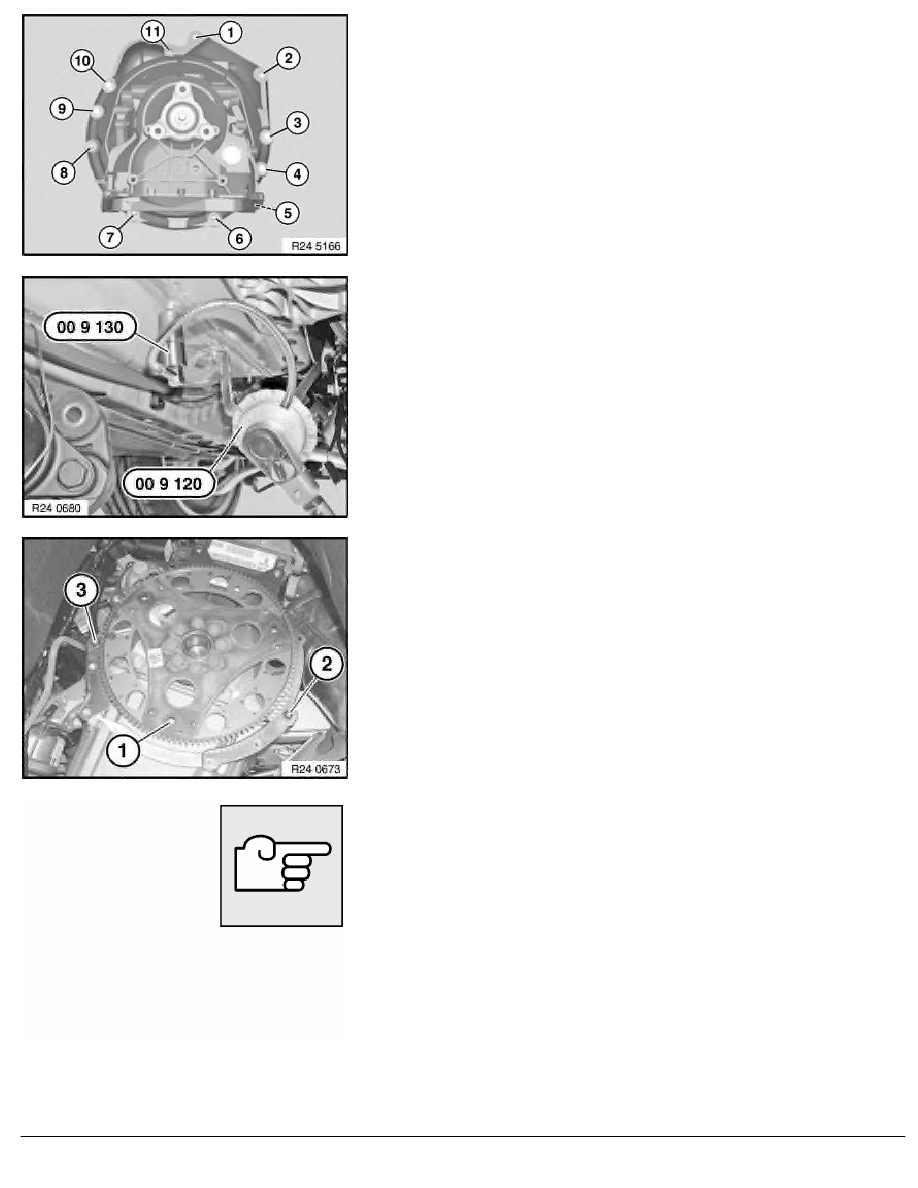
Release screws.
Installation:
Tightening torque, steel screws 24 00 1AZ
.
Aluminium screws/bolts must be replaced.
Tightening torque and angle of rotation, aluminium
screws/bolts (3, 4, 5, 9, 10) 24 00 2AZ
.
Installation:
Tighten down screws/bolts to specified torque.
Secure special angle of rotation tool 00 9 120 with magnet
00 9 130
to underbody and screw down blue aluminium screws/bolts in
accordance with angle of rotation.
Angle of rotation 24 00 2AZ
.
Installation:
Bore hole (1) of drive plate must be accessible from opening on
engine oil sump. Check dowel sleeves (2...3) for correct seating.
Replace damaged dowel sleeves.
Installation:
Rotate torque converter until bore in torque converter is flush with
bore in driving disc.
Flange automatic transmission to engine.
RA Removing and installing automatic transmission (6HP19Z) AWD
BMW AG - TIS
20.02.2013 07:50
Issue status (12/2007) Valid only until next DVD is issued
Copyright
Page - 6 -