
5 Series E34 525td (M51) TOUR
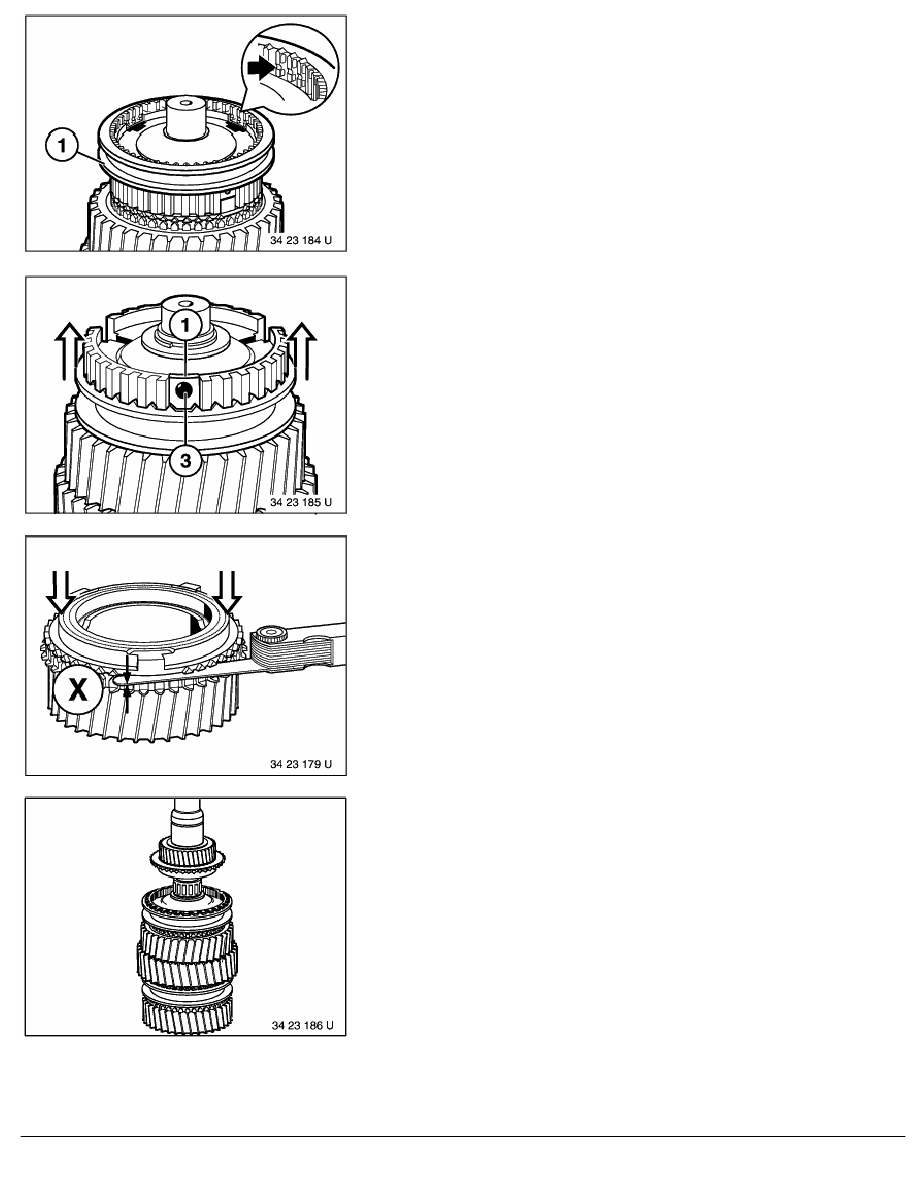
Fit sliding sleeve with stepped side (1) facing reverse gear wheel.
The three set-back or opened teeth must point to the springs.
Tilt thrust pieces (1) individually as far out of sliding sleeve until
balls (3) can be placed on pressure springs. Press balls (3)
inwards. Simultaneously press thrust pieces into sliding sleeve.
Insert 5th gear synchronizer ring in sliding sleeve. Pull sliding
sleeve uniformly upwards up to lock (neutral setting).
Check 5th gear synchronizing mechanism for wear.
Measure distance X between gear wheel and synchronizer ring. In
so doing, press down uniformly on the synchronizer ring by hand.
Specification: at least 0.75 mm
Actual new part distance: 0.95 ... 1.35 mm.
Insert synchronizer ring.
Attach needle bearing and drive shaft to 5th gear wheel.
RA Disassembling and assembling all synchronizing mechanisms (S5D 260Z / 310Z / 320
BMW AG - TIS
23.01.2013 07:13
Issue status (12/2007) Valid only until next DVD is issued
Copyright
Page - 8 -