
5 Series E39 525td (M51) SAL
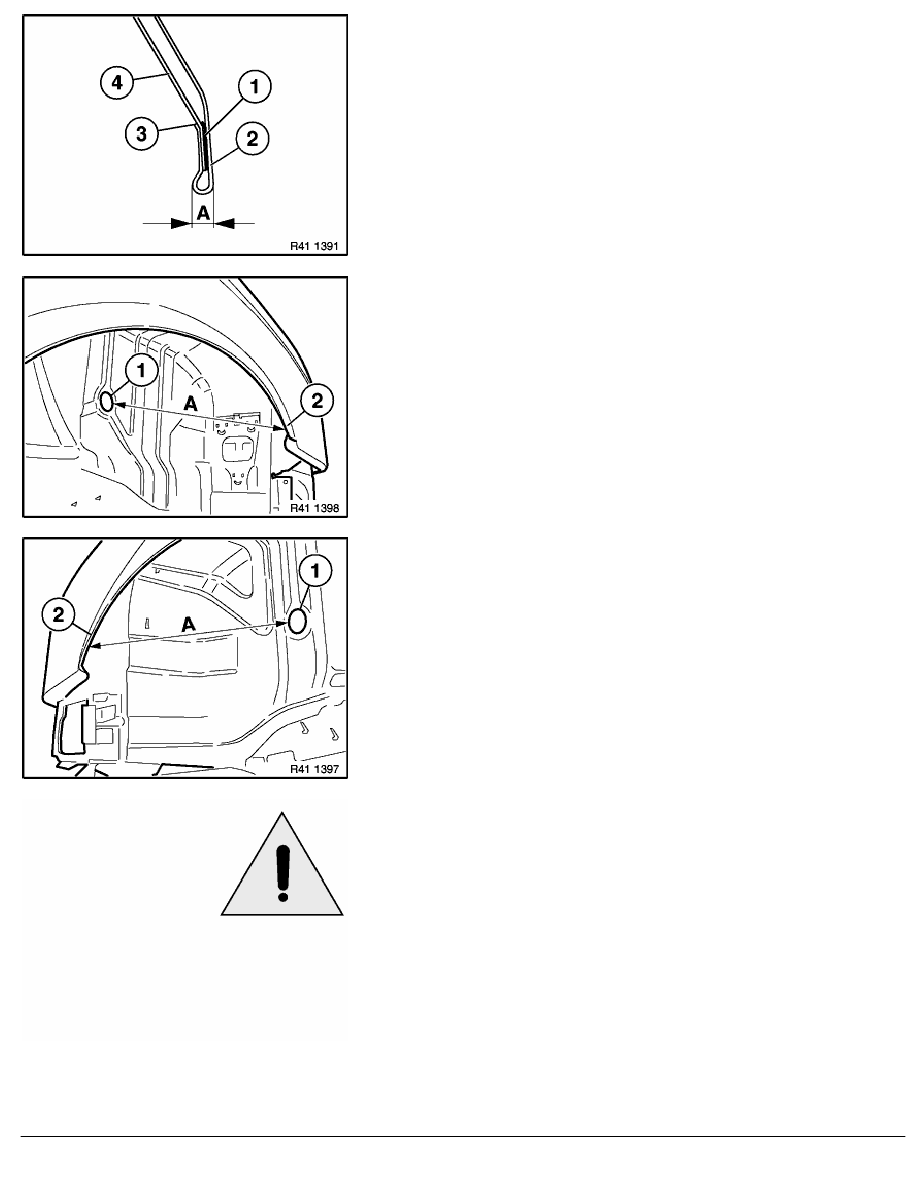
The adhesive (1) establishes the connection between outer wheel
arch section (4) and rear side panel (2).
Note:
The outer wheel arch section (4) is trimmed in this area so
that it cannot be welded with the rear side panel (2) and must
therefore be glued!
3 = Edge of wheel arch
Check measurement (A) after flanging, straighten rear left side
panel if necessary.
Measurement (A) = 362 mm, measured from edge of 36 mm dia.
bore (1) up to outer edge of flanged rear side panel (2).
Check measurement (A) after flanging, straighten rear right side
panel if necessary.
Measurement (A) = 362 mm, measured from edge of 36 mm dia.
bore (1) up to outer edge of flanged rear side panel (2).
Caution!
After completing repairs, it is absolutely essential to check that
the tire can move freely!
The tire scraping against the flanged rear side panel can
cause damage to the tire and to the rear side panel!
RA Replacing the rear left side panel
BMW AG - TIS
20.02.2013 05:25
Issue status (12/2007) Valid only until next DVD is issued
Copyright
Page - 13 -