
5 Series E60 530i (N52K) SAL
41 11 ...
Replacing outer/upper entrance protective
strips (Security) on front door
Read contents of Body, General.
Remove protective strips with hot air blower. Remove adhesive
residue, avoid damage to paintwork.
Installation:
Painted protective strips are bonded with window adhesive.
Fitting aid contained in new component.
When fitting the protective strips, apply only as much window
adhesive to the bonding surfaces to ensure that no adhesive
beads emerge from the joints. However, adequate adhesion of the
protective strips must be guaranteed!
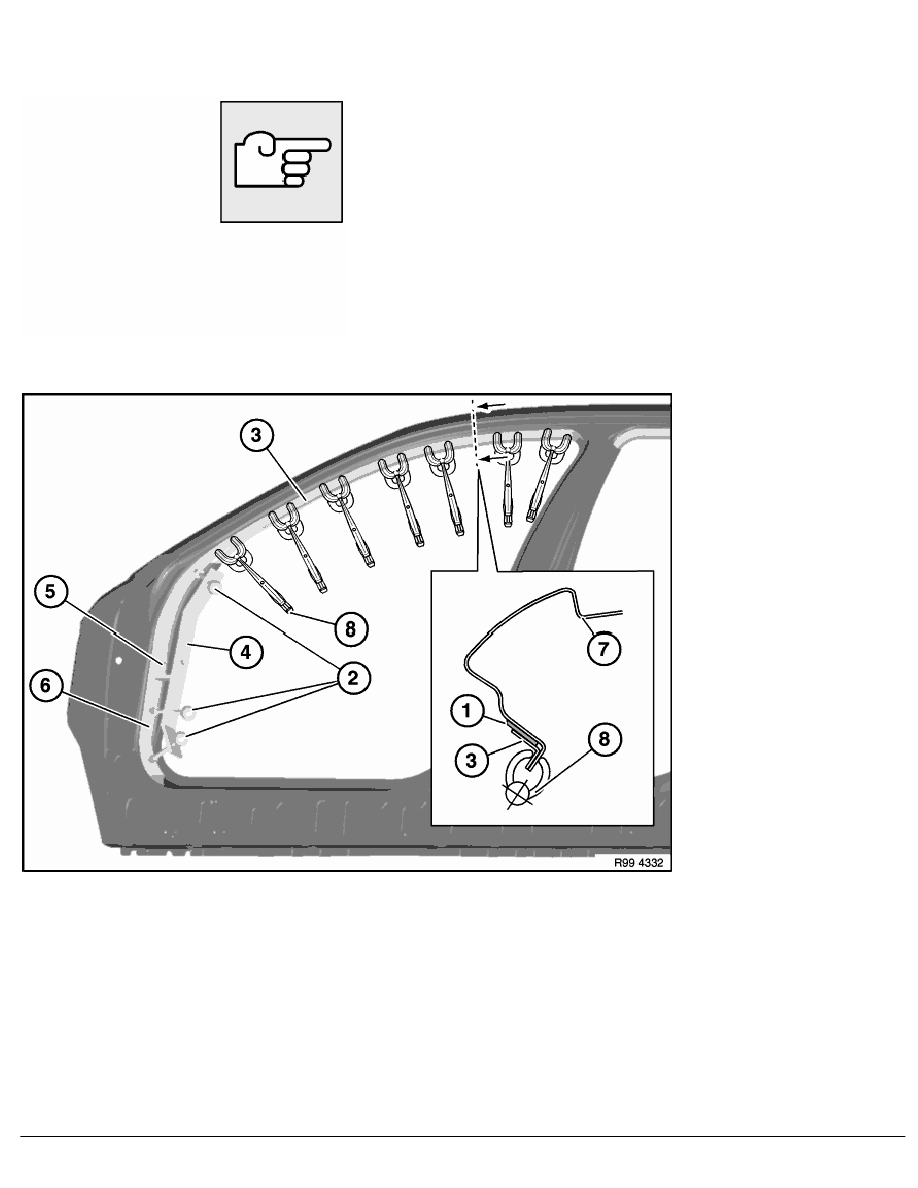
Overview of bonding front entrance protective strips (E60 Security):
1
Protective strip, top
5
Fastening point, door brake, for (4)
2
Retaining screws, fitting aid, bottom
6
Protective strip, bottom
3
Fitting aid, top
7
Body
4
Fitting aid, bottom
8
Gripping pliers
Apply paint activator A to body side. Coat protective strip bonding surfaces with Sika-Primer 206 G+P. Secure top
protective strip (1) with fitting aid (3) and gripping pliers (8) and glue to body. Position bottom protective strip (6).
Screw down fitting aid (4) to fastening point for door brake (5). Secure bottom protective strip (6) with screws (2)
and glue to body; if necessary, correct position and remove emerging adhesive.
RA Replacing outer/upper entrance protective strips (Security) on front door
BMW AG - TIS
21.02.2013 20:55
Issue status (12/2007) Valid only until next DVD is issued
Copyright
Page - 1 -